You can protect your garden from pests by creating a DIY netting structure using 5mm diamond eco-netting, 25mm poly pipe, and metal saddles. Position saddles along your raised bed edges, thread the pipe through to form arches, then drape and secure the netting with screws and stakes. This physical barrier eliminates up to 90% of common pests while allowing air, sunlight, and water to reach your plants. Continue below to master the complete construction process.
Why Garden Netting Works Better Than Chemical Pest Control
When you’re battling garden pests, netting creates a physical shield that blocks destructive insects like aphids, caterpillars, and whiteflies without introducing toxic chemicals into your growing space.
Unlike pesticides that harm beneficial pollinators and insects, garden netting allows air, sunlight, and water to reach your plants freely. This promotes healthier growth while maintaining effective pest control.
Garden netting protects plants from pests while preserving beneficial insects and allowing essential air, sunlight, and water to flow through naturally.
You’ll save money by eliminating repeated chemical applications throughout the growing season.
Studies demonstrate that physical barriers markedly reduce pest populations, leading to healthier plants and higher yields than chemically treated crops.
Garden netting’s reusable nature makes it sustainable across multiple seasons, whereas pesticides require constant repurchasing.
You’re investing in long-term garden health while protecting the environment from harmful chemical runoff.
Essential Materials and Tools for Building Your Netting Structure
Before you start constructing your garden netting system, gather the essential materials that’ll guarantee a sturdy and effective pest barrier.
You’ll need 4x4m of 5mm diamond eco-netting that protects plants while maintaining airflow and light penetration. For hardware, collect 6 x 25mm DETA metal saddles and 18 timber screws to secure your frame to raised beds or any garden bed structure.
Your frame requires three 2.6m lengths of Vinidex 25mm poly pipe, which you’ll cut to size.
Add bamboo stakes (either 2 x 1.5m or 1 x 2.4m) plus twine for extra support.
Once Mesh Became My Favorite solution for pest control, I realized having a cordless drill/driver and pipe cutter makes assembly much smoother and more efficient.
Step-by-Step Construction of a Raised Bed Netting Frame
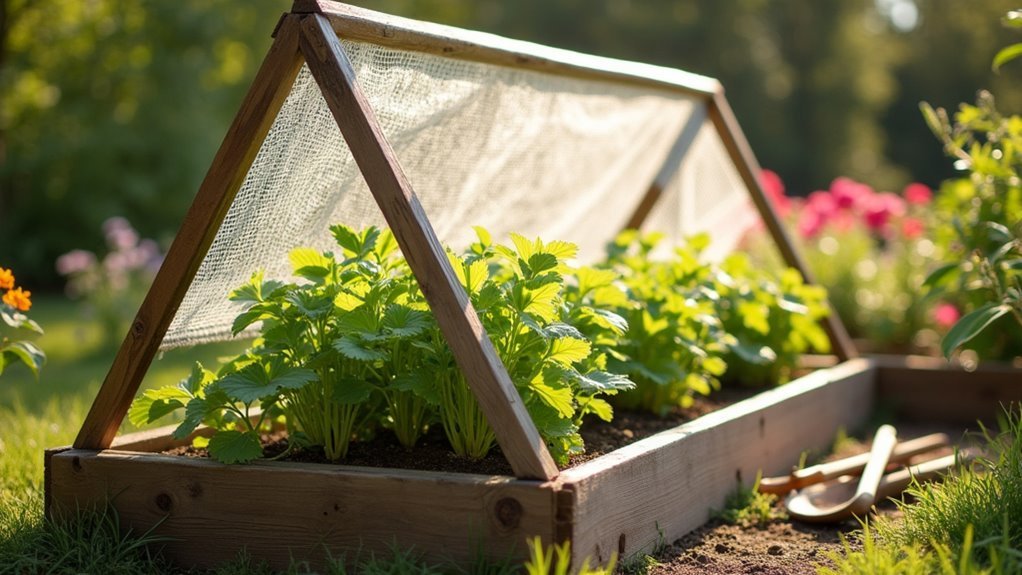
Now that you’ve assembled all your materials and tools, start building your frame by positioning six 25mm DETA metal saddles along each side of your raised bed. Secure them with timber screws to create a solid foundation.
Cut three 2.6m lengths of Vinidex 25mm poly pipe and thread them through the metal saddles to form arching supports.
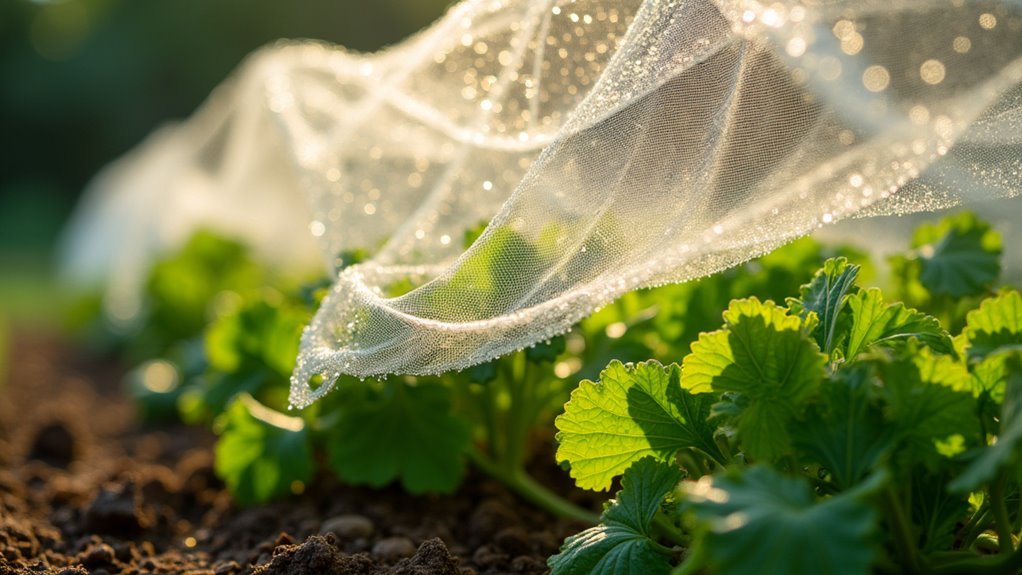
Drape your 4x4m diamond eco-netting over the entire garden mesh structure, ensuring adequate overhang on all sides.
Secure the netting effectively by:
- Using at least 18 timber screws around the bed’s perimeter
- Half-screwing screws for easy future access
- Tying one side with twine for extra stability
- Keeping the mesh taut to prevent sagging
This construction method creates a protective barrier that keeps pests away while allowing easy maintenance access.
Choosing the Right Mesh: Tulle Vs Garden Fabric Vs Anti-Bird Netting
After constructing your frame, you’ll need to select the appropriate mesh material that matches your specific garden protection needs.
Tulle offers an economical solution at $2 per yard, providing excellent protection for brassicas and other crops that don’t require pollination. However, it degrades faster under UV exposure.
Garden fabric made from polypropylene delivers superior durability and UV resistance while maintaining ideal airflow and water penetration. It’s your best choice for long-term pest control across various plant types.
Anti-bird netting specifically targets birds and larger pests threatening fruits and vegetables. Its larger mesh size allows pollinators access while blocking destructive wildlife.
Choose based on your target pests, plant varieties, and budget considerations for maximum protection effectiveness.
Securing and Adjusting Your Netting for Maximum Protection

Once you’ve selected your netting material, you’ll need to secure it properly to prevent pests from finding their way into your garden.
Effective anchoring techniques keep your netting in place during wind and weather, while smart seasonal adjustment methods let you adapt your setup as your plants grow and conditions change.
Let’s explore how to install and maintain your netting system for year-round garden protection.
Proper Anchoring Techniques
While installing garden netting provides excellent pest protection, it’s only effective when properly anchored and secured.
Without proper anchoring techniques, even the best Garden Cover won’t withstand pest pressure or weather conditions affecting your garden beds.
Effective anchoring requires multiple securing methods:
- Use landscaping pins or stakes to anchor corners and edges, keeping netting taut against wind and animal intrusion.
- Install half-screwed screws along raised bed perimeters for additional stability while allowing easy adjustments.
- Tie one side tightly with twine to eliminate gaps that pests could exploit while maintaining plant access.
- Create bamboo stake frameworks combined with twine to hold netting above plants for better airflow.
Regularly check anchoring points and adjust tension after heavy rains or strong winds to maintain protective integrity.
Seasonal Adjustment Methods
Garden netting requires ongoing adjustments throughout the growing season to maintain ideal protection as your plants develop and weather conditions change.
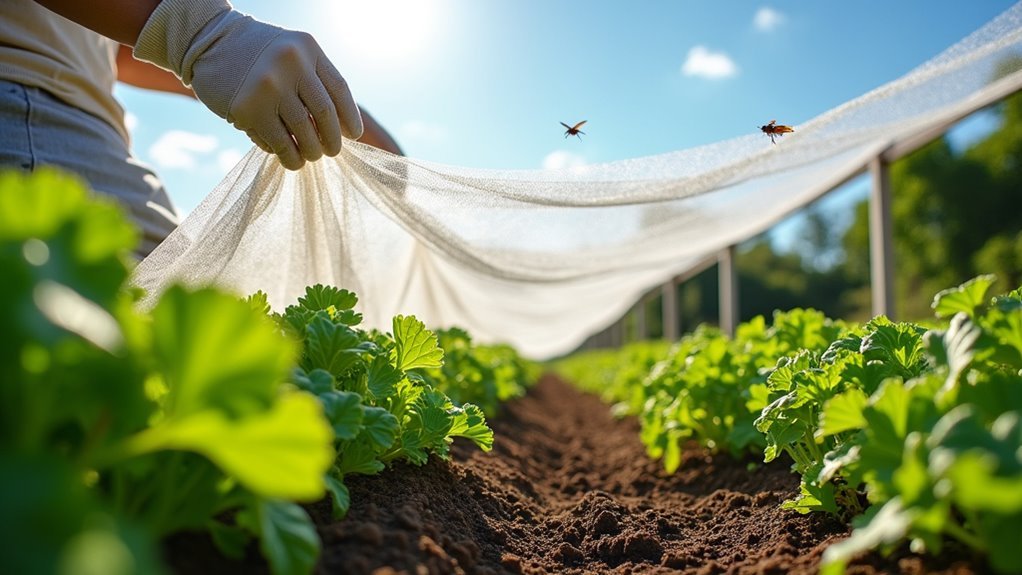
You’ll need to modify your setup as seedlings grow taller and spread wider. Flip one side of the netting to access your raised garden for inspections while keeping the rest protected underneath. This method allows you to monitor plant health without completely removing coverage.
Use half-screwed screws along your raised bed edges for quick seasonal adjustments. This system lets you easily remove and reattach netting as needed.
During extreme weather, reinforce your setup with additional stakes or weights to keep pests out effectively. Regular maintenance checks guarantee your netting remains damage-free and continues providing maximum protection throughout each growing season.
Maintaining Plant Access While Keeping Pests Out
Although protecting your plants from pests is essential, you’ll need regular access for watering, harvesting, and maintenance.
Design your garden netting system with convenience in mind by creating easy access points that don’t compromise pest protection.
The most effective approach involves securing one side of the net with twine, allowing you to tie it back for quick inspections without complete removal. This method maintains the protective barrier while giving you unrestricted access to your plants.
Consider these installation techniques for your raised bed:
- Use half-screwed screws along bed edges for adjustable positioning
- Guarantee adequate overhang length for secure anchoring
- Position access points near frequently tended areas
- Create multiple tie-back points for larger garden sections
This system effectively prevents pest intrusion while maintaining daily garden accessibility.
Troubleshooting Common Netting Problems and Solutions
Even the best garden netting setup can face challenges that compromise its effectiveness.
You’ll likely encounter holes and tears from weather damage or animal interference, which create entry points for the very pests you’re trying to exclude.
Wind displacement poses another common problem, as strong gusts can lift or shift your netting away from plants, leaving them vulnerable to attack.
Holes and Tears
Tiny holes in your garden netting might seem insignificant, but they’re like leaving your front door ajar for unwanted visitors.
Even the smallest damage allows pests to infiltrate and compromise your plants’ protection. You’ll need to inspect your netting regularly and address any holes and tears promptly to maintain effective pest control.
When you discover damage, repair it immediately using these methods:
- Patch repairs: Use leftover netting pieces for larger holes
- Sewing method: Stitch tears with weather-resistant thread
- Adhesive tape: Apply outdoor-rated tape for small tears
- Proper storage: Fold neatly and avoid direct sunlight during off-season
Remember to avoid overtightening when securing netting, as excessive tension increases tearing likelihood.
Maintain gentle tension that allows flexibility while keeping pests out.
Wind Displacement Issues
When strong winds hit your garden, they can turn your carefully installed netting into a billowing mess that defeats its protective purpose.
Wind displacement issues occur when your garden mesh became loose or improperly secured. You’ll need to anchor your netting firmly using half-screwed screws along your raised bed edges to prevent shifting during gusts.
Add landscaping pins or stakes for extra stability, driving them deep into the ground around the perimeter.
Pull your netting taut before securing it—loose material flaps excessively in wind. Consider positioning the mesh to minimize wind resistance by angling it strategically.
Regular inspections help catch small tears before they expand into major displacement problems during storms.
Frequently Asked Questions
Does Netting Protect Plants From Bugs?
Yes, you’ll find netting effectively protects your plants from various bugs including white flies, aphids, and caterpillars. It creates a physical barrier while still allowing sunlight, air, and water to reach your plants.
What Is the Best Netting to Protect Vegetables From Birds and Insects?
You’ll want polyethylene netting with fine weave micromesh for ideal protection. Choose UV-resistant options in 4x4m rolls, and use flexible hoop systems for support. This combination effectively blocks both birds and insects while allowing sunlight through.
What Protects Plants From Bugs?
You can protect plants from bugs using garden mesh like diamond eco-netting, which blocks pests while allowing water and sunlight through. Install it immediately after planting for best results.
What Netting Keeps Grasshoppers off Plants?
You’ll want garden mesh with 1/16 to 1/8 inch openings or lightweight floating row covers made from spunbond fabric. Both create effective barriers that grasshoppers can’t penetrate while maintaining airflow.
In Summary
You’ve now mastered creating effective garden netting that’ll protect your plants without harsh chemicals. Your DIY frame and properly selected mesh will keep pests at bay while maintaining easy access for harvesting and maintenance. Remember to regularly check for tears, adjust tension as needed, and monitor plant growth. With these skills, you’ll enjoy healthier crops and reduced pest damage season after season. Your garden’s natural protection system is complete and ready to work.

Leave a Reply