
Homemade wasp traps protect your garden by intercepting queen wasps before they establish colonies that can reach 20,000 aggressive defenders. You’ll prevent wasps from hunting beneficial pollinators like bees, which directly impacts your harvest quality and yields. Early spring intervention with DIY traps captures queens emerging from hibernation, stopping massive populations before they develop. Strategic placement and proper bait selection guarantee you’re targeting harmful wasps while keeping beneficial insects safe, and the techniques below will maximize your garden’s protection.
Understanding Wasp Behavior and Garden Threats
Twenty thousand eggs from a single queen wasp can turn your peaceful garden into a battleground by late summer.
You’ll notice these aggressive insects target your ripest fruits and crash your outdoor gatherings when they’re desperately seeking sugary treats.
What’s worse, wasps actively hunt bees, reducing the pollinators your garden depends on for healthy fruit and vegetable production.
This behavior creates a domino effect that damages your harvest quality and yields.
You can’t afford to wait until colonies reach full strength. Early spring intervention prevents massive populations from establishing themselves in your space.
A well-placed trap becomes your first line of defense, intercepting wasps before they locate their preferred food source and multiply beyond control.
Essential Materials for Building Effective Homemade Traps
You’ll need just a few common household items to create an effective wasp trap that actually works.
Start with selecting the right container, then gather proper cutting tools to modify it into a functional trap.
The final piece involves choosing the correct bait mixture that’ll attract wasps based on the season and their feeding preferences.
Basic Container Selection Guide
When choosing your container, make sure it’s clean and free from residual odors that might interfere with your bait for wasp attraction.
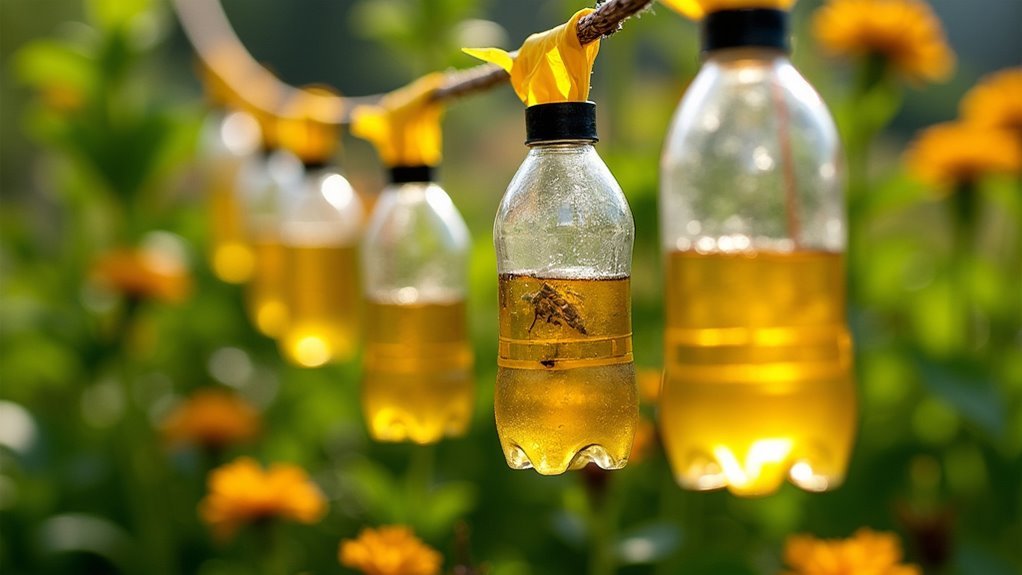
Two-liter soda bottles work exceptionally well because their sturdy plastic construction withstands outdoor conditions.
You can easily cut and manipulate these bottles to create the essential funnel design that traps wasps effectively while preventing their escape from your homemade solution.
Cutting Tools and Techniques
Once you’ve selected your container, gather the right cutting tools to transform it into a functional trap. You’ll need a sharp knife, box cutter, or scissors to accurately cut your plastic bottle. A permanent marker is essential for drawing a straight line around the bottle’s neck, guaranteeing a clean cut and proper fit when you invert the top section.
Mark your cutting line just below where the bottle begins widening. Using a rubber band or string as a guide helps maintain precision and creates uniform openings for maximum effectiveness.
Handle your cutting tools carefully, especially if you’re allergic to wasp stings, since this process involves direct interaction with the trap’s entry points. Proper technique guarantees wasps enter easily but can’t escape.
Bait Ingredients and Mixtures
After cutting your trap, selecting the right bait becomes essential for attracting wasps while avoiding beneficial insects like honeybees. Your bait ingredients should match seasonal wasp preferences.
In early spring, use protein sources like uncooked meat since wasps need protein for colony development. During late summer and fall, switch to sugary substances such as sugar water or fruit juice when wasps crave carbohydrates.
Create an effective mixture by combining vinegar and sugar with your chosen bait. Add one teaspoon of vinegar to deter honeybees while maintaining wasp attraction. Include several drops of dish soap to eliminate surface tension, preventing trapped wasps from escaping the liquid.
Replace your bait every 15-20 days to maintain effectiveness, and consider using multiple bait types simultaneously for maximum capture rates.
Step-by-Step Construction of DIY Wasp Traps
Building an effective wasp trap requires just a few common materials and takes less than ten minutes to complete.
Start with an empty plastic bottle and cut off the top just below the widening area. This creates a funnel that you’ll invert and insert back into the bottle, forming your homemade wasp traps.
Next, prepare your best bait mixture. Use protein-based options like lunch meat in early spring, then switch to sugary substances as the season progresses.
Add a teaspoon of vinegar to deter bees while attracting wasps, plus a few drops of dish soap to eliminate surface tension.
Pour the bait into the bottom section, insert the inverted funnel, and you’re ready to trap wasps effectively.
Choosing the Right Bait for Maximum Effectiveness
You’ll need different baits throughout the year since wasps’ dietary preferences change with the seasons.
Your bait selection should also protect beneficial honeybees while maintaining its attractiveness over time.
Let’s explore how seasonal timing, bee-safe ingredients, and proper maintenance schedules can maximize your trap’s effectiveness.
Seasonal Bait Selection
Since wasps’ dietary needs change dramatically throughout their lifecycle, selecting the right bait for your homemade trap depends entirely on timing.
During early spring through early summer, you’ll want protein-based baits like lunch meat or hamburger to attract emerging queens seeking food for their developing larvae.
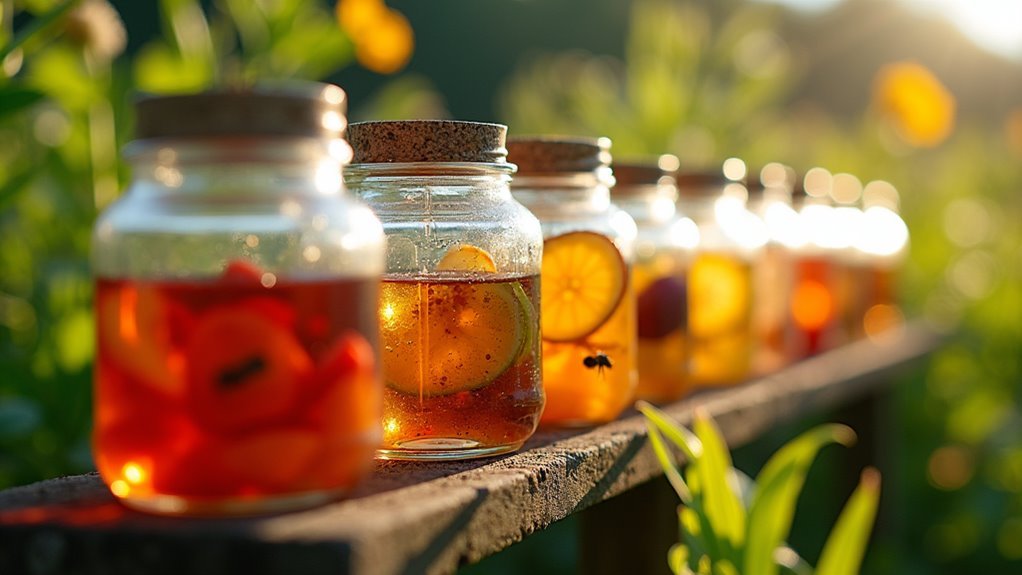
However, as seasonal bait selection shifts into late summer and fall, worker wasps crave sweets for winter preparation.
Switch to sugar bait options like sugar water, jam, or fruit juice during this period.
Never use honey since it attracts beneficial bees instead of wasps.
Adding vinegar to your bait mixture deters bees while maintaining wasp attraction.
Rebait weekly and consider mixing bait types throughout the season for ideal trapping success.
Bee-Safe Attractant Options
While targeting wasps effectively requires strategic bait selection, protecting beneficial pollinators like honeybees should remain your top priority when crafting homemade traps.
You’ll want to avoid honey entirely, as it’s irresistible to bees and defeats your bee-safe objectives. Instead, create attractants using sugar water or fruit juice combined with a teaspoon of vinegar, which deters honeybees while still luring wasps.
Adding a few drops of dish soap eliminates surface tension, preventing wasps from escaping once they’re trapped. For protein-based options, use uncooked meat or ham during early spring when wasps seek protein sources.
Switch to sweet liquid baits during late summer and fall when wasps crave sugary substances for winter preparation.
Fresh Bait Maintenance
Even perfectly crafted wasp traps won’t deliver results if you’re using stale, ineffective bait that’s lost its appeal.
Fresh bait maintenance requires replacing your attractant every 15-20 days to keep wasps and hornets actively interested. Old bait develops unpleasant odors that’ll actually repel your targets while attracting unwanted pests instead.
When you’re switching out bait, thoroughly clean your trap and remove any dead wasps. This prevents the trap from becoming a breeding ground for other insects.
Whether you’re using protein-rich options in spring or sugar water mixtures in late summer, consistency in maintenance makes the difference.
Add a few drops of dish soap to any fresh bait solution—it eliminates surface tension and prevents trapped wasps from escaping.
Optimal Placement and Timing Strategies
Three vital factors determine your wasp trap’s success: when you deploy it, where you position it, and how consistently you maintain it.
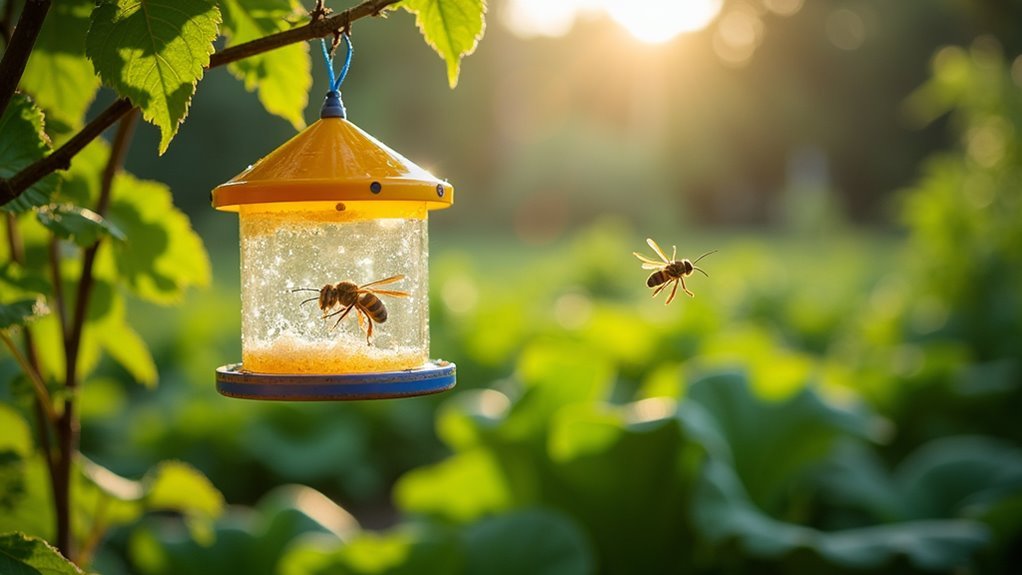
For ideal placement, position traps 6-7 meters away from human activity areas like picnic tables. This distance draws wasps away from food sources while maintaining effectiveness. Hang traps in trees approximately 1.5 meters above ground to maximize visibility and accessibility.
Deploy your traps in early spring, ideally by March, to capture queens before they establish nests and lay thousands of eggs. This timing prevents massive population explosions later in the season.
Spring deployment by March targets queen wasps before nest establishment, preventing thousands of offspring and seasonal population explosions.
Peak wasp activity occurs from August to October, making trap maintenance essential during this period. Commit to rebaiting traps weekly throughout the season to guarantee consistent attraction and capture rates.
Early Spring Queen Capture for Population Control
Because single queen wasps can lay up to 20,000 eggs once they establish nests, capturing them during early spring emergence becomes your most powerful population control strategy.
When queen wasp hibernation ends, you’ll have a critical window to prevent massive infestations. These reproductive females seek hidden, undisturbed locations to start colonies, making early intervention essential.
Target your trapping efforts with these key strategies:
- Place traps during sunny early spring days when queens are most active
- Position traps before queens locate suitable nesting sites
- Focus on capturing queens before egg-laying begins
- Prioritize early spring over waiting until fruit ripening season
- Remember one captured queen equals preventing thousands of offspring
Don’t wait until summer when established colonies threaten your garden. Early spring queen capture delivers maximum population control impact.
Protecting Beneficial Insects While Targeting Pests
You’ll want to craft your bait carefully to attract wasps while keeping beneficial insects like bees safe from harm.
The right mixture of vinegar and sugar water targets wasps during their peak activity periods without luring honeybees that your garden depends on for pollination.
Where you position these traps matters just as much as what’s inside them—proper placement protects pollinators while effectively capturing the pests you’re targeting.
Selective Bait Formulations
Two key principles guide effective selective bait formulations: timing your protein and sugar sources correctly, and incorporating specific deterrents that repel beneficial insects.
Early spring demands protein-based baits like uncooked meat or ham, while late season calls for sugary attractants.
Here’s how to keep wasps away from your garden while protecting pollinators:
- Add vinegar to deter honeybees from entering your hornet traps
- Use beer or soda as selective attractants that appeal specifically to wasps
- Include dish soap drops to eliminate surface tension and prevent escape
- Time protein baits for early spring when wasps seek building materials
- Switch to fruit juice or sugar water during late summer feeding periods
This targeted approach guarantees you’ll capture problem wasps without harming essential garden pollinators.
Strategic Trap Placement
Smart bait selection works hand-in-hand with strategic placement to maximize wasp capture while safeguarding beneficial insects.
Position your homemade wasp traps 6-7 meters from human activity areas to keep wasps away from gathering spots without endangering pollinators. Hang traps 1.5 meters above ground in trees, drawing wasps from gardens while protecting bees and other beneficial insects.
Strategic trap placement involves avoiding areas where honeybees frequently visit. Don’t place traps near flowering plants or pollinator habitats.
Monitor your traps regularly to ascertain they’re functioning effectively without disrupting the ecosystem. Deploy traps from March through October, with peak effectiveness during August-October when wasp populations surge.
This timing protects beneficial insects during their most active periods while controlling pest populations when they’re most problematic.
Maintenance and Bait Replacement Schedule
Once you’ve set up your homemade wasp trap, maintaining it properly guarantees maximum effectiveness throughout the season.
Regular maintenance keeps your wasp traps functioning at peak performance while preventing issues that could reduce their appeal to target pests.
Follow this essential maintenance schedule:
- Replace bait every 15-20 days to maintain trap effectiveness and consistent wasp attraction.
- Check traps weekly for live wasps and remove dead ones to prevent odors that attract other pests.
- Use protein sources like lunch meat in spring/early summer, then switch to sugary liquids in late summer/fall.
- Add one teaspoon of vinegar to bait mixture to deter honeybees from entering.
- Include several drops of dish soap to eliminate surface tension and prevent wasp escapes.
Measuring Success and Trap Performance
While properly maintained traps can capture hundreds of wasps throughout a season, you’ll need to track specific metrics to determine whether your homemade traps are delivering the results you want.
Start monitoring by counting trapped wasps weekly and recording the numbers. This data reveals local population density trends and helps you assess trap effectiveness over time.
Weekly wasp counts provide essential data for tracking population trends and measuring your trap’s effectiveness over time.
You should notice a significant reduction in wasp activity around your garden during peak months if your traps are working properly. Pay attention to the types of wasps caught—capturing queens early in the season provides maximum impact.
Homemade wasp traps that consistently catch 20-30 wasps per week indicate successful population control in your immediate area.
Advanced DIY Trap Modifications and Improvements
After you’ve established your basic homemade wasp traps and tracked their performance, you can implement several targeted modifications to dramatically boost their effectiveness.
The best wasp trap improvements focus on strategic enhancements that target specific behaviors:
- Add a teaspoon of vinegar to your bait mixture to attract wasps while deterring beneficial honeybees from entering.
- Include a few drops of dish soap to reduce surface tension, ensuring trapped wasps sink and can’t escape.
- Modify trap opening sizes with tape to create easy entry points with difficult exits.
- Use protein-based baits like rotten meat during early spring, then switch to food and sugary liquids as seasons progress.
- Maintain weekly cleaning schedules and fresh rebaiting to sustain peak trapping efficiency throughout the entire season.
Frequently Asked Questions
Why Are Wasps Good for the Garden?
You’ll find wasps incredibly beneficial because they’re voracious predators that’ll consume thousands of garden pests like aphids and caterpillars. They’ll also pollinate plants while controlling harmful insects, naturally reducing your need for chemical pesticides.
Do Homemade Wasp Traps Work?
Yes, you’ll find homemade wasp traps work effectively when you use proper bait and design. They’ll catch many wasps but won’t eliminate entire colonies, so you’ll need regular maintenance for best results.
Do Wasp Traps Harm Bees?
You can prevent wasp traps from harming bees by using vinegar-based baits, protein lures in spring, strategic placement away from flowers, and designing one-way entrances that don’t attract beneficial pollinators.
Should You Kill Wasps in Garden?
You shouldn’t kill wasps in your garden because they’re beneficial predators controlling pest populations. Instead, use non-lethal traps to manage them while preserving their ecological role and avoiding aggressive retaliation.
In Summary
You’ve now mastered the art of creating effective homemade wasp traps that’ll protect your garden without harming beneficial insects. By following proper construction techniques, selecting the right baits, and maintaining consistent schedules, you’re equipped to greatly reduce wasp populations around your plants. Remember to monitor trap performance regularly and adjust placement as needed. These cost-effective solutions will keep your garden safe while you enjoy a more peaceful outdoor experience.

Leave a Reply