You can create a highly effective wasp trap using a 2-liter bottle, apple cider vinegar, sugar, and dish soap. Cut the bottle neck, invert it to form a funnel, then add 3/4 cup apple cider vinegar with 2 tablespoons sugar and soap drops to reduce surface tension. Apple cider vinegar captures 50% more wasps than white vinegar due to its stronger scent that mimics fermenting fruit. This simple setup will discover additional optimization strategies for maximum wasp control.
Understanding Why Vinegar Attracts and Traps Wasps
When late summer arrives and natural food sources become scarce, wasps desperately search for alternatives, making apple cider vinegar an irresistible lure for your homemade traps.
The acetic acid in vinegar perfectly mimics fermenting fruit scents that wasps crave. You’ll find this creates a powerful attraction mechanism that draws them away from other food sources.
Adding sugar to your vinegar creates an even more enticing sweet-and-sour combination that wasps can’t resist.
Once they enter your trap, the slippery vinegar solution prevents their escape. The design works because wasps become disoriented by the strong scent, focusing solely on the vinegar instead of seeking exit routes.
This natural bait effectively exploits their foraging instincts, making vinegar-based traps highly successful.
Essential Materials for Building Your Vinegar Wasp Trap
Now that you understand how vinegar lures wasps into your trap, gathering the right materials will guarantee your trap works effectively.
You’ll need an empty 2-liter soda bottle as your foundation for this DIY wasp trap. A utility knife is essential for cutting the bottle at the neck, creating a funnel that you’ll invert into the bottom section.
For your bait mixture, combine 3/4 cup of apple cider vinegar with 2 tablespoons of sugar and several drops of dish soap. The soap prevents wasps from escaping once they’re trapped.
Consider adding wire or string for hanging your trap away from living areas.
These wasp traps require regular maintenance—rebait every 2-3 days, especially during hot weather, to maintain effectiveness.
Step-by-Step Bottle Preparation and Cutting Techniques
You’ll start by marking a clean cut line around your bottle’s neck, then carefully cutting through the plastic to create two separate pieces.
Next, you’ll remove the cap and flip the top section upside down before inserting it into the bottom half. This creates the funnel entrance that’ll trap wasps effectively while preventing their escape.
Marking the Cut Line
Before cutting your plastic bottle, grab a permanent marker and draw a clear, visible line around the neck just below where it starts to taper. This marking the cut line step is vital for creating an effective wasp trap that’ll actually work.
You’ll want the line to be bold and easy to follow since it determines how well your funnel will fit. For the most accurate cut, wrap a rubber band or string around the bottle as a guide, then trace along it with your marker.
This technique helps you cut the top section perfectly straight, ensuring the inverted piece fits snugly into the bottom portion. A precise cut is essential to prevent wasps from getting out once they’ve entered your trap.
Cutting the Bottle Top
Once you’ve marked your cutting line, position a sharp utility knife at the marked line and apply steady pressure while rotating the bottle slowly to create an initial score. This prevents the plastic from cracking unpredictably when cutting the bottle top for your wasp trap.
After scoring, complete the cut using one of these methods:
- Utility knife technique – Continue cutting deeper along the scored line, maintaining steady pressure.
- Sharp scissors approach – Use kitchen shears to follow your marked line for cleaner edges.
- Safety-first method – Sand any rough edges smooth to prevent cuts during assembly.
Remove the bottle cap completely once cutting the bottle top is finished. The opening needs to remain unobstructed when you invert this section into the bottom portion, creating the funnel entrance that’ll trap wasps seeking the plastic food container’s contents inside.
Inverting and Securing Pieces
Take your freshly cut bottle top and flip it upside down so the neck opening points toward the bottom of the bottle. When inverting the top, you’ll create the vital funnel entrance that lures wasps in but prevents their escape.
Remove the cap first, then carefully insert the inverted neck of the bottle into the bottom section. The pieces should fit snugly together – this tight connection is important for trap effectiveness. Secure it in place using tape around the rim where both sections meet.
| Securing Method | Stability Level | Ease of Setup |
|---|---|---|
| Tape Only | Good | Very Easy |
| Push Fit | Fair | Easy |
| Multiple Wraps | Excellent | Moderate |
| Staples | Best | Hard |
Test the connection by gently tugging – no movement means you’re ready for bait.
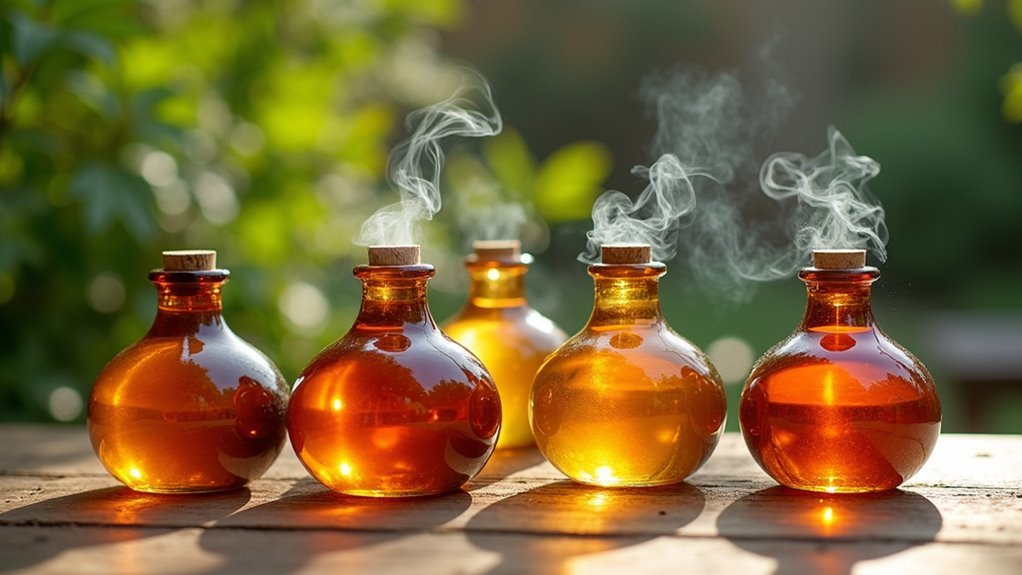
Creating the Perfect Vinegar and Sugar Bait Mixture
When creating an effective wasp trap, you’ll need the right bait mixture to lure these persistent insects. Your homemade wasp trap’s success depends on the perfect combination of ingredients that’ll keep wasps away from your outdoor spaces while drawing them into your trap.
For an irresistible bait mixture, combine:
- 3/4 cup white vinegar with 2 tablespoons sugar and 1 teaspoon salt
- Apple cider vinegar as an alternative during late summer and fall
- A few drops of dish soap to reduce surface tension
Mix thoroughly until sugar and salt dissolve completely.
Pour enough vinegar and water mixture to create 1-2 inches depth in your trap. This prevents escape once wasps enter. Refresh every 2-3 days in hot weather to maintain effectiveness.
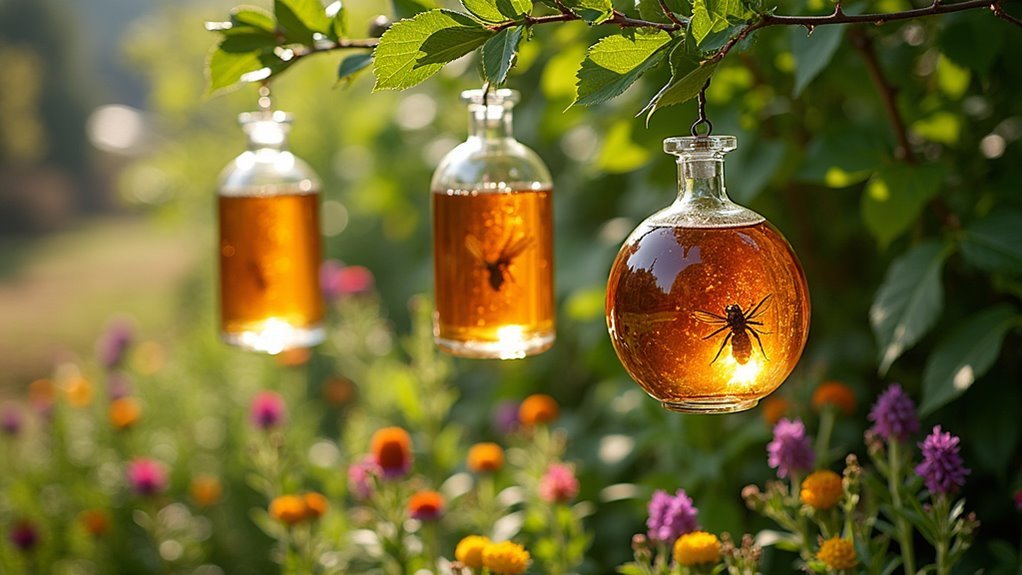
Apple Cider Vinegar Vs White Vinegar Effectiveness
You’ll notice significant differences in how apple cider vinegar and white vinegar attract wasps to your traps.
Apple cider vinegar’s stronger, sweeter scent typically captures more wasps than white vinegar’s milder aroma, making it the more effective choice for most trap designs.
However, your success rates can vary depending on your specific environment and the wasp species you’re targeting, so testing both types will help you determine what works best.
Scent Attraction Differences
Although both vinegars can attract wasps, apple cider vinegar consistently outperforms white vinegar in homemade traps due to its naturally sweet and fruity aroma.
The scent profile of apple cider vinegar mimics the fermented fruit wasps naturally seek, making it irresistible to these insects.
Here’s why apple cider vinegar works better in wasp traps:
- Sweet attraction: The fruity scent triggers wasps’ natural foraging instincts for sugary substances
- Enhanced effectiveness: Combined with sugar, it becomes even more appealing to wasps seeking carbohydrates
- Stronger draw: Late summer wasps prefer this sweeter smell over white vinegar’s sharp, acidic odor
White vinegar’s harsh smell actually repels wasps rather than attracting them, making it better suited for deterrent applications around nesting areas.
Trap Success Rates
Field testing reveals dramatic differences in trap performance between these two vinegar types.
You’ll capture up to 50% more wasps using apple cider vinegar compared to white vinegar under identical conditions. The sweet aroma mimics ripe fruit scents that naturally attract these pests, making your traps considerably more effective.
When you combine apple cider vinegar with sugar, you’ll create an irresistible attractant that outperforms white vinegar alone by substantial margins.
Even during periods when wasps are least active, apple cider vinegar maintains superior capture rates.
While white vinegar works as a backup option, you shouldn’t expect the same results.
To trap every wasp possible, stick with apple cider vinegar-based solutions. The enhanced effectiveness justifies any additional cost, delivering measurably better pest control outcomes for your property.
Bait Mixture Effectiveness
When creating the most effective wasp bait, the specific ingredients you combine with your vinegar base determine your trap’s overall success.
Apple cider vinegar consistently outperforms white vinegar due to its stronger scent and natural sweetness that wasps crave. Research confirms that proper ingredient combinations dramatically improve bait mixture effectiveness.
Your most potent combinations include:
- Apple cider vinegar mixed with sugar and water for enhanced sweetness appeal
- White vinegar combined with sugar and dish soap as an effective backup option
- Either vinegar type enhanced with dish soap to prevent wasp escape
Apple cider vinegar proves especially effective during late summer and fall when wasps actively seek sugary food sources.
The addition of dish soap serves dual purposes: attracting wasps while ensuring they can’t fly away once trapped.
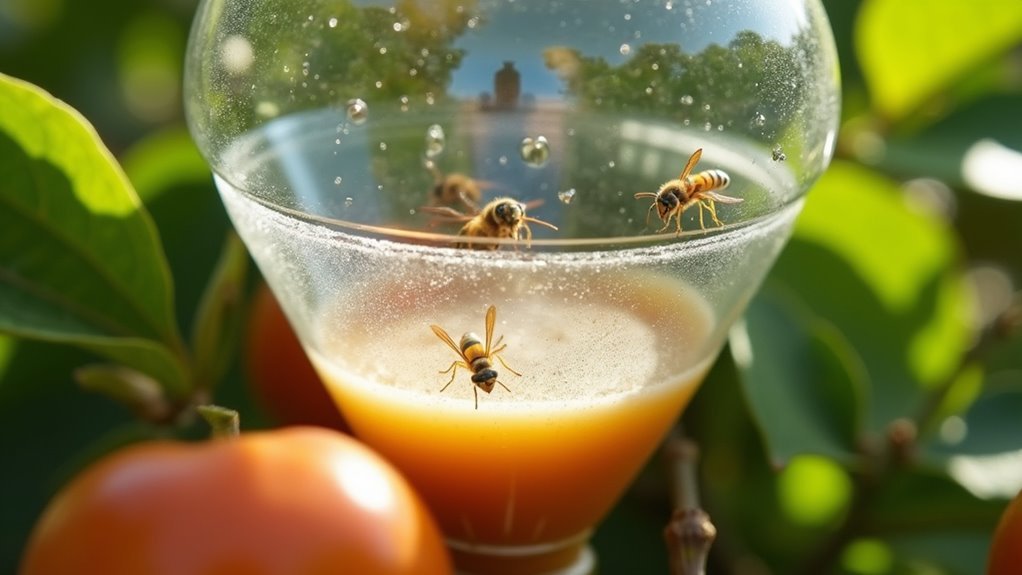
Adding Dish Soap to Prevent Wasp Escape
While vinegar alone attracts wasps effectively, you’ll dramatically improve your trap’s success rate by adding a few drops of dish soap to the mixture. The soap breaks the liquid’s surface tension, preventing wasps from floating or escaping once they land.
Without this essential addition, many wasps can simply fly away after touching the bait.
Mix approximately one tablespoon of dish soap with your vinegar solution to create a deadly barrier. This technique works especially well with sugary baits, ensuring trapped wasps can’t escape the liquid. The soap causes them to sink immediately upon contact rather than remaining on the surface.
Remember to refresh your bait and soap mixture regularly, particularly during warm weather when wasp activity peaks and the solution degrades faster.
Optimal Trap Placement for Maximum Results
Your expertly crafted vinegar and soap mixture won’t deliver results if you place traps in the wrong locations. Strategic trap placement determines whether you’ll capture wasps or watch them fly past unbothered.
Even the most effective wasp trap becomes useless when positioned incorrectly—location strategy makes the difference between success and failure.
Position traps at least 10 yards from patios, decks, and dining areas. This distance effectively draws wasps away from high-traffic zones while keeping your family safe.
For optimal outcomes, follow these essential placement guidelines:
- Hang traps in shaded areas under eaves or trees, as wasps prefer cooler, darker environments over direct sunlight.
- Deploy multiple traps strategically around your property to cover larger areas and increase capture rates.
- Monitor and reposition traps regularly based on wasp activity, moving them closer to nests when necessary.
Early spring deployment yields the best results when queens search for nesting sites.
Safety Precautions When Handling Wasp Traps
You’ll need proper protective clothing every time you handle wasp traps to prevent dangerous stings.
Always wear long sleeves, gloves, and a mask before approaching any trap, whether it’s for installation, checking, or removal.
Time your trap maintenance carefully by checking them during early morning or late evening when wasps are less active.
Protective Clothing Requirements
When setting up or maintaining wasp traps, you’ll need proper protective clothing to shield yourself from potential stings. Essential gear includes long sleeves, long pants, gloves, and closed-toe shoes to minimize exposed skin areas where wasps might sting.
Your clothing choices can greatly impact sting risks:
- Avoid bright colors or floral patterns – these attract wasps and increase your chances of being targeted
- Wear face protection like goggles or masks – facial stings are particularly dangerous and painful
- Consider a bee veil or netted hat – especially important if you’re allergic or working in high-activity areas
Remember to stay calm and avoid sudden movements while handling wasp traps. Your protective clothing works best when combined with careful, deliberate actions that won’t provoke defensive behavior.
Trap Maintenance Timing
Beyond wearing the right protective gear, timing your trap maintenance makes the difference between a safe, straightforward task and a potentially dangerous encounter.
You’ll want to perform trap maintenance during early morning or late evening when wasps are naturally less active and less likely to sting. Check your traps every 2-3 days during these ideal windows to remove dead wasps and refresh bait for continued effectiveness.
Handle traps carefully, ensuring they’re securely closed to prevent live wasps from escaping.
When disposing of trapped contents, seal dead wasps in a bag before discarding to avoid attracting more wasps or drawing attention from nearby wasp nests.
This timing strategy greatly reduces your risk while maintaining trap efficiency throughout the season.
Seasonal Baiting Strategies for Different Times of Year
Since wasp behavior changes dramatically throughout the year, your baiting strategy must adapt to match their shifting dietary preferences.
These seasonal baiting strategies form a vital component of effective Integrated Pest Management, ensuring your wasp repellent approach remains targeted year-round.
Your bait selection should follow these seasonal patterns:
- Spring to Early Summer: Use protein-based baits like lunch meat or hamburger to attract emerging queens searching for protein sources.
- Late Summer to Fall: Switch to sugary baits such as sugar water, jam, or fruit juice when wasps prioritize sweet substances.
- Year-Round Enhancement: Add vinegar to any bait mixture to deter bees while maintaining wasp attraction.
Avoid honey completely, as it attracts beneficial insects.
Rebait your traps weekly and adjust based on seasonal changes for ideal effectiveness.
Maintenance Schedule and Trap Monitoring
You’ll need to establish a consistent maintenance routine to keep your wasp traps working effectively throughout the season.
Check your traps every 2-3 days during hot weather, removing dead wasps promptly to prevent odors that could deter new targets from entering.
Refill the bait weekly with fresh attractants, as stale or diluted solutions won’t draw wasps as effectively as potent, recently prepared mixtures.
Empty and Refill Frequency
While maintaining consistent trap performance requires regular attention, establishing a proper emptying and refilling schedule will enhance your wasp control success.
You’ll need to empty your wasp trap when it becomes full to prevent reduced effectiveness and maintain continuous capture rates.
Follow this essential schedule:
- Check every 2-3 days during hot weather when wasp activity peaks and traps fill faster
- Empty immediately when traps reach capacity, disposing of trapped wasps carefully to avoid attracting more to the area
- Refill with fresh bait at least weekly, adapting between protein-based baits for spring/summer and sugary solutions for late summer/fall
Monitor for live wasps in your trap, as this indicates both effective bait choice and proper placement.
Clean thoroughly before each refill to maintain peak attraction.
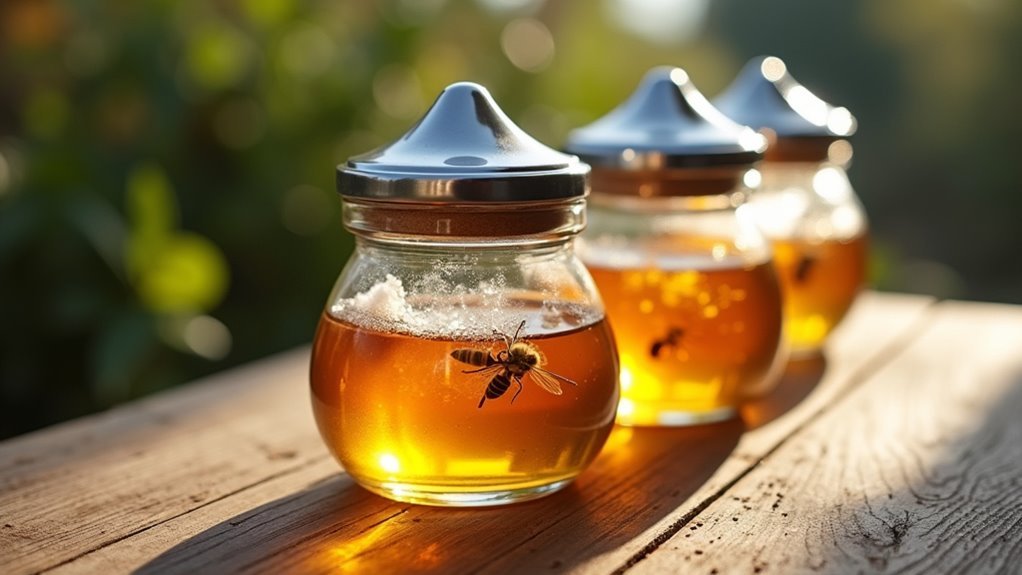
Dead Wasp Removal
Dead wasps accumulating in your trap won’t just create an unpleasant sight—they’ll actually sabotage your wasp control efforts by releasing alarm pheromones that warn other wasps to stay away.
You’ll need to monitor the traps at least weekly to remove these counterproductive carcasses promptly.
When performing dead wasp removal, always wear gloves or use tools to avoid direct contact. Any live wasps might still be lurking inside, ready to sting.
Dispose of dead wasps far from your trap location to prevent their pheromones from creating a danger zone that repels future targets.
During peak wasp season in late summer and early fall, you’ll want to check more frequently—every few days—to maintain ideal trap effectiveness.
Combining Vinegar Traps With Repellent Sprays
When you combine vinegar traps with repellent sprays, you’ll create an all-encompassing defense system that tackles wasp problems from two angles.
This dual approach maximizes your pest control effectiveness by using traps to capture wasps while sprays deter them from establishing nests nearby.
Combining traps and sprays creates a comprehensive defense that attacks wasp problems from multiple directions for maximum control effectiveness.
Here’s how to implement this strategy:
- Create your repellent spray – Mix equal parts vinegar and water, then apply to potential entry points around your outdoor spaces.
- Enhance your bait – Use apple cider vinegar mixed with sugar in your vinegar traps to complement the spray’s deterrent effect.
- Maintain regular application – Reapply the repellent spray after rain to preserve its effectiveness throughout the season.
This two-pronged approach provides both proactive and reactive measures, greatly increasing your chances of reducing wasp populations around your yard.
Troubleshooting Common Trap Performance Issues
Even the most carefully constructed wasp traps can underperform if you’re not addressing key setup and maintenance factors.
First, verify you’re using protein-based bait during spring when wasps feed larvae, then switch to sugary substances in late summer.
Check that your inverted bottle setup doesn’t have gaps where wasps can escape. Position traps at least 10 yards from high-traffic areas to prevent wasps from returning to their wasp nest or food sources nearby.
Empty and rebait every 2-3 days, especially in warm weather.
Try adding dish soap to common household sugar solutions – this prevents wasps from escaping once trapped.
Proper troubleshooting transforms ineffective pest removal attempts into successful wasp control systems.
Alternative Vinegar-Based Wasp Deterrent Methods
Beyond fixing trap performance problems, you can take a proactive approach by creating barriers that prevent wasps from targeting your outdoor spaces in the first place. Vinegar serves as an excellent natural deterrent when applied strategically around your property.
Create an effective repellent spray using these simple steps:
- Mix equal parts water and vinegar in a spray bottle, then apply around outdoor seating areas, doorways, and eaves.
- Add several drops of peppermint oil to enhance the deterrent effect, as wasps strongly dislike this scent.
- Spray during early morning or evening hours when wasps are less active to minimize sting risk.
Reapply your vinegar solution regularly, especially after rain or heavy outdoor use, since its effectiveness diminishes over time.
This preventive approach complements your trapping efforts.
Cost-Effective Tips for Multiple Trap Setups
Since wasp populations can span large outdoor areas, setting up multiple traps becomes essential for thorough pest control without breaking your budget.
These cost-effective tips will help you maximize your vinegar wasp traps without overspending. Start by collecting empty soda bottles – they’re free and environmentally friendly.
Mix 3/4 cup white vinegar, 2 tablespoons sugar, and 1 teaspoon salt in each bottle for an effective attractant. Position several traps strategically around your property to cover more ground. Your total material costs shouldn’t exceed $10-$15.
Check and refill traps every 2-3 days to maintain effectiveness. To further reduce expenses, repurpose old bait materials like fruit scraps or leftover sugary beverages instead of buying commercial attractants.
Frequently Asked Questions
Does Vinegar Really Kill Wasps?
Vinegar doesn’t kill wasps, but you’ll find it’s an effective repellent and trap ingredient. You can use it to deter wasps from nesting and mask attractive odors when you’re creating DIY wasp control solutions.
What Is the Most Effective Homemade Wasp Trap?
You’ll get the best results by cutting a 2-liter bottle’s top off, inverting it inside, then filling with white vinegar, sugar, salt, and dish soap for an effective homemade wasp trap.
How Do You Make a Wasp Trap With Vinegar?
Cut a 2-liter bottle’s neck off and invert it inside the bottom. Mix 3/4 cup white vinegar, 2 tablespoons sugar, and 1 teaspoon salt. Add mixture and hang away from activity.
What Is the Most Effective Wasp Deterrent?
You’ll find apple cider vinegar mixed with equal parts water creates the most effective natural wasp deterrent. Spray it around outdoor areas regularly, especially after rain, to mask food odors that attract wasps.
In Summary
You’ve now got proven methods to tackle your wasp problem using simple vinegar traps. Remember, you’ll see better results when you’re consistent with bait replacement and strategic placement. Don’t get discouraged if you don’t catch wasps immediately – it sometimes takes a few days for them to discover your traps. With these cost-effective techniques, you’ll protect your outdoor spaces without harsh chemicals or expensive commercial solutions.


Leave a Reply