You can mouse-proof your foundation affordably using steel wool for gaps under 1/4 inch, hardware cloth for larger openings, and basic foam sealants—all costing just $5-30 per item. Focus on sealing cracks, installing mesh over foundation vents, and maintaining proper drainage around your home’s perimeter. Essential tools like caulking guns and wire cutters add $10-25 each to your investment. With total costs typically under $100, you’ll save considerably compared to professional services while discovering additional techniques that maximize your protection.
Foundation Crack Inspection and Assessment
Vigilance in foundation inspection forms your first line of defense against unwanted rodent visitors.
You’ll need to examine cracks regularly, focusing on openings larger than 1/4 inch that mice can exploit. Use a flashlight to illuminate hidden gaps in dimly lit areas around foundation walls and foundation vents.
Pay special attention to mortar joints in older homes, where deteriorating materials create vulnerabilities for rodent exclusion failures. Check for concrete settling or shifting that forms new cracks over time.
Aging mortar joints and concrete settlement in older homes create prime entry points that compromise your rodent defense system.
Document every crack and gap you discover, prioritizing the largest openings for immediate sealing. This systematic approach creates an effective barrier against mice infiltration.
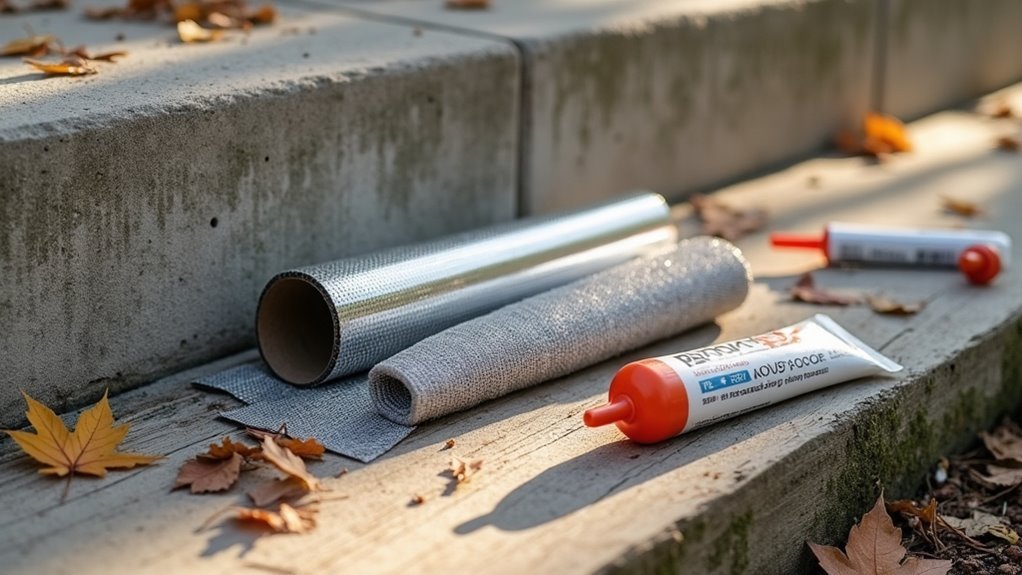
Steel Wool and Hardware Cloth Solutions
Once you’ve identified foundation cracks and gaps, you’ll need cost-effective materials to seal them permanently. Steel wool works perfectly for small openings under 1/4 inch. It’s budget-friendly, compresses easily into gaps around pipes and vents, and rodents can’t chew through it.
Always wear gloves when handling steel wool since the wires are sharp.
For larger gaps and holes, hardware cloth provides excellent protection. This strong wire mesh typically features openings between 1/4 and 1/2 inch, creating an effective barrier against rodent entry.
You can cut hardware cloth to fit specific areas, making it versatile for DIY projects.
Combining steel wool and hardware cloth creates a thorough, affordable rodent-proofing strategy that addresses various entry points without breaking your budget.
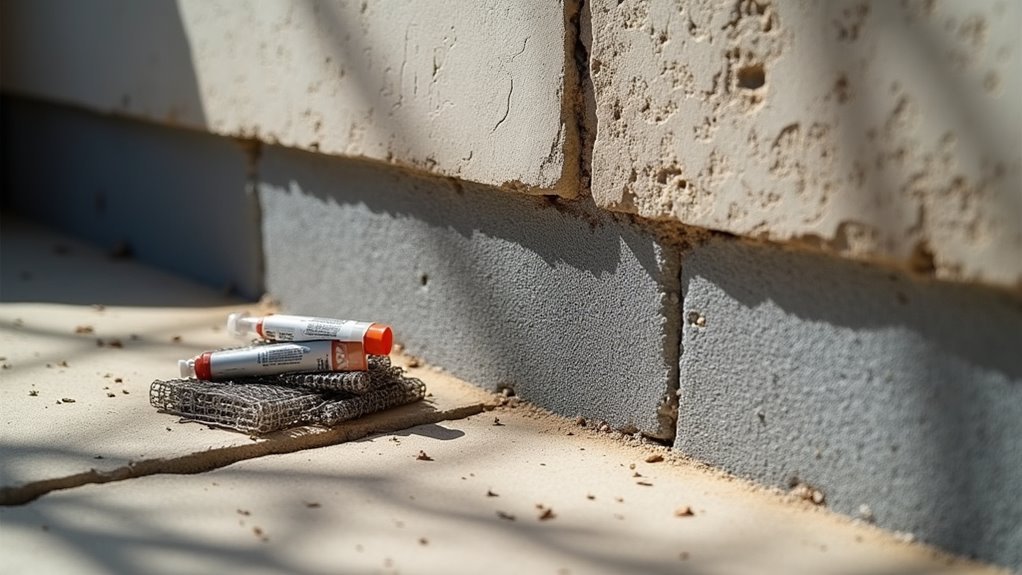
Concrete Patching for Large Foundation Gaps

When foundation gaps exceed what steel wool and hardware cloth can handle, concrete patching becomes your most reliable solution.
You’ll need to address any openings larger than 1/4 inch in diameter to prevent rodent entry effectively.
Start by cleaning out old concrete and debris from the damaged area to guarantee proper adhesion. High-quality concrete patching compounds cost between $10 to $30 per gallon at local hardware stores, making this an affordable option for large repairs.
Clean debris thoroughly from damaged foundation areas before applying $10-30 concrete patching compounds for proper adhesion and affordable large-scale repairs.
Apply the compound in layers, allowing each layer to cure completely before adding the next. This technique creates a solid, durable seal that rodents can’t penetrate.
Remember to inspect your patched areas regularly. Foundation settling can cause new cracks, creating fresh entry points that you’ll need to address promptly.
Mortar Repair Techniques for Deteriorated Joints
Beyond large foundation gaps, deteriorated mortar joints between blocks or stones create equally problematic entry points that require different repair approaches.
You’ll need to perform tuck pointing for badly deteriorated foundation mortar by removing old material completely before applying new mortar. This guarantees proper adhesion and creates an effective rodent barrier.
Match your new mortar to existing color for aesthetic consistency. Apply high-quality sealants to smaller cracks and gaps, which prevents rodent chewing while providing water resistance. Use outdoor-formulated mortar for increased longevity and pest protection effectiveness.
Regular inspection and maintenance of mortar joints prevents future deterioration that creates significant rodent entry points.
For extensive repairs, you may need professional help to guarantee proper technique and long-lasting results.
Foam Sealant Application Methods

You’ll find that mastering proper foam application techniques can save you money while creating an effective rodent barrier.
Start by selecting cost-effective sealants that are specifically designed for rodent resistance rather than generic foam products.
Focus your application efforts on foundation walls, utility entry points, and siding gaps where mice commonly infiltrate homes.
Proper Foam Application Techniques
Three critical steps guarantee your foam sealant creates an effective barrier against mice.
First, clean and dry the target area thoroughly to confirm proper adhesion and prevent moisture problems.
Second, use a caulking gun for precise control when you fill gaps, applying the foam evenly throughout cracks and openings. Remember that foam expands considerably after application, so don’t overfill the space initially.
Apply your sealant when temperatures range between 60°F and 100°F for ideal curing results. Colder conditions will hinder proper expansion and adhesion.
For larger gaps, insert backing material first before applying foam to create a secure seal.
Always follow the manufacturer’s specific instructions regarding curing times and potential reapplication needs, as different foam products have varying effectiveness requirements.
Cost-Effective Sealant Selection
Selecting the right foam sealant can stretch your mouse-proofing budget while delivering maximum protection for your home.
You’ll find foam sealants are economical options for filling gaps and cracks larger than 1/4 inch, creating effective barriers against rodent entry when applied correctly.
However, don’t rely on foam sealant alone for mouse control—it’s not rodent-proof and mice can chew through it. You’ll need to cover foam with durable sealant or exclusion material for lasting results.
Clean debris from gaps before application to guarantee proper adhesion. Use a caulking gun for even distribution, letting the foam expand completely.
Regular inspections and reapplication maintain continuous protection against potential access points.
Metal Flashing Installation Around Foundation Base
When it comes to creating a long-lasting barrier against mice, metal flashing around your foundation base offers one of the most effective and budget-friendly solutions available. This durable material resists rodent chewing while solving multiple rodent problems simultaneously.
Here’s how to install metal flashing properly:
- Position the flashing at least 6 inches above ground level at an angle to direct water away from your foundation.
- Choose galvanized or stainless steel materials for maximum rust resistance and longevity without breaking your budget.
- Overlap existing foundation materials completely to eliminate any potential entry points along the edges.
- Inspect regularly for wear or damage to maintain the barrier’s effectiveness over time.
This investment provides both moisture protection and rodent deterrence in one cost-effective solution.
Caulking Small Gaps and Entry Points
While metal flashing handles larger foundation gaps, caulking takes care of the smaller openings that mice frequently exploit to enter your home.
You’ll find caulk and foam particularly effective for sealing gaps less than 1/4 inch around windows, doors, and foundation walls. Choose high-quality caulk that resists rodent chewing for maximum protection.
Before applying, clean and dry all surfaces thoroughly for ideal adhesion. Use a caulking gun for precise application in tight spaces.
Proper surface preparation and using a caulking gun ensures precise sealing in hard-to-reach areas.
Focus on easily overlooked areas where foundations meet walls or around utility penetrations.
Remember to inspect your caulking regularly, especially after weather changes. Cracked or separated caulk creates new entry points, potentially making your mouse traps less effective by allowing continuous rodent access.
Wire Mesh Barriers for Foundation Vents
You’ll need wire mesh with the right gauge to effectively block mice while maintaining proper airflow through your foundation vents.
Choose mesh between 16 to 19 gauge with openings around 0.218 to 0.225 inches – any larger and mice can squeeze through.
Proper installation requires securing the mesh tightly across all vent openings without leaving gaps where rodents might find entry points.
Mesh Size Requirements
Since mice can squeeze through openings as small as 1/4 inch, selecting the right mesh size becomes critical for effective rodent exclusion at your foundation vents.
You’ll need precise measurements to prevent rodents from entering your home’s vulnerable areas.
Here are the essential mesh size requirements for budget-friendly mouse-proofing:
- Opening size: Choose mesh with openings between 0.218 to 0.225 inches maximum to block even the smallest mice.
- Wire gauge: Select 16 to 19 gauge mesh for ideal durability without excessive cost.
- Material: Opt for galvanized or stainless steel mesh that resists rust and rodent chewing.
- Coverage: Guarantee complete opening coverage with no gaps that compromise effectiveness.
This specification balance provides cost-effective protection while maintaining long-term reliability against persistent rodent intrusion attempts.
Installation Best Practices
Once you’ve selected the proper mesh specifications, proper installation techniques determine whether your foundation vent barriers will successfully exclude mice or become ineffective obstacles.
Cut your wire mesh to fit snugly around each vent opening, eliminating any gaps that mice could exploit as entry points. Secure the mesh firmly using screws or heavy-duty staples to prevent wind or debris from dislodging it.
You’ll want to guarantee continuous coverage across all foundation vents without leaving vulnerable spots. For high-activity rodent areas, consider upgrading to heavier 16-19 gauge wire mesh for increased durability.
Schedule regular inspections to check for wear, damage, or loose sections, and replace compromised mesh immediately to maintain your barrier’s effectiveness.
Door Sweep Installation for Ground-Level Access
When gaps beneath your exterior doors create highways for mice, installing door sweeps offers one of the most cost-effective barriers you can implement.
Door sweeps create an affordable $10-$20 barrier that blocks mouse entry points beneath exterior doors.
These simple devices provide excellent rodent control for just $10 to $20 in materials.
For effective door sweep installation, follow these steps:
- Choose durable materials – Select rubber or metal options that resist rodent chewing and weathering
- Guarantee full coverage – Install sweeps that extend the complete width of your door without gaps
- Create tight seals – Position sweeps to press firmly against the threshold, eliminating access points
- Schedule regular maintenance – Inspect and replace worn sweeps to maintain effectiveness
Combine door sweeps with automated garage door closers to guarantee doors stay sealed when not in use, maximizing your ground-level protection.
Vegetation Management Around Foundation Perimeter
You’ll want to trim any overgrown shrubs back at least 12 inches from your foundation to eliminate hiding spots where mice can approach undetected.
Clear away dense ground cover, fallen leaves, and debris within 10 feet of your home since these materials provide perfect nesting opportunities for rodents.
Keep mulch pulled back from the foundation walls to prevent creating moisture-rich environments that attract both mice and their food sources.
Trim Overgrown Shrubs
Dense shrubs and overgrown vegetation around your home’s foundation create perfect highways and hideouts for mice seeking shelter.
When you trim overgrown shrubs and maintain proper spacing, you’ll effectively stop mice from using these areas as staging points for home invasion.
Here’s your budget-friendly approach to foundation vegetation management:
- Cut back all shrubs at least 3 feet from your foundation walls
- Remove dense brush and fallen debris that creates moisture traps and nesting materials
- Keep grass short around the entire perimeter to eliminate ground-level cover
- Prune vegetation regularly to prevent regrowth and maintain clear sight lines
This simple maintenance costs only your time and effort, yet creates an inhospitable environment that forces rodents to seek shelter elsewhere.
Clear Ground Cover
Beyond shrub management, ground-level vegetation control forms your second line of defense against rodent infiltration. Maintaining clear ground cover around your foundation eliminates hiding spots where rodents typically seek shelter. You’ll want to keep grass and weeds trimmed to 2 inches or less, creating an uninviting environment for mice.
| Ground Cover Type | Required Height | Maintenance Frequency | Cost Impact |
|---|---|---|---|
| Grass | ≤2 inches | Weekly | Low |
| Weeds | ≤2 inches | Bi-weekly | Minimal |
| Mulch | Avoid entirely | N/A | None |
| Gravel | Any depth | Seasonal | Moderate |
Remove all brush, leaves, and debris that provide nesting materials. Establish a 12-inch clear zone around your foundation without vegetation or clutter—this barrier notably deters rodent activity.
Maintain Mulch Distance
Three critical mulch management strategies will dramatically reduce rodent attraction to your foundation perimeter.
You’ll create an effective barrier by implementing specific placement and material choices that discourage nesting opportunities.
Here are four essential mulch management techniques:
- Maintain 12-inch clearance – Keep mulch at least one foot away from your foundation walls to eliminate convenient hiding spots for mice and rats.
- Choose coarse textures – Select pebble-like mulch instead of fine materials, as rodents find rough surfaces less appealing for nesting purposes.
- Limit depth to 2-3 inches – Shallow mulch layers reduce shelter opportunities while still providing landscape benefits.
- Replace with gravel – Consider switching to decorative stones near your foundation, as they offer zero nesting material and create an inhospitable environment for rodents.
Gravel and Landscaping Modifications
While mice can squeeze through surprisingly small openings to reach your home’s foundation, you can create an effective barrier using simple landscaping modifications that won’t break your budget.
Installing a gravel barrier around your foundation deters mice since they prefer burrowing in softer materials like soil or mulch. Fill a 12-inch zone around your home’s perimeter with crushed stone or gravel, creating a solid barrier that discourages rodent approach while improving drainage.
Keep this gravel-filled area clean and free from debris or organic matter.
Maintain at least 12 inches between landscaping elements and your foundation, eliminating potential hiding spots. Regularly trim vegetation and keep mulch levels low near the foundation, as thick vegetation provides cover and nesting opportunities that attract mice to your property.
Foundation Drainage Improvements
Poor foundation drainage creates the perfect storm for mouse infestations by weakening your home’s structural defenses and providing the moist conditions these pests crave.
Inadequate drainage transforms your foundation into a mouse magnet by creating structural vulnerabilities and the damp environments rodents seek.
When water pools near your foundation, it erodes structural materials and creates gaps around entry points that mice exploit.
Here’s how to improve your foundation drainage affordably:
- Install French drains around your foundation’s perimeter to redirect water away from vulnerable areas.
- Extend downspouts at least 6 feet from your house to prevent moisture accumulation near the foundation.
- Regrade landscaping so soil slopes away from your home, preventing water from seeping toward structural weak points.
- Add gravel drainage materials near your foundation to enhance water flow and eliminate rodent-friendly habitats.
These drainage improvements strengthen your home’s defenses while creating an inhospitable environment for mice.
Regular Maintenance Schedule and Inspections
Since mouse-proofing isn’t a one-time fix, establishing a regular maintenance schedule becomes your most cost-effective defense against future infestations.
You’ll need to inspect potential entry points monthly, focusing on foundation walls, door gaps, and deteriorating mortar for timely repairs.
Conduct quarterly foundation inspections around porches and decks, sealing new cracks immediately.
Check your attic and roof twice yearly for rodent signs like droppings or gnaw marks, particularly near ventilation systems.
Implement regular maintenance routines removing debris and nesting materials from your foundation area.
Keep vegetation trimmed to eliminate rodent habitats.
Document every inspection and repair in a maintenance log, tracking changes over time.
This systematic approach helps you identify recurring entry problems and strengthen your overall exclusion strategy affordably.
Cost Comparison of DIY Materials and Tools
When you’re planning your mouse-proofing project, understanding material costs helps you make smart purchasing decisions that fit your budget.
You’ll find significant price differences between basic sealing materials like steel wool ($5) and more durable options like galvanized wire mesh ($20-30), so comparing longevity against upfront costs is essential.
Your tool investment will vary depending on whether you choose simpler materials that require minimal equipment or opt for hardware cloth and mesh that need cutting tools and fasteners.
Basic Sealing Material Costs
Although mouse-proofing your home might seem expensive, you’ll find that basic sealing materials cost surprisingly little and deliver excellent value.
You can effectively secure your foundation without straining your budget by choosing the right materials for each situation.
Here’s what you’ll typically spend on essential sealing materials:
- Caulk – $5 to $10 per tube, covering 10 to 20 linear feet for small gaps
- Steel wool – $3 to $8 per package for openings under 1/4 inch diameter
- Hardware cloth – $1 to $3 per square foot for larger entry points
- Copper mesh – $10 to $20 per roll for chew-resistant, long-lasting protection
Don’t forget a quality caulking gun ($5 to $15) to improve application efficiency and results.
Hardware Cloth Vs Mesh
Two primary mesh options stand out for DIY mouse-proofing: hardware cloth and galvanized wire mesh.
Hardware cloth costs $0.50 to $1.50 per square foot, making it more budget-friendly than galvanized wire mesh at $0.75 to $2.00 per square foot. You’ll find hardware cloth offers superior rodent protection with 1/4 inch openings versus larger mesh gaps.
Installation’s straightforward with basic tools like wire cutters and staples, while some mesh types require additional framing equipment that increases costs.
However, galvanized wire mesh lasts up to 20 years compared to hardware cloth’s shorter lifespan. For small gaps and tight budgets, choose hardware cloth. Reserve thicker wire mesh for larger openings where durability outweighs initial savings.
Tool Investment Analysis
Beyond selecting the right barriers, smart tool investment maximizes your mouse-proofing budget while ensuring long-term success.
You’ll need specific tools to effectively seal entry points and prevent mice from infiltrating your foundation.
Essential tool investments include:
- Caulking guns and putty knives – $10 to $25 each for precise application of sealants around foundation cracks
- Wire cutters – $10 to $25 for trimming mesh materials to fit specific openings perfectly
- High-quality sealants like copper mesh – $10 to $30 per roll for durable, long-lasting protection
- Galvanized wire mesh – $15 to $40 per roll for covering larger vents and openings
Your total investment typically ranges from $100 to $300, delivering substantial savings compared to professional pest control services while providing effective mice prevention.
Frequently Asked Questions
What Can I Put Around Foundation to Keep Mice Away?
You can seal foundation cracks with caulk or steel wool, install metal flashing around exterior walls, remove debris and vegetation from the perimeter, and use pest-resistant insulation materials.
How Do I Stop Mice From Digging Under My Foundation?
Fill gaps around your foundation with steel wool or copper mesh. Install hardware cloth 12 inches underground. Remove debris and vegetation nearby. Repair foundation cracks promptly and apply peppermint oil as a natural deterrent.
What Insulation Will Mice Not Eat?
You’ll want aircrete or cement bonded wood fiber products since they’re pest-resistant. Dense-pack cellulose with boric acid also works well. Avoid fiberglass, denim batts, and most foam products—mice love nesting in them.
What Sealant Can Mice Not Chew Through?
You can’t rely on standard caulk since mice chew through it easily. Use polyurethane or silicone-based sealants instead—they bond stronger and resist rodent damage better than traditional options.
In Summary
You’ve got plenty of affordable options to mouse-proof your foundation without emptying your wallet. Start with steel wool and hardware cloth for immediate gaps, then tackle larger issues with concrete patching and mortar repairs. Don’t forget foam sealants for smaller cracks and drainage improvements to prevent future problems. By combining DIY materials with regular inspections, you’ll create an effective barrier that’ll keep mice out while staying within budget.


Leave a Reply