You can safely remove bats from your attic by installing one-way exclusion devices during late summer or early fall, then sealing all entry points with hardware cloth after confirming complete exit. Use bright LED lights to discourage roosting, modify your property’s habitat by reducing insect populations, and install bat houses 300 feet away as alternative roosting sites. Wait for winter migration when temperatures drop to 35-40°F before final sealing, then thoroughly clean and sanitize the area with proper protective equipment. The techniques below will guide you through each step.
Install One-Way Bat Exclusion Devices
When dealing with bats in your attic, one-way exclusion devices offer the most humane and effective removal method. These devices, including exclusion cones and bat valves, allow bats to exit while preventing re-entry.
One-way exclusion devices provide the most humane solution for safely removing bats from attics without causing harm.
You’ll need to identify entry points by looking for guano or urine stains, then secure the devices properly at these locations.
Time your installation during late summer or early fall, avoiding maternity season to prevent separating mothers from their young.
One-way bat exclusion devices require careful monitoring for several days after installation to ascertain all bats have exited successfully.
Once you’ve confirmed complete bat removal, seal all entry points with hardware cloth or caulk. This final step prevents future infestations and completes the humane exclusion process.
Seal All Entry Points After Bat Exit
After confirming all bats have successfully exited your attic, you must immediately seal every entry point to prevent their return.
Remember that bats need only a dime-sized hole to re-enter your home.
Use durable materials like metal mesh, hardware cloth, or caulk to block access points effectively.
Focus on common entry areas including soffits, eaves, and gable vents where bats typically gain access.
Before sealing, conduct a thorough attic inspection to identify all potential entry locations, as bats often use multiple access points.
This all-encompassing bat exclusion approach guarantees you don’t miss any gaps.
After sealing the final entry point, perform one last inspection to confirm your attic is completely bat-free.
Schedule regular maintenance checks to identify new gaps or deterioration that could allow future infestations.
Use Bright LED Lights to Discourage Roosting
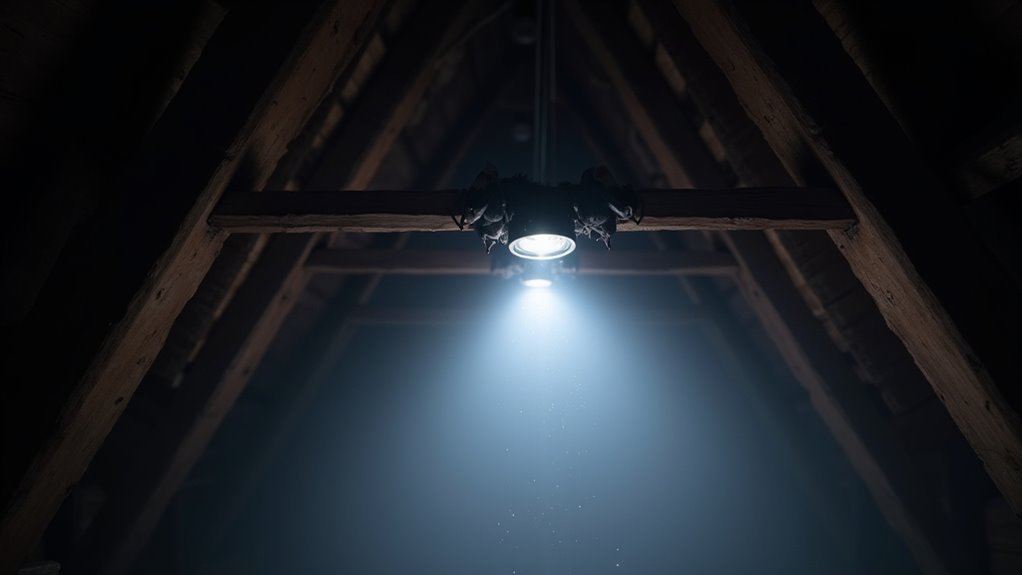
You’ll need to install bright white LED lights throughout your attic to create an environment that’s uncomfortable for roosting bats.
Focus on placing these lights in corners, along beams, and near potential roosting spots where bats typically gather during daylight hours.
The intensity should be sufficient to flood the entire space with bright light, particularly during nighttime when bats are most active.
Strategic Light Placement
Since bats naturally gravitate toward dark, quiet spaces for roosting, strategically placing bright LED lights throughout your attic can effectively disrupt their comfort and encourage them to relocate.
Focus on positioning bright white LEDs near entry points, corners, and areas where you’ve noticed bat activity. Mount lights at varying heights to eliminate shadowy hiding spots that bats prefer.
You’ll want to illuminate the entire space consistently, as partial lighting won’t achieve effective bat exclusion. Install floodlights in combination with one-way bat valves for maximum results.
Keep these bright lights running continuously at night when bats are most active, as this consistent illumination will make your attic uninhabitable for roosting while encouraging them to seek darker alternatives elsewhere.
LED Intensity Requirements
While any lighting can create some disturbance, you’ll need LED lights that emit at least 700 lumens to effectively disrupt bats’ roosting behavior and force them to abandon your attic.
White LEDs work best since they mimic natural daylight, creating an uncomfortable environment that contradicts bats’ preference for dark spaces.
Install floodlights strategically throughout roosting areas to maximize coverage and eliminate shadowy hiding spots.
Keep lights running continuously during dusk and nighttime hours when bats are most active. This constant illumination considerably reduces bat activity and encourages them to seek alternative locations.
For ideal results, combine your lighting system with one-way bat exclusion devices. This approach allows existing bats to exit while preventing re-entry, making your bat infestation removal efforts more effective and permanent.
Create Habitat Modification Around Your Property
When bats find your property appealing for food, water, and shelter, they’ll naturally gravitate toward your attic as an ideal roosting spot.
Habitat modification proves essential to prevent bats from establishing residence on your property. Start by managing insect populations around your home, eliminating beetles, moths, and mosquitoes that serve as their primary food sources.
Reduce water sources like standing water in gutters, birdbaths, or containers, as bats need accessible drinking water. Turn off unnecessary outdoor lighting at night since bright lights attract insects that draw bats closer to your home.
Additionally, consider installing bat houses at least 300 feet away from your residence. This provides alternative roosting options while supporting natural pest control efforts without encouraging bats near your attic.
Install Bat Houses as Alternative Roosting Sites
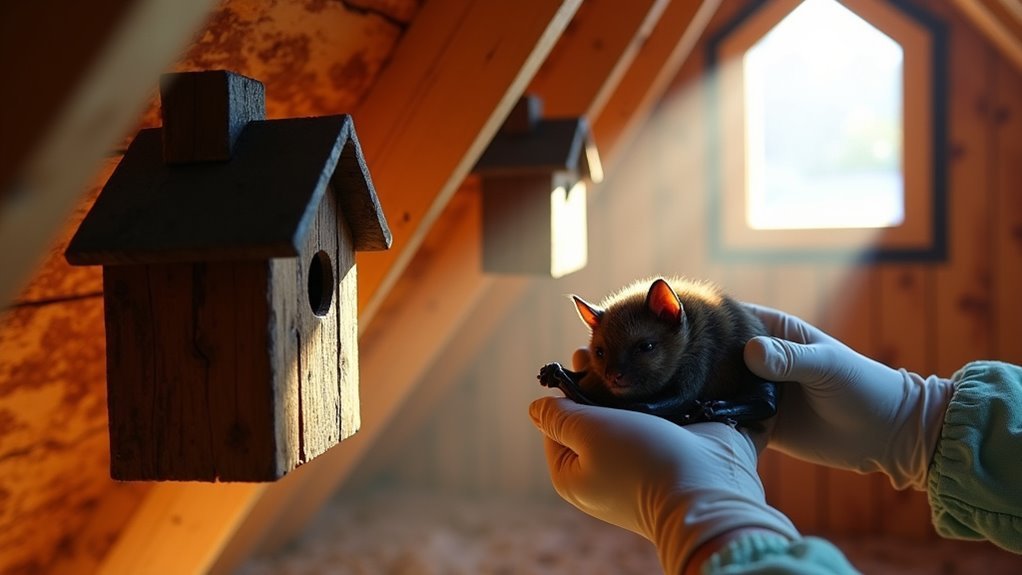
Although removing bats from your attic remains the primary goal, installing bat houses creates a win-win solution that benefits both homeowners and local bat populations.
You’ll provide bats with safe alternative roosting sites while supporting their natural insect control benefits.
Design your bat houses to be at least 14 inches tall and 24 inches wide, ensuring adequate space for bat colonies to thrive.
Install them 10-15 feet high on buildings or poles, facing south or southeast for maximum sun exposure and warmth.
Don’t expect immediate results—bats may take weeks or months to discover and occupy new houses.
Installing multiple bat houses increases your success rate since bats prefer community roosting options with their colonies.
Remove Food Sources That Attract Bats
Since bats primarily hunt insects for food, reducing available prey around your property will make your home less attractive to these nocturnal visitors.
Start by eliminating indoor pest problems like beetles, moths, and mosquitoes that serve as primary food sources. Turn off bright outdoor lights at night, as they attract insects that lure bats into your vicinity.
Minimize water sources around your property, including standing water and leaky fixtures, since bats need hydration.
Shield fruit trees with protective nets and regularly clean up fallen fruit and debris to remove bats’ alternative food sources.
These proactive steps will encourage bats to find different roosting areas, making your attic less appealing without causing harm to these beneficial creatures.
Wait for Winter Migration Before Sealing
You’ll want to time your sealing efforts around bats’ natural winter hibernation patterns when temperatures consistently drop between 35 to 40°F.
This temperature-based exit behavior guarantees the bats have already migrated to their hibernation sites, making it the best sealing timing for your attic.
Winter Hibernation Patterns
When temperatures drop between 35 to 40°F, bats naturally enter hibernation and migrate away from your attic, creating the perfect window for permanent sealing.
You’ll find this timing essential for effective bat control since these mammals can live up to 30 years, making persistent infestations likely without proper exclusion methods.
During winter hibernation, you can safely seal entry points without risking trapping bats inside.
This natural migration pattern works in your favor, as waiting guarantees complete departure from your attic space.
Once spring arrives and bats awaken, sealed entry points will prevent their return to your property.
Remember that professional sanitization should follow sealing to remove guano and odors that might attract future bat populations back to your home.
Optimal Sealing Timing
After bats have vacated your attic for their winter hibernation sites, you’ll have a critical opportunity to permanently seal all entry points without risk of trapping any stragglers inside.
When temperatures consistently drop between 35 to 40°F, bats typically begin their winter migration, making this the ideal sealing timing for your exclusion efforts.
Before sealing, conduct a thorough inspection of your attic and surrounding areas. Small openings can be surprisingly difficult to identify, so examine every potential access point carefully.
Professional assistance is highly recommended for effective sealing and sanitization, ensuring complete coverage of all entry points.
This winter approach also avoids disturbing bats during their sensitive maternity period, making it the safest method for both homeowners and wildlife while achieving permanent exclusion results.
Temperature-Based Exit Behavior
Understanding bat temperature-based exit behavior becomes essential for timing your exclusion work correctly. When temperatures consistently drop between 35 to 40°F, bats in the attic will naturally leave for winter hibernation sites.
You’ll want to monitor their activity during fall to identify when they’ve vacated your space completely. This temperature-triggered departure creates the perfect window for effective bat control.
Once you’ve confirmed they’ve left for the season, you can safely seal all entry points without risking trapping them inside. This timing protects both you and the bats while ensuring compliance with wildlife protection laws.
Professional assistance helps identify all potential openings, since even small gaps can provide future access points for returning colonies.
Clean and Sanitize Bat-Infested Areas
Before you begin cleaning bat-infested areas, you’ll need proper protective equipment since bat droppings and urine contain dangerous pathogens that can cause serious health issues.
Wear thick rubber gloves and a respirator mask to protect yourself from exposure.
Use non-toxic cleaning products like enzyme-odor removers and disinfectants to effectively neutralize odors and clean and sanitize surfaces contaminated with bat guano.
Remove all droppings and urine thoroughly, as residual scents will attract bats back due to their keen sense of smell.
Complete removal of bat droppings and urine is essential since lingering scents will draw bats back to previously used roosting sites.
Dispose of contaminated materials in heavy-duty trash bags like Glad Forceflex to prevent leakage and exposure to pets or wildlife.
After cleanup, apply enzymatic stain removers to eliminate lingering odors and reduce the likelihood of bats recognizing the area as suitable roosting space.
Monitor Entry Points for Guano and Stains
You’ll need to establish a systematic monitoring routine to track bat activity around identified entry points.
Check these areas daily for fresh guano deposits, which appear as small dark pellets, and document any new urine stains or discoloration patterns on nearby surfaces.
Take photos of these locations to create a visual record that’ll help you identify changes in activity levels and confirm whether your exclusion efforts are working.
Identifying Fresh Guano Deposits
While searching for signs of bat activity, you’ll need to focus on identifying fresh guano deposits, which serve as reliable indicators of current infestations. Fresh guano appears moist and shiny, contrasting sharply with older, dry, dusty droppings. This distinction helps you determine if bats in your home are actively using specific areas.
| Guano Age | Appearance | Texture | Activity Level | Action Required |
|---|---|---|---|---|
| Fresh (1-2 days) | Dark, shiny | Moist, soft | High activity | Immediate attention |
| Recent (3-7 days) | Darker brown | Slightly dry | Moderate activity | Monitor closely |
| Week old | Brown/gray | Crumbly | Low activity | Assess patterns |
| Month old | Gray/white | Dusty, brittle | Past activity | Historical data |
| Very old | Whitish | Powdery | No activity | Clean safely |
Focus your inspections on areas where you’ve spotted these small, dark pellets near potential entry points.
Tracking Stain Patterns Daily
Once you’ve identified fresh guano deposits, establish a daily monitoring routine to track stain patterns at confirmed entry points. Document urine stains that appear as dark discolorations near roosting sites, photographing their size and intensity each day.
Mark guano accumulation areas on a simple diagram, noting any changes in volume or distribution patterns. Check for fresh rub marks on exterior walls where bats squeeze through openings – these dark streaks from fur oils indicate active pathways.
Your bat problem assessment becomes more accurate when you’re tracking these patterns consistently. Record observations in a log, including weather conditions that might affect activity levels. This systematic approach helps you identify the most heavily used entry points, making your removal efforts more targeted and effective.
Photographing Evidence Changes
Photography serves as your most reliable tool for documenting bat activity patterns and creating a permanent record of evidence changes.
You’ll want to photograph guano accumulations, which appear as small, dark, crumbly pellets throughout your attic. Use a flash to enhance visibility in dark corners where droppings typically collect.
Document urine stains and greasy rub marks on surfaces where bats frequently travel. These marks reveal their preferred entry and exit routes.
Take clear photos of potential entry points like small cracks or gaps, as these images will support your sealing efforts once you’ve safely removed bats from your home.
Regular photographic documentation helps you track changes over time, identify active areas, and measure the effectiveness of your exclusion methods.
Apply Professional-Grade Odor Neutralizers
Eliminate persistent odors by applying professional-grade odor neutralizers specifically designed to break down bat guano’s organic compounds.
These enzymatic solutions target ammonia-like scents that can attract new bats to your attic, guaranteeing they won’t return due to scent recognition.
You’ll need to apply these neutralizers after thoroughly cleaning affected areas for maximum effectiveness.
Professional-grade products are formulated for safe indoor use, minimizing health risks while eliminating hazardous material odors.
Professional-grade odor neutralizers ensure safe indoor application while effectively eliminating hazardous bat guano odors without compromising your family’s health.
Essential steps for odor elimination:
- Choose enzymatic cleaners that specifically target organic matter in bat droppings
- Apply after initial cleanup to guarantee neutralizers can penetrate residual odors
- Focus on heavily contaminated areas where guano accumulation was most severe
- Reapply regularly to maintain a bat-free environment and prevent wildlife attraction
Frequently Asked Questions
What’s the Best Way to Get Rid of Bats in Your Attic?
Install a bat valve on their primary exit point, then seal all entry holes with hardware cloth or caulk. You’ll need to wait until they’ve all left before sealing completely.
What Do Bats Hate Most?
Bats hate bright white LED lights most, as they’re extremely sensitive to illumination. You’ll also find they despise strong pungent odors like peppermint oil, loud noises, and ultrasonic frequencies that disrupt their echolocation.
Is It Safe to Live in a House With Bats in the Attic?
You shouldn’t live with bats in your attic. They pose serious health risks through rabies transmission and histoplasmosis from droppings. The ammonia odor affects air quality while guano damages structural materials over time.
How Do You Encourage Bats to Leave?
You’ll encourage bats to leave by installing bright LED lights, using one-way exit valves, eliminating their food sources, and providing alternative bat houses away from your home for safer roosting options.
In Summary
You’ve got the tools to safely remove bats from your attic without harming them or yourself. Remember, timing’s essential—don’t seal entry points during maternity season. Always wear protective gear when cleaning guano, and be patient with exclusion devices. If you’re dealing with a large colony or feel overwhelmed, don’t hesitate to call wildlife professionals. With persistence and the right approach, you’ll reclaim your attic while respecting these beneficial creatures.


Leave a Reply