You’ll dramatically improve your wasp trap’s effectiveness by using protein-based baits in spring and switching to sugary baits in late summer. Add dish soap to break surface tension and apple cider vinegar to deter beneficial bees. Create multiple small entry holes around your trap’s upper section and position them 20-40 feet from dining areas at varying heights. Place traps in shaded locations and refresh bait weekly while removing dead wasps. These strategic adjustments will reveal even more powerful techniques for complete wasp control.
Choose the Right Bait for the Season

Why do some wasp traps fail while others succeed? The answer lies in choosing the right bait for the season.
In spring to early summer, you’ll need protein-based baits like lunch meat or hamburger since wasps are actively seeking food sources for their colonies.
During late summer and early fall, switch to sugary baits such as sugar water, jam, or fruit juice when wasps are attracted to sweet substances.
Don’t use honey as bait—it primarily attracts bees rather than wasps.
Instead, enhance your bait’s effectiveness by adding apple cider vinegar, which deters bees while still drawing wasps.
Add a few drops of dish soap to prevent wasps from escaping by breaking liquid surface tension.
Add Soap to Your Trap Water
While selecting the right bait draws wasps to your trap, adding dish soap to the water guarantees they can’t escape once they’re caught.
When you add soap to your trap water, it breaks the surface tension that normally allows wasps to float. This forces them to drown rather than simply landing on the water’s surface and flying away.
The soap acts as a suffocating agent, greatly boosting your catch rate compared to water alone. You’ll need just a few drops of biodegradable dish soap to make your wasp traps dramatically more effective while minimizing environmental impact.
Remember to check and refill your soap-water mixture regularly throughout wasp season to maintain peak efficiency and maximize the number of wasps captured.
Position Traps Away From Dining Areas

You’ll want to place your wasp traps at least 20-40 feet away from where you’re eating to avoid drawing these pests directly to your food.
This distance creates a diversion zone that pulls wasps toward the traps instead of your dining table.
Strategic placement in shaded areas near trees or shrubs maximizes your trap’s effectiveness while keeping your outdoor meals wasp-free.
Optimal Distance Guidelines
Since wasps can quickly turn an outdoor meal into an unpleasant experience, you’ll need to position your traps at least 20-40 feet away from dining areas to effectively draw these pests away from food sources.
This ideal distance guarantees you won’t accidentally attract more wasps to your eating space while still capturing nearby insects.
Focus on placing traps in shaded areas where wasps naturally gather, particularly near trees and shrubs where they’re most active.
These cooler spots become especially attractive to wasps during hot weather. You’ll keep wasps away more effectively by avoiding placement directly beside picnic tables or outdoor dining spaces.
Remember to regularly monitor your trap locations and relocate them as needed to maintain maximum efficiency in high-activity areas.
Strategic Placement Benefits
Why struggle with wasps hovering around your barbecue when proper trap placement can redirect them entirely? Strategic positioning creates a barrier between wasps and your dining space, dramatically reducing unwanted encounters.
Place traps near natural wasp habitats like trees and shrubs where they typically forage. This intercepts them before they discover your food sources. Hanging traps from branches or positioning them on elevated surfaces away from high-traffic areas maximizes their visibility to wasps while keeping guests comfortable.
Never position traps directly on picnic tables or near dining areas—this attracts wasps to exactly where you don’t want them. Instead, create a perimeter defense that draws wasps away from your gathering. Monitor trap performance regularly and relocate based on wasp activity patterns to maintain peak effectiveness throughout your outdoor event.
Use Vinegar to Deter Beneficial Bees
While wasps find vinegar’s sharp scent irresistible, bees naturally avoid this acidic ingredient, making it the perfect foundation for selective wasp traps.
Unlike wasps that are attracted to vinegar’s pungent aroma, beneficial bees steer clear of acidic substances, protecting these essential pollinators from your trapping efforts.
Create bee-safe wasp traps by following these steps:
- Mix 3/4 cup white vinegar with sugar and salt to create an effective wasp lure
- Position vinegar-based traps away from flowering plants to minimize bee encounters
- Replace bait regularly to maintain the vinegar’s potency and effectiveness
- Monitor trap activity to guarantee you’re catching wasps, not beneficial insects
This targeted approach lets you control wasp populations while preserving the bees your garden desperately needs.
Create Multiple Entry Points But No Exit

You’ll want to cut several small holes around your trap’s upper section, positioning them at different heights to catch various wasp species.
The key is making these entry points large enough for wasps to enter but small enough to prevent easy escape.
A funnel design works exceptionally well since it guides wasps inward while creating a maze-like barrier that confuses them when they try to find their way out.
Multiple Hole Placement Strategy
Since wasps naturally seek out multiple entry routes when foraging, creating several holes in your trap considerably boosts its effectiveness compared to single-entry designs.
You’ll want more wasps attracted to the trap through strategic hole placement that prevents their escape.
Here’s your ideal placement strategy:
- Size matters – Keep holes approximately 1/4 inch diameter, small enough to prevent easy exit while allowing entry.
- Target the upper section – Position holes around the bottle’s top where wasps naturally fly toward light.
- Adjust quantity – Increase hole numbers in high-activity areas based on local wasp traffic.
- Maintain functionality – Check and clean holes regularly to prevent clogging from debris or dead wasps.
This multi-entry approach maximizes capture rates while maintaining the trap’s one-way design principle.
Funnel Design Prevents Escape
Building on the multiple hole strategy, the funnel design takes your trap’s effectiveness to the next level by creating a psychological barrier that prevents escape.
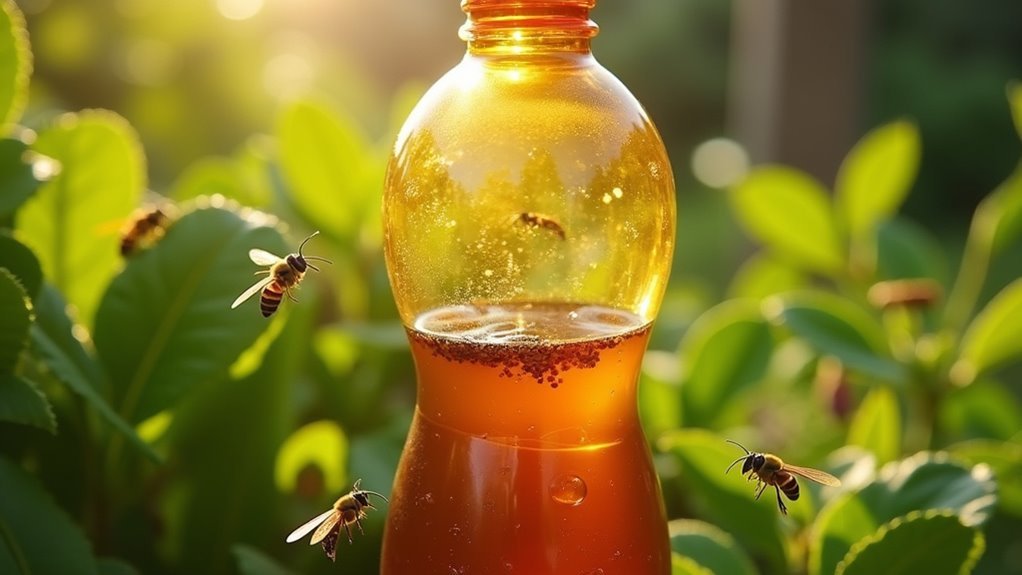
You’ll create this DIY wasp trap by cutting a plastic bottle’s top third and flipping it upside down into the bottom section. The narrow neck forms natural entry points that attract wasps with ease, but the funnel design makes finding the exit nearly impossible.
The inverted bottle creates a one-way system where wasps follow the funnel’s contours inward but can’t navigate back out.
You’ll want to make sure your entry holes are wide enough to draw wasps in while remaining narrow enough to confuse their escape route.
Remember to maintain the trap regularly by removing dead wasps, as decomposition creates odors that deter new arrivals.
Size Matters for Effectiveness
While funnel traps excel at preventing escape, optimizing your entry point dimensions dramatically increases capture rates by accommodating more wasps simultaneously.
Size matters when creating effective trap design that balances wasp accessibility with escape prevention.
Here’s how to maximize your entry points:
- Diameter specification – Cut openings approximately 1/4 inch wide to allow wasp entry while restricting their exit capabilities.
- Multiple access points – Create several small holes rather than one large opening to reduce wasp competition during entry.
- Strategic placement – Position entry points around different trap sections to attract wasps from various angles.
- Funnel integration – Combine properly-sized openings with inward-tapering funnels for maximum retention.
This approach guarantees wasps can easily enter but struggle to locate exit routes once inside.
Place Traps at Varying Heights
Different wasp species hunt for food at distinct elevations, so positioning your traps at multiple heights throughout your property will maximize your capture rates.
When you place traps at varying heights, you’ll target different behaviors effectively. Hang traps 5 to 10 feet high from trees or eaves to intercept wasps scouting elevated food sources. Ground-level traps work best for yellow jackets and other species that forage close to the earth’s surface.
Experiment with low, mid, and high placements to discover what works best in your specific environment.
Don’t set your traps once and forget them—regularly adjust their height throughout the season as wasp behavior changes with food availability patterns.
Maintain and Refresh Traps Weekly
Once you’ve positioned your traps at ideal heights, you’ll need to maintain them weekly to guarantee peak performance.
Regular maintenance keeps your wasp traps working effectively and prevents them from becoming counterproductive.
Consistent trap maintenance prevents your wasp control system from losing effectiveness and turning into a wasp magnet instead.
Follow this weekly maintenance routine:
- Check trap contents – Monitor the number of trapped wasps to assess effectiveness.
- Refresh the bait – Replace stale bait that’s lost its attractiveness to wasps.
- Remove dead wasps – Clear carcasses to prevent odors that deter other wasps.
- Enhance liquid bait – Add dish soap drops to break surface tension and prevent escapes.
Don’t neglect positioning during maintenance.
Keep traps in shaded areas near wasp activity zones for maximum attraction.
Fresh bait and clean traps maintain their lure, ensuring continuous wasp control throughout the season.
Frequently Asked Questions
What Is the Most Effective Homemade Wasp Trap?
Cut a plastic soda bottle’s top off and invert it into the bottom, creating a funnel. You’ll bait it with white vinegar, sugar, and salt mixture, adding dish soap to prevent escapes.
What Is the Easy Trap Wasp Lure?
You’ll need three-quarters cup white vinegar, two tablespoons sugar, and one teaspoon salt. This combination attracts wasps while deterring bees. Add dish soap drops to prevent escapes from your trap.
What Is the Bait Recipe for a Wasp Trap?
You’ll need 3/4 cup white vinegar, 2 tablespoons sugar, and 1 teaspoon salt for your wasp trap bait. Add a few drops of Dawn dish soap to prevent wasps from escaping once trapped.
Why Doesn’t My Wasp Trap Work?
Your wasp trap isn’t working because you’re probably using wrong bait for the season, positioning it poorly, or not maintaining it weekly. Check entrance hole sizes and switch baits seasonally.
In Summary
You’ll see better results when you implement these seven wasp-trapping strategies consistently. Don’t expect overnight success—it takes time to reduce wasp populations effectively. Remember that you’re protecting both your family and beneficial pollinators by using targeted baits and proper placement. Keep renewing your traps weekly, and you’ll notice fewer aggressive wasps around your outdoor spaces. With patience and persistence, you’ll reclaim your yard from these unwanted pests.
Leave a Reply