You can create an effective DIY crawlspace pest monitoring system using a Raspberry Pi and BME 280 sensor for under $100. Mount your Raspberry Pi from floor joists and place the humidity sensor centrally, about 12 inches above ground for ideal readings. Enable I²C communication, install Python modules, and configure Wi-Fi connectivity for remote monitoring. Set humidity alerts at 70% and temperature thresholds based on your climate to detect pest activity early. This thorough guide’ll walk you through each step.
Understanding Crawl Space Pest Monitoring Fundamentals
Since crawl spaces create ideal conditions for pests with their dark, often humid environments, understanding the fundamentals of pest monitoring becomes essential for protecting your home’s structural integrity.
Effective pest control in crawl spaces centers on early detection through sensors and traps that track activity before infestations cause significant damage. You’ll want to maintain humidity levels below 70% to prevent moisture-loving pests from establishing colonies that can lead to water damage.
Modern monitoring systems provide real-time alerts when pest activity’s detected, allowing you to respond quickly.
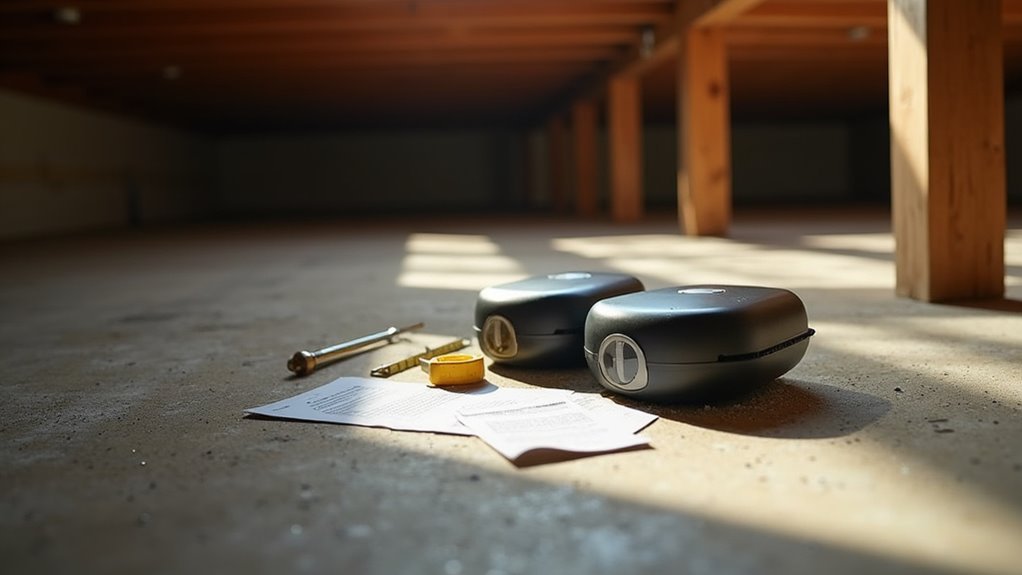
Essential Hardware Components and Equipment Selection
You’ll need specific electronic components to build an effective crawlspace pest monitoring system that can reliably detect environmental changes indicating pest activity.
The core hardware includes a Raspberry Pi for data processing, a BME 280 sensor for measuring temperature and humidity, and female-to-female jumper wires for connections.
Beyond selecting the right components, you must carefully consider where and how you’ll mount this equipment in your crawlspace to guarantee peak performance and protection from moisture damage.
Required Electronic Components
Building an effective crawlspace pest monitoring system requires careful selection of electronic components that can withstand harsh environmental conditions while delivering reliable data.
You’ll need a Raspberry Pi (models 3, 4, 0W, or 0WH work perfectly) as your central processing unit. The BME 280 sensor captures accurate temperature and humidity readings, which indicate potential pest activity when levels fluctuate unexpectedly.
Connect these components using female to female jumper wires for secure electrical connections. Your power source must provide continuous electricity—locate a nearby outlet or run an extension cord to your installation area.
Don’t forget to install a vapor barrier if one doesn’t exist, as it protects your electronics from moisture damage.
Finally, establish reliable Wi-Fi connectivity for remote monitoring and real-time alerts when environmental conditions suggest pest intrusion.
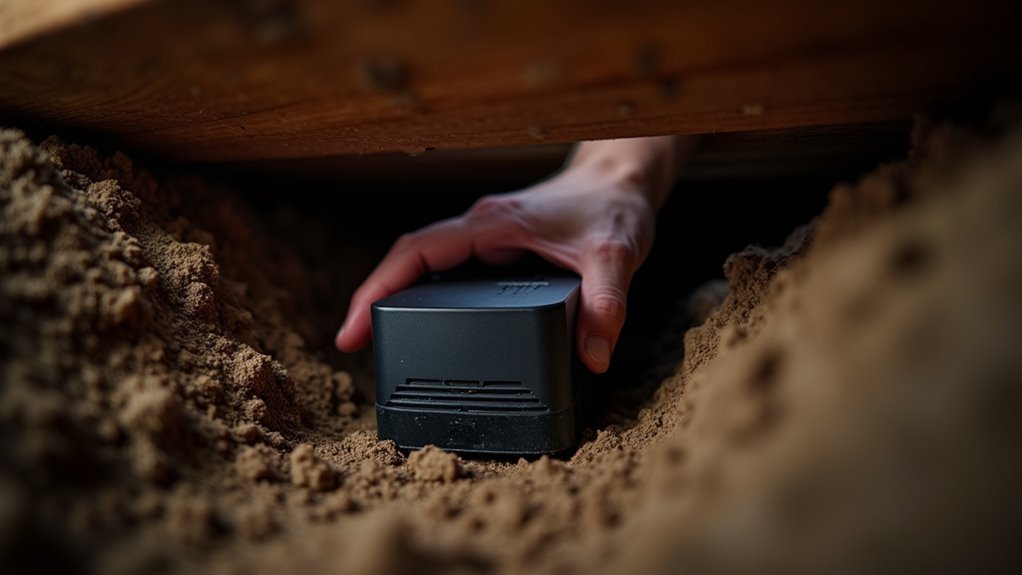
Physical Placement Considerations
The success of your monitoring system depends heavily on where and how you mount each component within the crawlspace environment.
You’ll want to hang your Raspberry Pi from a floor joist rather than placing it on the ground. This prevents water damage and promotes proper airflow around the device. Confirm you’ve got reliable Wi-Fi coverage extending to your installation location before proceeding.
Position your BME 280 sensor where airflow is ideal for accurate environmental readings. While it might seem logical to place sensors in corners, central locations often provide better data.
Verify power outlet accessibility or plan for extension cord routing. Use female to female jumper wires for secure connections between components.
Consider cleaning the area with white vinegar beforehand to confirm accurate baseline readings.
Choosing the Optimal Sensor Placement Location
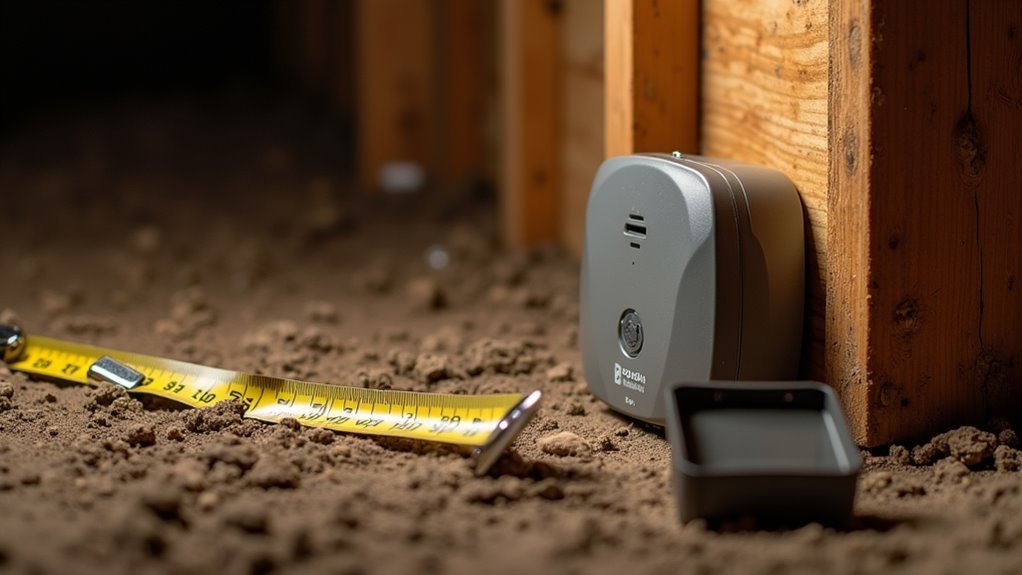
Since accurate data collection depends entirely on proper sensor positioning, you’ll need to mount your device approximately 12 inches above the ground level. This height prevents moisture damage while maintaining accurate readings.
Target areas with known pest activity, especially near vents and plumbing access points. These locations often experience the environmental changes that signal infestations.
| Optimal Placement | Avoid These Areas |
|---|---|
| Well-ventilated spaces | Near heat sources |
| Floor joist mounting | Close to insulation |
| Pest entry points | Moisture pockets |
| 12 inches above ground | Direct ground contact |
Hang your sensor from floor joists using secure mounting hardware. This positioning enhances airflow around the device and protects it from potential water damage. Choose well-ventilated areas to prevent localized humidity from skewing your data readings.
Raspberry Pi Setup and Initial Configuration
Once you’ve identified your ideal mounting location, setting up your Raspberry Pi becomes the next priority for creating an effective crawlspace monitoring system.
You’ll need a compatible model (3, 4, 0W, or 0WH) with essential accessories including a BME 280 sensor for temperature and humidity readings.
Follow these configuration steps:
- Enable I²C communication on your Raspberry Pi to connect with the BME 280 sensor for accurate data collection.
- Install required Python modules for BME 280 sensor operations and data streaming capabilities.
- Create a Python script that reads and transmits sensor data at regular intervals for continuous monitoring.
- Configure remote access by noting your Pi’s IP address and setting up SSH for effortless management from anywhere.
This foundation guarantees reliable crawlspace environmental monitoring.
BME 280 Sensor Wiring and Connection Process
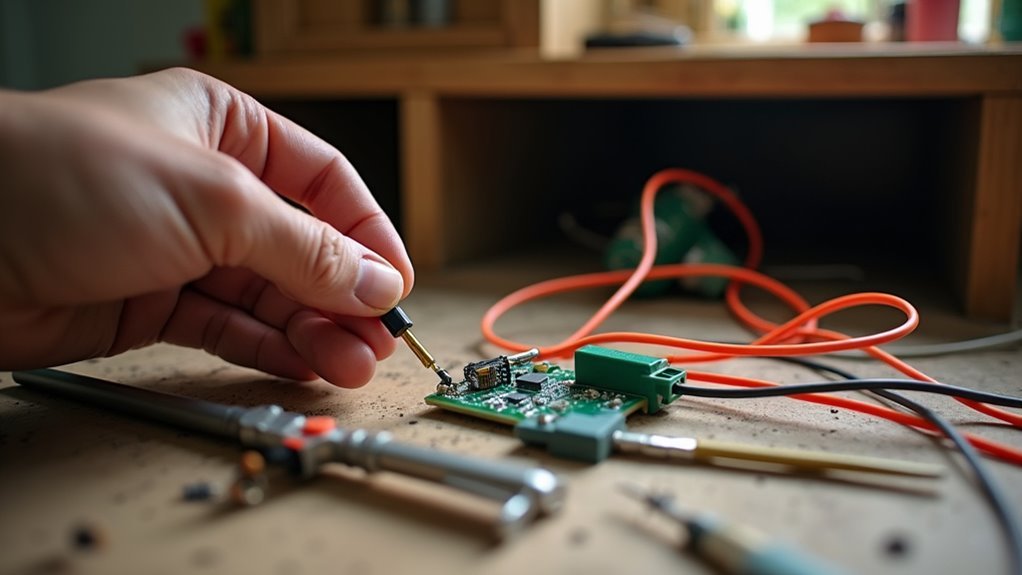
You’ll need to connect your BME 280 sensor to the Raspberry Pi using four specific wiring connections that correspond to power, ground, and I²C communication lines.
The sensor’s VCC pin connects to the Pi’s 3.3V power supply, while the GND pin links to any available ground pin on the GPIO header.
Your SCL and SDA pins must connect to their corresponding I²C pins on the Raspberry Pi to establish proper data communication between the devices.
Wiring Configuration Steps
Four essential connections link your BME 280 sensor to the Raspberry Pi’s GPIO pins.
You’ll need female-to-female jumper wires to establish these critical connections for your crawlspace monitoring system.
- VCC to 3.3V: Connect the sensor’s VCC pin directly to the Raspberry Pi’s 3.3V power pin to provide proper voltage.
- GND to Ground: Link the sensor’s ground pin to any available ground pin on the Raspberry Pi for circuit completion.
- SDA to GPIO 2: Connect the sensor’s data pin to GPIO 2 for I²C communication protocol.
- SCL to GPIO 3: Wire the sensor’s clock pin to GPIO 3 to synchronize data transmission.
After completing these connections, use a multimeter to verify each wire’s integrity and check for potential shorts before powering up your system.
Connection Point Identification
Before proceeding with actual wiring, locate the specific connection points on both your BME 280 sensor and Raspberry Pi to guarantee accurate pin identification.
On your BME 280 sensor, you’ll find four essential pins: VCC for power input, GND for ground connection, SDA for data transmission, and SCL for clock signals.
Your Raspberry Pi’s GPIO header contains the corresponding connection points you’ll need. Identify GPIO 2 as your SDA pin and GPIO 3 as your SCL pin for I²C communication.
For power, locate either the 3.3V or 5V pin depending on your sensor’s voltage requirements. Find any available ground pin to complete your circuit.
Double-check these pin positions using your Raspberry Pi’s GPIO diagram before making connections with female-to-female jumper wires.
Software Installation and Programming Requirements
While the hardware assembly forms the foundation of your crawlspace pest monitor, the software installation transforms your Raspberry Pi into a functional monitoring system.
Software installation breathes life into your hardware, transforming a collection of components into an intelligent pest monitoring system.
You’ll need to configure several components to create an effective pest detection network.
- Install Raspberry Pi OS – Download and flash the official operating system to your microSD card, then enable I²C communication in the configuration settings to allow proper sensor connectivity.
- Install Python modules – Add the BME 280 sensor libraries and data streaming packages using pip to enable temperature and humidity readings.
- Create monitoring script – Write a Python program that reads sensor data at regular intervals and transmits information to your remote dashboard.
- Enable remote access – Configure SSH and note your Pi’s IP address for convenient system management.
Establishing Wi-Fi Connectivity and Network Access
Network connectivity serves as the lifeline between your crawlspace monitor and your remote monitoring dashboard. Before installing your Raspberry Pi, test Wi-Fi signal strength in the crawlspace using your mobile device. If you’re experiencing weak connectivity, install a Wi-Fi range extender or mesh network to boost signal strength.
| Component | Requirement | Configuration Method |
|---|---|---|
| Raspberry Pi Zero | Compatible Wi-Fi adapter | USB Wi-Fi dongle |
| Network Settings | WPA/WPA2 security | Edit wpa_supplicant.conf |
| Signal Strength | -70 dBm or stronger | Wi-Fi extender/mesh |
| Connection Status | Stable connectivity | SSH monitoring |
| Data Transmission | Regular updates | Network monitoring tools |
Configure your Pi’s network settings by editing the wpa_supplicant.conf file with your network credentials. Regularly monitor connection status through SSH access to guarantee consistent data transmission from your pest monitoring system.
Data Visualization Dashboard Creation and Customization
You’ll need to create a visual dashboard that transforms your raw sensor data into easily readable charts and graphs for effective crawl space monitoring.
Your dashboard setup options include platforms like Initial State, which offers customizable gauge types, background images, and seamless integration with outside weather data to provide thorough environmental context.
You can configure automated alerts through text or email notifications when temperature and humidity levels exceed your predetermined thresholds, ensuring you’re immediately notified of potential pest-attracting conditions.
Dashboard Setup Options
Once your sensors begin collecting data from your crawl space, you’ll need a visual interface to monitor conditions effectively.
Initial State and similar platforms offer excellent dashboard creation tools that transform raw sensor readings into meaningful visual displays.
Your dashboard setup options include:
- Gauge Selection – Choose from circular, linear, or digital gauges to display temperature and humidity readings in formats that make sense to you.
- Visual Customization – Add background images and adjust color schemes to create an appealing interface that’s easy to read at a glance.
- Alert Configuration – Set threshold-based notifications for text or email alerts when conditions exceed your defined parameters.
- Weather Integration – Incorporate external weather data to understand environmental correlations affecting your crawl space without additional coding requirements.
Alert Configuration Methods
Setting up effective alerts transforms your crawl space monitoring system from a passive data collector into an active guardian of your home’s structural health.
You’ll configure temperature and humidity thresholds directly within your data visualization dashboard, enabling automatic text or email notifications when conditions exceed safe limits.
Create specific triggers in your bucket settings to monitor unusual patterns that might indicate pest activity or moisture problems.
Your alert system becomes more sophisticated when you integrate outside weather data, providing context for environmental changes affecting your crawl space.
Remember to keep your Raspberry Pi script running continuously—without consistent data collection, your carefully configured alerts can’t function properly.
This proactive approach catches potential issues before they become costly structural problems.
Alert System Configuration for Threshold Monitoring
While raw sensor data provides valuable insights into your crawl space conditions, configuring an automated alert system transforms passive monitoring into proactive pest prevention.
You’ll want to establish critical thresholds that trigger immediate notifications when conditions favor pest activity.
Here’s how to configure your alert system effectively:
- Set humidity alerts at 70% – Mold growth accelerates beyond this point, attracting moisture-loving pests and creating ideal breeding conditions.
- Configure temperature thresholds – High temperatures combined with humidity create perfect pest environments, so establish upper limits based on your regional climate.
- Enable multi-channel notifications – Use Initial State or similar platforms to send both text and email alerts for redundancy.
- Schedule seasonal threshold adjustments – Review and modify your settings quarterly to account for changing weather patterns and guarantee year-round effectiveness.
Remote Access Setup and Troubleshooting Tips
Establishing remote access to your DIY crawl space monitor guarantees you can check conditions and troubleshoot issues from anywhere without crawling into tight spaces.
Connect your Raspberry Pi to Wi-Fi and note its IP address for SSH access. You’ll need to enable I²C communication for the BME 280 sensor to collect accurate temperature and humidity readings.
Create a Python script that reads sensor data at regular intervals and transmits information to your data visualization platform like Initial State.
When troubleshooting problems, first verify all connections are secure and check your power supply.
Confirm your Raspberry Pi configuration is correct to prevent connectivity issues. Keep your Raspberry Pi OS and Python libraries updated regularly to maintain compatibility with visualization software and assure ideal monitoring system performance.
Maintenance Schedule and Long-term Performance Optimization
Once your crawl space monitoring system is operational, you’ll need to implement a structured maintenance routine to guarantee peak performance and extend its lifespan.
- Schedule quarterly inspections to check for pest signs and verify your monitoring system’s functionality. These regular checkups help catch issues before they become serious problems.
- Maintain cleanliness by removing organic debris from your crawl space. This reduces pest attraction and improves monitoring accuracy considerably.
- Control humidity levels between 40-50% relative humidity. This range deters pests while optimizing your monitoring devices’ effectiveness.
- Respond promptly to system alerts and notifications. Quick action prevents minor pest activity from escalating into full infestations.
Additionally, review and update your entire system annually, incorporating new technology and methods for continued optimization.
Frequently Asked Questions
How to Bug Proof Crawl Space?
You’ll need to seal all cracks and gaps in foundation walls, install wire mesh over vents, eliminate moisture sources, apply diatomaceous earth barriers, and regularly clean out debris that attracts pests.
Where Should a Crawl Space Vent Fan Be Installed?
You should install your crawl space vent fan near the lowest point to effectively remove humid air. Mount it securely off the ground, directing airflow toward existing vents for ideal air exchange.
What Can I Use Instead of Crawl Space Encapsulation?
You can install vapor barriers, use dehumidifiers maintaining humidity below 50%, add proper ventilation with fans, choose rodent-resistant insulation, and apply natural pest deterrents like diatomaceous earth around your crawl space perimeter.
How to Secure a Vapor Barrier in a Crawl Space?
Clean the crawl space thoroughly, then cut polyethylene sheeting to fit. Overlap seams by 12 inches, seal with waterproof tape, anchor edges with adhesive, and extend 6 inches up walls.
In Summary
You’ve built an extensive crawl space monitoring system that’ll detect pest activity before it becomes a major problem. Your Raspberry Pi setup with BME 280 sensors now provides real-time data on temperature, humidity, and environmental changes that indicate unwanted visitors. Keep your system updated, check connections monthly, and adjust alert thresholds based on seasonal patterns. You’ll catch infestations early and protect your home’s foundation from costly damage.


Leave a Reply