You’ll start by clearing debris and inspecting your crawlspace for entry points, then seal gaps with expanding foam and steel wool. Install 20-mil polyethylene sheeting as a vapor barrier, securing it to walls with construction adhesive and overlapping seams by 12 inches. Close foundation vents permanently using rigid foam board and spray foam for airtight seals. Add a dehumidifier to maintain 30-50% humidity levels, preventing moisture that attracts pests. Follow our complete guide below for detailed installation steps and maintenance tips.
Understanding Crawlspace Pest Problems and Moisture Issues
When moisture accumulates in your crawlspace, it creates the perfect storm for pest infiltration and structural damage. Excess humidity attracts wood-eating insects like termites and carpenter ants, which can compromise your home’s structural integrity.
This moisture also promotes mold and mildew growth, degrading indoor air quality and causing health problems for your family.
Ground dampness, plumbing leaks, and improper drainage all contribute to elevated moisture levels, creating an ideal breeding ground for pests. Traditional crawlspace vents often fail to reduce moisture effectively, especially in humid climates, allowing pests to enter your home seamlessly.
Installing pest barriers alongside proper moisture management, including vapor barriers and dehumidifiers, will prevent mold growth and considerably reduce pest infestations while protecting your home from moisture-related damage.
Essential Tools and Materials for Pest Barrier Installation
Success in crawlspace pest barrier installation depends heavily on gathering the right tools and materials before you begin.
You’ll need a utility knife for cutting materials to size, a tape measure for precise measurements, and heavy-duty staples or nails to secure the barrier to walls.
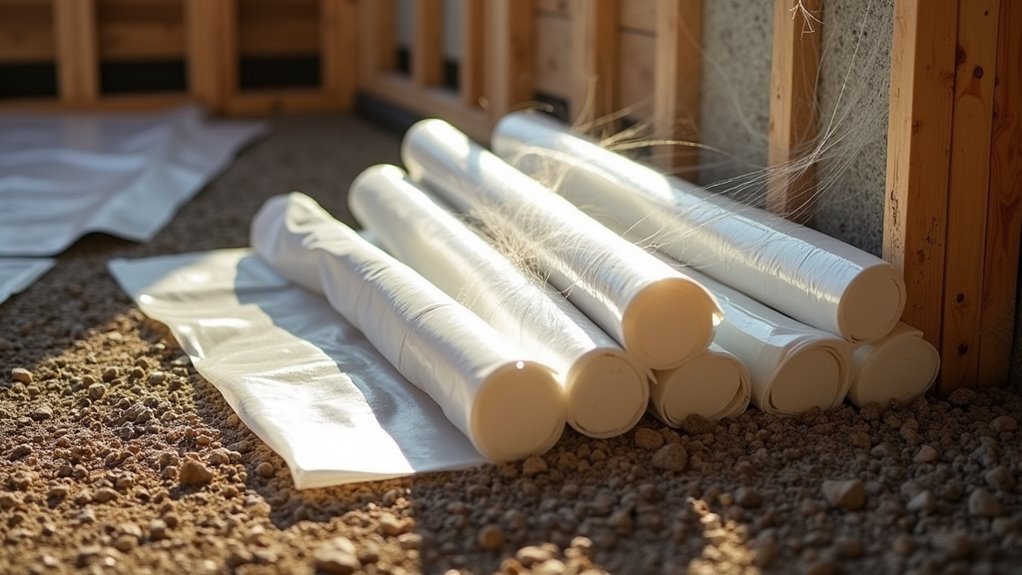
For materials, choose durable polyethylene sheeting with 20-mil thickness—this vapor barrier provides excellent resistance against tearing, puncturing, moisture, and pest infiltration.
Additionally, stock up on construction adhesive or double-sided tape for sealing edges and waterproof seaming tape for joining sections.
Before installing a vapor barrier, clear your crawlspace of debris and obstacles that could compromise effectiveness.
Remember to overlap seams by at least 6 inches for maximum protection against pests and moisture.
Pre-Installation Safety Preparations and Crawlspace Assessment

Before you begin installing your pest barrier, you’ll need to gather essential safety equipment and conduct a thorough crawlspace evaluation.
Start by assembling protective gear including gloves, masks, and knee pads to shield yourself from potential hazards like mold, sharp debris, or contaminated materials.
Next, you’ll systematically inspect the space for structural damage, moisture problems, and existing pest activity to determine the best barrier installation approach.
Safety Equipment Requirements
Proper safety equipment forms the foundation of any successful crawlspace pest barrier installation.
You’ll need essential personal protective equipment to protect yourself from dust, allergens, and potential hazards lurking in tight spaces.
Your safety equipment checklist should include:
- Protective gear trio – Wear durable gloves, safety goggles, and a quality dust mask to shield against airborne particles and sharp debris.
- Reliable lighting – Bring a sturdy, well-lit flashlight to illuminate dark corners and identify potential hazards or existing pest damage.
- Emergency preparedness – Keep a first aid kit nearby for treating minor cuts or injuries that may occur during installation.
Before entering, gather all necessary tools and materials within easy reach.
This preparation minimizes your time in the potentially hazardous environment while ensuring you’re properly protected throughout the installation process.
Structural Damage Inspection
Since pest barriers can only perform effectively when installed on solid structural foundations, you must thoroughly examine your crawlspace for any signs of damage before proceeding.
Look for rotting wood, sagging floors, or compromised support beams that indicate structural damage from moisture intrusion or pest activity. Use moisture meters to check humidity levels and identify problem areas where excess moisture creates conditions for both structural decay and pest attraction.
Inspect plumbing for leaks and condensation issues that compromise structural integrity.
Examine foundation walls and piers carefully for cracks or gaps that allow pest entry and potentially weaken the structure.
Document all findings and prioritize necessary repairs before installing barriers. This guarantees you’re building on a sound foundation for effective, long-lasting pest control.
Moisture Level Assessment
After completing your structural assessment, you’ll need to evaluate moisture levels throughout the crawlspace, as excess humidity creates ideal conditions for both pest activity and barrier degradation.
Use moisture meters to check humidity levels—readings consistently above 60% signal high risk for mold and pest infestations that’ll undermine your barrier’s effectiveness.
To prevent moisture problems:
- Inspect plumbing and foundation for leaks or standing water that attract pests
- Check exterior grading to guarantee water drains away from your home’s foundation
- Clean gutters and downspouts to prevent overflow directing water into the crawlspace
Remove any debris, wet insulation, or organic materials you discover, as these provide food sources for pests and worsen moisture level issues in your crawlspace.
Clearing Debris and Preparing the Crawlspace Environment
You’ll need to start by removing all old poly sheeting, wet insulation, and accumulated debris from your crawl space to create a clean foundation for your pest barrier installation.
Focus on clearing away organic materials like leaves, wood scraps, and any food sources that could attract pests or serve as nesting sites.
Once you’ve removed existing materials, carefully inspect all structural elements including joists, beams, and foundation walls for signs of damage, moisture issues, or potential pest entry points.
Remove Existing Materials
Clear out all debris, old insulation, and fallen materials from your crawl space before installing any pest barriers. This thorough crawl space clean guarantees nothing will obstruct your installation or provide hiding spots for unwanted critters.
When you remove existing materials, you’ll create a clean slate for proper barrier placement.
Focus on these essential steps:
- Bag and dispose of old insulation – Remove damaged or contaminated materials that could harbor pests or moisture.
- Clear fallen wood, boxes, and stored items – Eliminate clutter that creates pest highways and nesting areas.
- Sweep or vacuum remaining debris – Get rid of dust, leaves, and small particles that accumulate over time.
You’ll need adequate lighting and protective gear during this process to work safely and efficiently.
Inspect Structural Elements
Once you’ve cleared the debris, conducting a thorough inspection of your crawl space’s structural elements becomes your next critical task. You’ll need to examine every wooden beam, joist, and support structure for signs of damage that could jeopardize your pest barrier installation.
| Structural Element | What to Check For |
|---|---|
| Floor joists | Wood rot, sagging, termite damage |
| Support beams | Cracks, moisture damage, pest holes |
| Foundation walls | Gaps, cracks, crumbling mortar |
| Subflooring | Soft spots, water stains, decay |
| Sill plates | Termite activity, moisture exposure |
Address any structural issues before proceeding. Fix drainage problems and install a vapor barrier if moisture control is needed. This inspection guarantees your crawl space provides a stable foundation for effective pest barriers.
Identifying and Sealing Entry Points for Pests
Before installing any pest barriers, you must conduct a thorough inspection of your crawl space to locate every potential entry point where unwanted visitors might gain access.
Look carefully at foundation walls, piers, and areas around plumbing or electrical penetrations where gaps commonly occur.
Once you’ve identified problem areas, it’s time to seal them:
- Fill small gaps with expanding foam or caulk for airtight coverage
- Stuff larger holes with steel wool before applying foam to prevent rodent gnawing
- Cover vents and openings with mesh screens or rigid foam board to maintain ventilation
Check your seals regularly, as moisture and temperature changes can create new entry points.
After sealing everything properly, you can install your pest barrier around the perimeter for maximum protection.
Selecting the Right Vapor Barrier Material for Pest Prevention
You’ll need to choose a vapor barrier that’s thick enough to resist punctures from rodent claws and teeth while maintaining its moisture-blocking properties.
Consider materials specifically designed to deter termites and other insects, as standard polyethylene won’t provide adequate protection against all pest types.
Your barrier selection should integrate seamlessly with existing termite prevention systems to create a thorough defense strategy for your crawlspace.
Polyethylene Thickness Requirements
When selecting polyethylene for crawlspace pest barriers, thickness becomes your primary defense against both moisture infiltration and unwanted intruders.
You’ll need a polyethylene vapor barrier that’s at least 10 to 20 mils thick to effectively block pests and moisture from entering your crawlspace.
Consider these essential thickness requirements:
- Minimum 10-20 mils – This thickness provides robust protection against insect infiltration while maintaining durability against tears and punctures.
- Reinforced materials – Choose reinforced polyethylene for enhanced strength against rodents and larger pests that might attempt to breach the barrier.
- White-colored options – Select white polyethylene for better visibility during inspections, making damage detection easier.
Always verify your chosen thickness meets local building codes, as many jurisdictions specify minimum requirements for effective pest prevention in crawlspace applications.
Rodent-Resistant Material Options
Rodent infestations can devastate even the thickest polyethylene barriers if you don’t choose materials specifically designed to resist gnawing and clawing.
When selecting rodent-resistant vapor barriers, look for reinforced polyethylene sheeting treated with specific additives that deter pests from chewing through the material. These specialized barriers maintain their protective properties while actively discouraging rodent damage.
Choose white-colored vapor barriers for enhanced visibility, allowing you to quickly spot any pest activity or potential damage during inspections. The bright surface makes tears, holes, or droppings immediately apparent.
Verify your selected material meets the minimum 20-mil thickness requirement for maximum durability. This combination of chemical deterrents, visual advantages, and robust construction creates a thorough defense system that protects your crawl space from moisture infiltration and pest intrusion simultaneously.
Termite Barrier Integration
Although termites pose a different threat than rodents, they require equally strategic material selection when installing your crawl space vapor barrier.
You’ll need to integrate your vapor barrier with termite protection to create thorough defense against these destructive pests.
Here’s what you should prioritize for effective termite barrier integration:
- Choose reinforced polyethylene at least 20 mil thick – This durability withstands termite damage while maintaining moisture control that deters their activity.
- Select white-colored barriers for enhanced visibility – You’ll easily spot termite tubes or damage during routine inspections in your crawl space.
- Overlap seams by 6 inches minimum with waterproof tape – This eliminates entry points where termites typically penetrate.
Regular maintenance and inspection of your integrated system guarantees long-term protection against termite infiltration.
Installing Vapor Barriers on Foundation Walls
Begin your vapor barrier installation by thoroughly cleaning the foundation walls to remove any debris, dirt, or moisture that could compromise adhesion.
Once clean, attach the vapor barrier using double-sided construction tape, ensuring it extends at least 6 inches above ground level. Secure the barrier permanently with termination bars and masonry screws for maximum durability.
Overlap all seams by at least 12 inches and seal them with waterproof seam tape to create a continuous moisture barrier.
For pipe penetrations, carefully cut slits in the material and tape them securely around fixtures to maintain an airtight seal.
Keep the vapor barrier taut against foundation walls throughout installation to prevent sagging and potential moisture infiltration points.
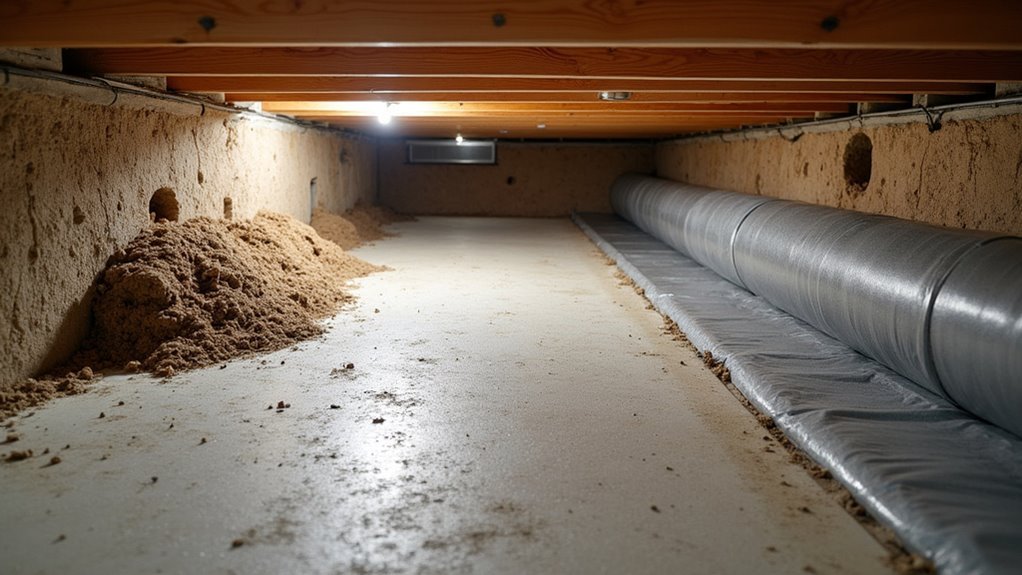
Covering the Crawlspace Floor With Protective Sheeting
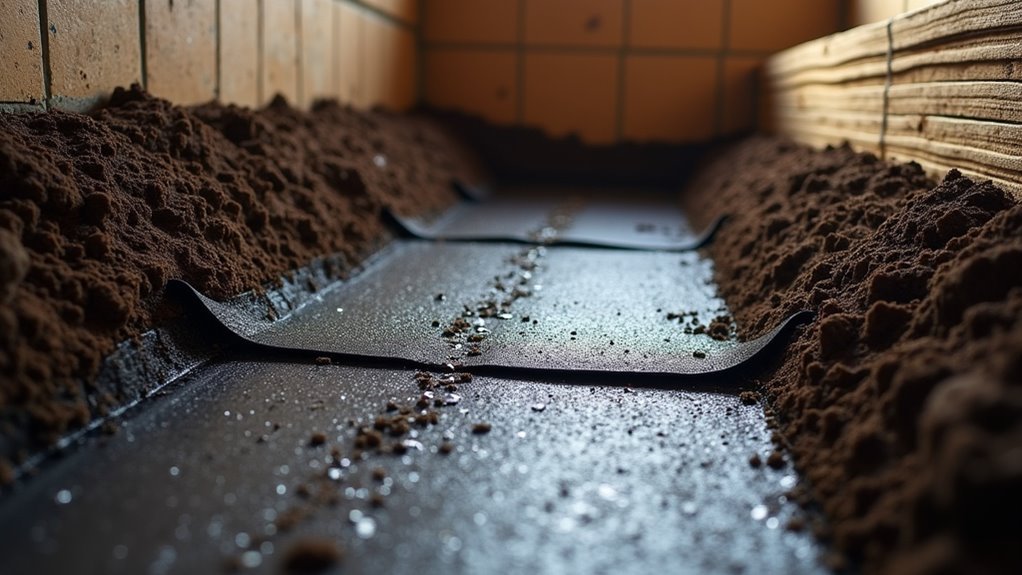
After completing the wall installation, you’ll need to cover the crawlspace floor with protective sheeting to create a complete moisture and pest barrier.
This crawl space vapor barrier prevents ground moisture from infiltrating your home and creating conditions that attract pests.
Follow these essential steps for proper floor coverage:
- Choose durable materials – Use reinforced polyethylene sheeting that’s at least 20 mil thick to withstand wear and resist punctures from debris or foot traffic.
- Secure all seams properly – Overlap sheeting by 12 inches at joints and seal with waterproof tape, then extend material 6 inches up foundation walls using rubberized butyl tape.
- Anchor the barrier – Stake down sheeting with landscape fabric stakes to prevent shifting and maintain position over time.
Sealing Seams and Penetrations to Block Pest Access
The most critical step in creating an impenetrable pest barrier involves meticulously sealing every seam and penetration in your crawlspace sheeting.
Overlap all seams by at least 12 inches, then secure them with waterproof seam tape for maximum protection. Apply construction adhesive or double-sided tape along edges to reinforce vulnerable areas.
For penetrations around pipes and utility lines, cut precise slits in the barrier material to fit snugly around these obstacles. Use detail patches to cover larger openings.
Apply seaming tape around all penetrations to create a monolithic seal that eliminates entry points.
Regularly inspect your work to identify any wear or damage. Even minor breaches can compromise your entire pest control system, allowing unwanted invaders into your crawlspace.
Closing Vents and Managing Airflow for Pest Control
While sealing sheeting creates your primary defense, foundation vents present another significant entry point that demands immediate attention.
In humid climates, you’ll need to close these crawl space vents permanently to prevent water-laden air from entering your space. Open vents invite condensation, creating perfect breeding grounds for rodents and insects.
Here’s your three-step approach to effective vent sealing:
- Cut rigid foam board to fit snugly inside each vent opening from the interior side
- Apply spray foam around all edges to eliminate gaps and create an airtight seal
- Schedule regular inspections every six months to verify your seals remain intact
This sealed environment maintains stable temperature and humidity levels, dramatically reducing pest attraction while preventing moisture problems that compromise your crawl space’s integrity.
Installing Dehumidification Systems to Reduce Moisture
Once you’ve sealed your vents, installing a dehumidification system becomes your next critical step in eliminating the moisture that attracts pests to your crawl space.
You’ll need a properly sized unit that removes 30-70 pints daily, targeting humidity levels between 30-50% to prevent mold and pest infestations.
Choose a dehumidifier with built-in humidity sensors for automatic operation and energy efficiency. Position it centrally in your crawl space with adequate drainage access.
You’ll enhance moisture control by combining your dehumidification system with an existing vapor barrier, which reduces the unit’s workload by blocking ground moisture.
Maintain effectiveness through regular filter cleaning and drainage system checks.
This thorough moisture control approach creates an inhospitable environment for pests while protecting your home’s structural integrity.
Post-Installation Inspection and Quality Checks
After completing your pest barrier installation, you’ll need to perform a thorough inspection to verify everything’s properly secured and functioning as intended.
Your post-installation inspection guarantees maximum effectiveness against unwanted intruders.
Follow these essential steps during your quality check:
- Visual barrier examination – Check every inch for gaps, tears, or loose sections that could compromise protection.
- Seam and edge verification – Confirm all joints around pipes, wires, and vents are completely sealed without entry points.
- Hard-to-reach area inspection – Use a flashlight to examine dark corners and spaces where problems often hide.
Monitor your crawl space regularly for pest activity signs and moisture accumulation, which can weaken barrier effectiveness.
Schedule follow-up inspections every six months to maintain ideal performance and address emerging issues before they become costly problems.
Ongoing Maintenance for Long-Term Pest Prevention
Even though your pest barriers are now installed and inspected, you’ll need consistent maintenance to preserve their protective power over time. Regular upkeep guarantees your crawl space encapsulation continues blocking unwanted intruders effectively.
| Maintenance Task | Frequency |
|---|---|
| Inspect for pest droppings and nesting materials | Monthly |
| Check drainage and clean gutters | Seasonally |
| Examine barrier wear and tear | Annually |
| Clean debris and clutter | Quarterly |
Monitor your humidity level consistently, using dehumidifiers when necessary to maintain an environment that’s less attractive to pests. Keep the area clean and debris-free, as clutter provides perfect hiding spots for rodents and insects. Maintain proper drainage around your foundation and verify gutters stay clear to prevent moisture build-up that attracts termites and other pests.
Frequently Asked Questions
Can You Install a Crawl Space Vapor Barrier Yourself?
Yes, you can install a crawl space vapor barrier yourself. You’ll need reinforced polyethylene sheeting, utility knife, and construction tape. Measure carefully, overlap seams twelve inches, and secure with waterproof tape.
What Can I Use for a Moisture Barrier in My Crawl Space?
You can use polyethylene vapor barrier that’s at least 6 mil thick for your crawl space moisture barrier. Reinforced polyethylene sheeting works better since it resists punctures and tears more effectively.
What Are the Requirements for a Vapor Barrier in a Crawl Space?
You’ll need durable 20-mil reinforced polyethylene covering the entire floor, extending six inches up walls. Overlap seams twelve inches with waterproof tape, seal all penetrations tightly, and make certain it’s wrinkle-free.
How Much Does It Cost to Put a Moisture Barrier in a Crawl Space?
You’ll spend $1,000 to $3,000 for professional moisture barrier installation in your crawl space. If you’re doing it yourself, expect costs between $500 to $1,500 for materials and tools only.
In Summary
You’ve successfully installed your DIY crawlspace pest barriers, but your work isn’t finished. You’ll need to inspect your barriers quarterly, checking for tears or gaps. Monitor humidity levels monthly and clean your dehumidifier filters regularly. Don’t forget to examine entry points seasonally, as settling can create new openings. By staying proactive with maintenance, you’ll keep pests out and protect your home’s foundation from moisture damage for years to come.


Leave a Reply