
You’ll save hundreds of dollars by building your own pest heat detector instead of purchasing commercial units that cost $30-$150 each and often include unnecessary features. Your DIY system uses basic materials costing just a few dollars while providing customizable placement in high-activity areas where pests typically nest. You’ll gain superior control over detection capabilities and reduce future service calls by understanding the system mechanics. Discover how simple components can create an effective thermal monitoring solution.
Understanding the Science Behind Thermal Pest Detection

When you’re dealing with a pest problem, thermal detection offers a scientific approach that goes beyond traditional visual inspections.
Heat detection works by utilizing sensitive thermal cameras that identify irregular temperature patterns indicating pest presence. Different pests create distinct thermal signatures – termite nests appear as hotspots due to their metabolic activity, while rodent nests show up as cold spots where insulation has been damaged or displaced.
The technology’s effectiveness lies in its ability to detect temperature differences on surfaces, revealing hidden nests within walls that you’d otherwise miss.
However, you’ll need proper training to interpret thermal images accurately. Understanding these key indicators helps you recognize pest activity patterns, eliminate guesswork during inspections, and notably improve your detection efficiency while preventing potential damage.
Cost Benefits of Building Your Own Heat Detection System
While commercial pest heat detectors can drain your budget with prices ranging from $30 to $150 per unit, building your own system offers substantial savings without sacrificing effectiveness.
The cost benefits become immediately apparent when you consider that basic materials like rubber bands and wooden blocks cost mere dollars compared to expensive commercial units.
Basic materials like rubber bands and wooden blocks cost mere dollars versus expensive commercial detector units.
You’ll maximize your investment by customizing detector placement in high-activity areas, eliminating the need for multiple costly units throughout your property.
Understanding your system’s mechanics means you won’t pay for future service calls or repairs.
Most importantly, you’re designing for your specific needs rather than paying for unnecessary features.
This targeted approach can save you hundreds of dollars while delivering precisely the detection capabilities you require.
Essential Materials and Tools for DIY Construction
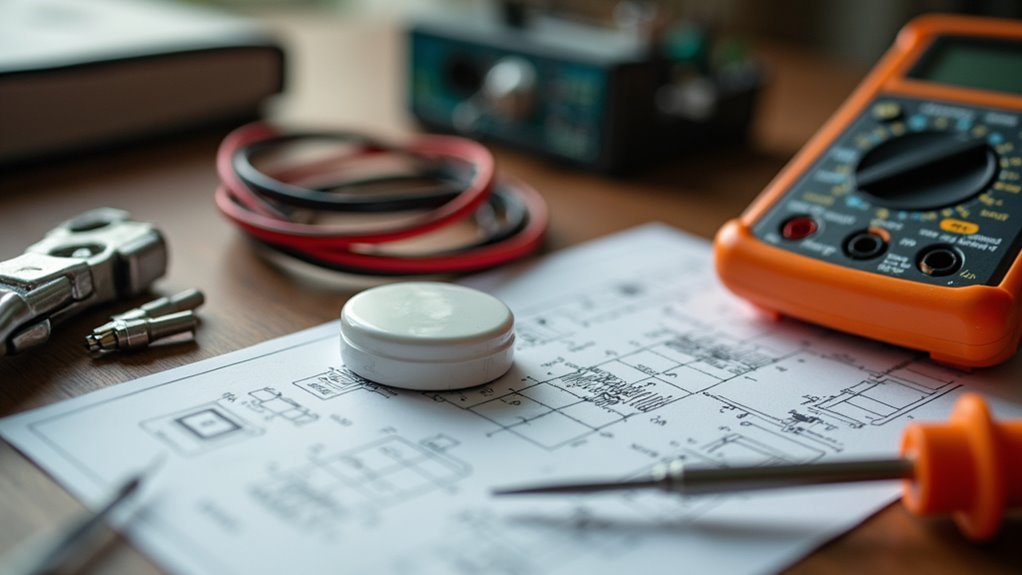
You’ll need just a few basic materials to build your heat detector: a rubber band, wooden block, thin nail, and cardboard for the arrow mechanism.
These simple components work together as the rubber band expands with heat changes, moving the cardboard arrow that’s pivoted on the nail.
For assembly tools, you’ll only require basic items like scissors for cutting cardboard and a small hammer or sturdy object to insert the nail into the wooden base.
Basic Component Selection
Success in building your own pest heat detector hinges on selecting the right components and gathering the proper tools before construction begins.
You’ll need specific materials to create an effective device that can identify potential pest infestations by monitoring for any heat source above 135°F.
Your core component selection includes:
- Thermal sensor – Capable of detecting temperature changes above your specified threshold
- Microcontroller (Arduino) – Controls the entire detection system and processes sensor data
- Power source – Either battery-operated or wired connection for consistent operation
You’ll also want to include a wireless module for remote monitoring capabilities.
Essential construction tools include a soldering iron for electrical connections, a breadboard for prototyping, and basic programming knowledge to configure your microcontroller properly.
Assembly Tool Requirements
Before you begin construction of your pest heat detector, gather the essential materials that’ll form the foundation of your device. You’ll need a heat source like matches or a lighter to effectively demonstrate temperature detection capabilities.
Secure a rubber band and wooden block to create the movement mechanism that responds to thermal expansion. A thin nail serves as the vital connector between your cardboard arrow and rubber band, enabling visible movement when heat’s applied.
Cut cardboard into an arrow shape – this visual indicator showcases thermal expansion and contraction principles. Unlike commercial heat detectors, your homemade version requires steady hands and careful attention during assembly.
Each component must work harmoniously to demonstrate the heat detection concept effectively, making proper preparation indispensable for successful construction.
Step-by-Step Assembly Instructions for Maximum Effectiveness
Four essential materials form the foundation of your DIY pest heat detector: a rubber band, wooden block, thin nail, and cardboard arrow.
These simple components work together to create an effective temperature-sensing device that’ll help you locate warm-blooded pests.
Follow these assembly steps for maximum effectiveness:
- Secure the rubber band around your wooden block, ensuring it’s taut enough to respond to temperature changes while allowing smooth movement when heated.
- Insert the thin nail through the cardboard arrow’s center and position it beneath the rubber band, creating a pivot point that enables the arrow to rotate freely.
- Test your detector by bringing a heat source near the rubber band, observing how thermal expansion causes the arrow to move and indicate temperature variations accurately.
Identifying Pest Activity Through Temperature Pattern Recognition
Once you’ve assembled your heat detector, you’ll need to understand how different pests create distinct temperature signatures that reveal their presence.
Termite nests appear as bright hotspots on your thermal display because their activity and moisture-rich mud tubes generate significant heat.
You’ll spot rodent nests as cooler areas within insulation, where their body warmth contrasts sharply with surrounding temperatures.
Social insects like hornets create unmistakable heat clusters from their collective activity.
Your heat detectors will show these patterns clearly once you learn to interpret them correctly.
Training yourself to recognize these temperature variations is essential for effective identification.
Practice reading thermal images regularly to develop accuracy in distinguishing between normal temperature fluctuations and actual pest infestations.
Maintenance and Troubleshooting Your Homemade Device
You’ll need to perform regular calibration checks to guarantee your homemade pest heat detector continues operating accurately over time.
Start by testing your device monthly with a controlled heat source to verify it’s responding to temperature changes as designed.
Don’t forget to establish a component replacement schedule, particularly for battery-operated parts that should be swapped out every five years to maintain reliable performance.
Regular Calibration Checks
Since your homemade pest heat detector’s accuracy directly impacts its effectiveness, establishing a regular calibration schedule becomes crucial for maintaining ideal performance.
You’ll need to conduct calibration checks at least annually or after exposing your device to extreme temperature variations.
Here’s your calibration maintenance routine:
- Test functionality using controlled heat sources – Verify your detector activates within specified temperature thresholds for accurate pest detection.
- Document all calibration adjustments and results – Track performance trends over time to identify potential issues before they compromise detection capabilities.
- Perform thorough maintenance during calibration checks – Clean sensors thoroughly and inspect all connections to extend your device’s lifespan.
Regular calibration checks guarantee your homemade detector remains reliable, preventing false readings that could undermine your pest monitoring efforts.
Component Replacement Schedule
Beyond maintaining calibration accuracy, your homemade pest heat detector requires strategic component replacement to sustain peak performance over time.
Your component replacement schedule should prioritize the heat sensor element, which needs replacing every five years to maintain ideal sensitivity and accuracy in detecting temperature changes.
You’ll want to inspect thermal sensor components biannually, checking for wear or damage that could compromise functionality.
Monthly testing using a heat source verifies your alarm system activates correctly, guaranteeing reliable pest detection when needed.
Keep dust and debris away from your detector, particularly in attics and garages where accumulation interferes with performance.
Document all replacements and maintenance checks in a detailed log. This tracking system helps you monitor your device’s history and guarantees you’re maintaining consistent upkeep protocols.
Frequently Asked Questions
What Is the Purpose of a Heat Detector?
Your heat detector’s purpose is detecting significant temperature increases that indicate potential fires. You’ll benefit from fewer false alarms compared to smoke detectors, especially in dusty environments like garages, attics, and areas storing flammable materials.
What Is the Purpose of a Heat Sensor?
You’ll use a heat sensor to detect significant temperature increases that indicate potential fires. It’ll monitor temperature changes and trigger alarms when predetermined thresholds are exceeded, providing reliable fire detection in challenging environments.
Do I Need a Heat Detector?
You’ll need a heat detector if you have areas like attics, garages, or basements where smoke detectors aren’t practical due to dust or exhaust that causes false alarms.
What Are Heat Detectors Best Used For?
You’ll find heat detectors work best in dusty areas, garages, attics, and basements where smoke detectors fail. They’re ideal for detecting fires in spaces with flammable materials or high ceilings.
In Summary
You’ve learned how thermal detection works, calculated the cost savings, gathered your materials, and assembled your device. Now you can identify pest patterns through temperature changes and maintain your system properly. You’ll save money while gaining valuable skills and customizing detection for your specific needs. Your DIY heat detector gives you control over pest monitoring without relying on expensive commercial solutions or professional services.


Leave a Reply