
You’ll need essential equipment like a high-quality flashlight, hand mirror, and moisture meter to conduct an effective pest inspection. Start by walking your property’s perimeter to identify entry points, then focus on interior hotspots like kitchens, bathrooms, and storage areas. Look for telltale signs including droppings, nesting materials, unusual odors, and moisture damage that attracts pests. Document your findings carefully to develop targeted treatment strategies and determine whether you need professional intervention or can handle issues yourself through quarterly maintenance inspections.
Essential Equipment and Preparation for Your Pest Inspection

Seven essential tools form the foundation of every successful pest inspection, starting with a high-quality flashlight that’ll illuminate dark corners where pests typically hide.
A high-quality flashlight serves as the cornerstone tool for illuminating hidden pest activity in dark, hard-to-reach areas.
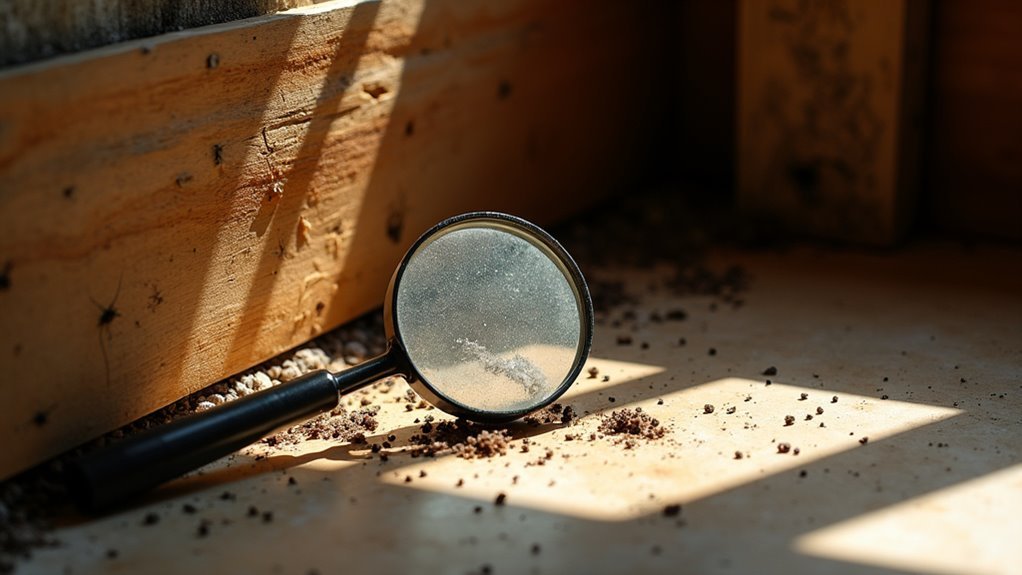
You’ll also need a hand mirror for viewing tight spaces, a magnifying glass for examining evidence, and a moisture meter to detect conditions that attract pests.
Don’t forget basic supplies like paper and pen for documentation.
Your personal protective equipment should include gloves and knee pads for safety during the inspection process.
Prepare treatment tools like sprayers and dusters beforehand to address problems immediately.
Keep your smartphone or tablet ready for taking detailed notes and photos.
Before beginning your thorough inspection, introduce yourself to the client and ask about recent pest activity to identify potential problem areas.
Exterior Property Assessment and Entry Point Identification
You’ll start your exterior assessment by walking the entire perimeter of your property to spot potential pest entry points.
Focus on identifying foundation gaps and cracks where insects and rodents can squeeze through, as even tiny openings can become major access routes.
Don’t overlook moisture problem areas like leaky gutters, standing water, or poor drainage, since these conditions attract pests and create ideal breeding environments.
Perimeter Inspection Strategy
A thorough perimeter inspection forms the foundation of effective pest control, requiring you to systematically examine your property’s exterior for vulnerabilities that invite unwanted invaders. Start your pest inspection by walking around your home’s entire perimeter, documenting entry points like gaps, cracks, and damaged screens. Check moisture sources including gutters and downspouts that attract pests. Identify harborage areas such as wood piles and overgrown vegetation where insects and rodents shelter.
| Area to Inspect | What to Look For | Signs of Pests |
|---|---|---|
| Foundation/Walls | Cracks, gaps, holes | Droppings, gnaw marks |
| Screens/Windows | Tears, loose frames | Spider webs, egg cases |
| Gutters/Drainage | Clogs, standing water | Mosquito larvae, moisture damage |
| Vegetation/Mulch | Dense growth, wood contact | Ant trails, termite tubes |
| Storage Areas | Food sources, clutter | Chewed materials, nests |
Document all findings for your thorough pest inspection record.
Foundation Gaps and Cracks
Foundation gaps and cracks represent the most common entry points that allow pests to infiltrate your home’s interior spaces.
You’ll need to inspect your foundation thoroughly for visible cracks and gaps that serve as highways for rodents and insects. Focus particularly on areas where foundation meets siding, since these junctions commonly develop gaps that facilitate pest entry.
Use a flashlight to examine shaded foundation areas, revealing hidden cracks and crevices you’d otherwise miss.
Watch for moisture accumulation near any gaps, as damp conditions attract termites and ants. These same openings that welcome pests can also lead to structural damage over time.
Once you’ve identified foundation gaps, seal them immediately with appropriate materials to block pest entry and preserve your home’s integrity.
Moisture Problem Areas
While foundation gaps create obvious entry routes, moisture accumulates around your property’s exterior and transforms these areas into pest magnets that demand equal attention.
You’ll need to inspect gutters, downspouts, and air conditioning units for leaks that create water accumulation. Focus on overly moist foundation areas where water collects, as these conditions attract common pests like termites and mosquitoes.
Check outdoor features for standing water in bird baths or clogged drainage systems that become breeding grounds.
Dense vegetation and mulch beds near your structure retain moisture while providing pest harborage. Document all moisture issues and potential entry points you discover.
This thorough assessment guarantees effective pest prevention by eliminating the water sources that draw unwanted visitors to your property.
Interior Hotspot Examination and Problem Area Detection
After completing your exterior assessment, you’ll need to shift your attention to the interior’s most vulnerable areas where pests commonly establish themselves.
Focus your inspection on kitchens and bathrooms where moisture and food sources attract unwanted visitors, then move to basements and attics that often provide ideal nesting conditions.
Use proven moisture detection methods to identify problem areas, as excess humidity creates the perfect environment for pest infestations to flourish.
Kitchen and Bathroom Focus
Since kitchens and bathrooms create the perfect storm of moisture, food sources, and hiding spots, they’re prime real estate for pest infestations.
You’ll need to conduct thorough pest inspections in these critical areas to spot early signs of infestation.
Focus your examination on these key areas:
- Under sinks and behind appliances – Check for droppings, moisture damage, and nesting materials.
- Pantry spaces and cabinets – Look for food contamination and pest activity.
- Bathroom corners and moldy spots – Search for water leaks that attract cockroaches and silverfish.
- Tight crevices using flashlight and mirror – Identify live pests and structural damage.
Document your findings carefully to develop an effective pest management strategy.
If issues persist, consider professional pest control services.
Basement and Attic Checks
Though basements and attics might seem like forgotten spaces in your home, they’re actually pest superhighways that demand your immediate attention.
During routine inspections, you’ll want to check for moisture signs since damp conditions fuel pest infestations, especially termites and rodents.
In your basement, search for termite mud tubes in hidden corners—these indicate active infestations requiring immediate action.
Your attic needs equal scrutiny for droppings, nests, and gnawing marks that signal rodent or bat activity.
Use a flashlight and hand mirror to examine dark corners and tight spaces where pests establish hideouts.
Document everything you find in these critical areas, as they’re hotspots that can quickly spiral into major infestations throughout your entire home.
Moisture Detection Methods
During your basement and attic inspections, you’ll discover that moisture detection forms the backbone of effective pest prevention. High moisture levels create perfect breeding grounds for termites, mold, and other unwanted invaders.
Your home inspection should focus on identifying these problem areas before they escalate into serious pest problems.
Use these essential moisture detection techniques during your assessment:
- Deploy a moisture meter around sinks, baseboards, and crawlspaces to identify elevated humidity levels.
- Inspect for soft wood and musty odors that indicate ongoing moisture issues.
- Check plumbing systems for dripping pipes and leaks that create excess dampness.
- Locate stagnant water around your property that serves as mosquito breeding grounds.
Thorough moisture detection protects your home from costly infestations.
Moisture Management and Structural Vulnerability Checks
While conducting pest inspections, you’ll find that moisture management stands as one of your most critical checkpoints since excess humidity acts like a magnet for destructive pests including termites, cockroaches, and countless other unwanted invaders.
During structural vulnerability checks, you should inspect for soft wood and moldy odors that signal moisture-related issues creating pest harboring sites.
Use a moisture meter around sinks, baseboards, and crawl spaces to pinpoint problematic moisture levels.
Check for standing water around your property, as it creates breeding grounds for mosquitoes and contributes to wood rot.
Don’t forget to examine drainage systems and verify proper slope away from foundations.
These proactive steps prevent water accumulation, considerably reducing pest infestation risks linked to moisture problems.
Common Pest Signs and Activity Documentation
After addressing moisture vulnerabilities, you must learn to recognize and document the telltale signs that pests leave behind during their activities.
These common signs of pest activity serve as essential evidence for determining infestation severity and treatment needs.
Recognizing pest activity indicators provides crucial data for assessing infestation levels and developing effective treatment strategies.
Document these key indicators during your inspection:
- Droppings and waste – Check corners, cabinets, and appliance areas for rodent or insect excrement.
- Nesting materials – Look for shredded paper, fabric, or other materials in hidden spaces.
- Visible damage – Record chewed furniture, gnawed wires, damaged walls, or disturbed wood structures.
- Unusual odors – Note any urine, decay, or musty smells that suggest pest presence.
Pay special attention to food storage areas where pests commonly seek sustenance, as these zones often reveal the most activity.
Treatment Planning Based on Inspection Findings
Once you’ve completed your thorough inspection and documented all pest signs, you’ll need to transform these findings into a strategic treatment plan that addresses each identified issue.
Start by referencing pest control guides to match specific treatment methods with the pests you’ve found.
Prioritize time-sensitive problems first—termites and bed bugs can’t wait. Focus on areas that need immediate attention based on infestation severity and potential damage.
Your treatment plan should include targeted removal strategies for active infestations and preventive measures like sealing entry points and fixing moisture problems.
Don’t forget to schedule follow-up inspections to monitor treatment effectiveness. This ongoing evaluation lets you adjust your approach and catch new pest activity early, ensuring long-term success.
Professional vs. DIY Inspection Considerations

Determining whether to conduct your own pest inspection or hire a professional depends on several key factors that directly impact your treatment planning success.
While a DIY Home Pest Inspection saves money upfront, you’ll need to weigh the risks of missing critical signs like termite mud tubes or hidden nests.
Consider these key differences:
- Expertise Level – Professionals have specialized training to identify subtle pest indicators you might overlook.
- Equipment Access – Advanced detection tools aren’t typically available for DIY inspections.
- Comprehensive Reporting – A good inspection from professional services includes detailed findings and treatment recommendations.
- Long-term Costs – Missing infestations during DIY inspections can lead to expensive damage.
Professional services provide thorough treatment and prevention strategies that often justify their cost through effective pest management.
Maintaining an Effective Quarterly Inspection Schedule
While one-time inspections can catch immediate problems, establishing a consistent quarterly inspection schedule guarantees you’re staying ahead of pest activity throughout the year.
Set specific dates every three months to maintain thoroughness and consistency. Create a detailed checklist focusing on common entry points like gaps, cracks, and screens to guide each inspection systematically.
Establish regular three-month inspection dates and develop comprehensive checklists targeting gaps, cracks, and screens for systematic pest prevention.
Schedule your inspections before seasonal changes since different pests emerge at various times throughout the year. Document all findings, treatments, and pest activity to track patterns and address recurring issues effectively.
Consider engaging professional pest control services for expertise and advanced techniques tailored to your inspection outcomes. Extensive records help you identify problem areas and implement targeted preventive measures, ensuring your property remains protected against unwanted pests.
Frequently Asked Questions
What Do They Do During a Pest Inspection?
During a pest inspection, you’ll see professionals examine your property’s structural areas, use specialized tools like thermal cameras, check entry points, document pest evidence, and create a thorough report with treatment recommendations.
What Is the Hardest Pest to Get Rid Of?
Termites are often considered the hardest pest you’ll face. They’ll silently destroy your home’s structure from within, causing thousands in damage before you even notice they’re there.
How Much Does a Home Pest Inspection Cost?
You’ll typically pay around $100 for a home pest inspection, though costs vary by location, home size, and company. Get multiple estimates for competitive pricing, and check if sellers offer concessions.
What Happens if You Fail a Pest Inspection?
You’ll need immediate pest control treatment and may face closing delays. Your property value could drop, you’ll have disclosure requirements for future sales, and you’ll need ongoing monitoring with follow-up inspections.
In Summary
You’ve now got the foundation for conducting thorough pest inspections that’ll protect your property year-round. Remember, consistency beats perfection—stick to your quarterly schedule and document everything you find. Don’t hesitate to call professionals when you’re dealing with extensive infestations or structural concerns. By staying proactive with regular walkthroughs, you’ll catch problems early and save yourself from costly damage down the road.


Leave a Reply