
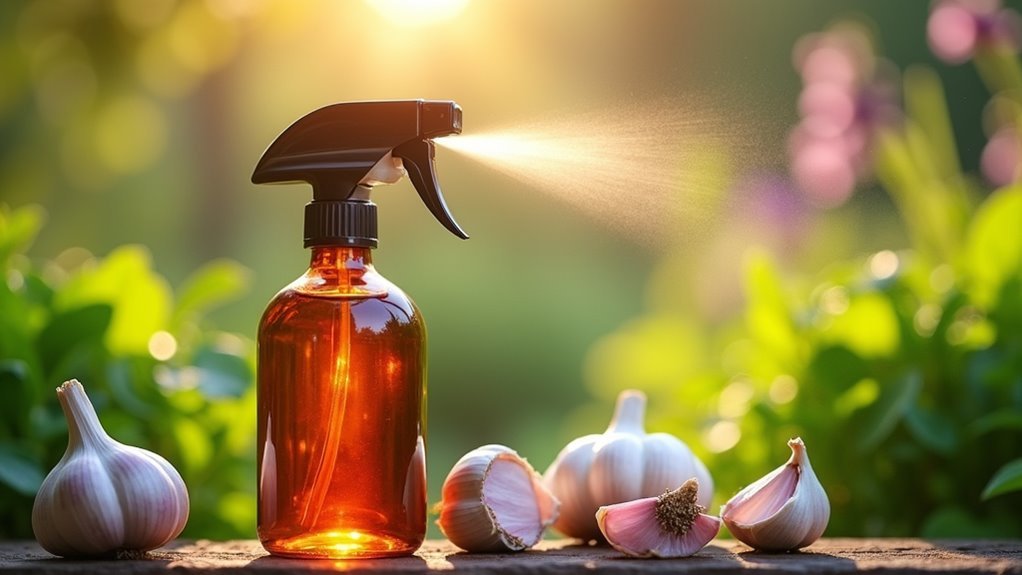
You can create a potent fermented garlic spray by crushing 10-12 fresh garlic cloves with water and fermenting for 5-7 days, which concentrates allicin and sulfur compounds that disrupt insect sensory receptors. This powerful organic repellent reduces pest populations by up to 80% when properly applied, targeting everything from aphids to caterpillars while boosting soil health through beneficial microorganisms. The techniques below will maximize your spray’s effectiveness across different garden situations.
The Science Behind Fermented Garlic’s Pest-Repelling Properties
When you ferment garlic, you’re releasing a powerful arsenal of natural pest-fighting compounds that can transform your garden’s defense system.
The fermentation process greatly enhances allicin and sulfur compounds, creating a potent repellent that disrupts insect sensory receptors. These compounds make your plants less appealing to pests like aphids, spider mites, and caterpillars while remaining safe for beneficial insects.
Fermented garlic creates powerful sulfur compounds that repel harmful pests while protecting beneficial insects in your garden ecosystem.
During fermentation, garlic’s natural toxicity to certain insects increases considerably. The process also introduces beneficial microorganisms that boost soil health and strengthen your plants’ immune systems.
Scientific research dating back to the 1970s confirms garlic’s effectiveness as a natural pesticide alternative, proving you can protect your garden without harsh chemicals while maintaining a healthy ecosystem.
Essential Ingredients for Creating Fermented Garlic Spray
You’ll need just a few key ingredients to create an effective fermented garlic spray that keeps garden pests at bay.
The core fermentation base requires fresh garlic heads and water, while natural enhancement additives like sugar or molasses boost the fermentation process.
Don’t forget the essential equipment and storage supplies that’ll help you properly ferment, strain, and apply your homemade pest deterrent.
Core Fermentation Base Ingredients
Fresh garlic forms the foundation of any effective fermented pest spray, bringing powerful sulfur compounds that naturally repel unwanted garden visitors.
You’ll need fresh garlic as your primary ingredient, which becomes more potent through fermentation. The fermentation process requires a carbohydrate source like sugar or molasses to feed beneficial bacteria that create the magic.
Water balances these core ingredients, establishing the perfect environment for bacterial activity. You can enhance your spray’s effectiveness by adding optional ingredients such as chili peppers or herbs, targeting specific pests while improving aroma.
The beneficial bacteria work for 1-2 weeks at room temperature, transforming simple ingredients into a powerful pest-repelling solution that protects your garden naturally.
Natural Enhancement Additives
Beyond garlic’s natural pest-fighting abilities, strategic additives transform your fermented spray into a specialized garden defense system.
These enhancements work synergistically with garlic’s beneficial sulfur compounds, creating a more potent solution than basic fermented garlic spray alone.
Key Enhancement Additives:
- Cayenne pepper or neem oil – Provides targeted insecticidal properties while boosting repellent effects against specific pest species.
- Molasses or honey – Feeds beneficial bacteria during fermentation, creating a more robust process that maximizes pest-repelling power.
- Essential oils (eucalyptus, tea tree) – Adds powerful aromatic compounds that enhance pest deterrence while providing antifungal benefits.
- Hot peppers – Introduces capsaicin compounds that create additional burning sensations, effectively deterring mammalian pests from treated plants.
Equipment and Storage Supplies
Creating effective fermented garlic spray starts with gathering the right equipment and ingredients. You’ll need fresh garlic cloves as your primary component, along with clean water for dilution. A glass jar serves as your ideal fermentation container, avoiding plastic that might absorb odors.
Consider adding sugar or molasses to boost the fermentation process. For straining, you’ll require cheesecloth or a fine mesh strainer to remove solid particles before bottling. Essential storage supplies include a spray bottle for application and dark containers for long-term storage.
Keep liquid soap handy as an optional surfactant to help your fermented garlic spray adhere better to plant surfaces. Proper equipment guarantees your homemade pest deterrent maintains potency and effectiveness throughout its storage period.
Step-by-Step Fermentation Process for Maximum Potency
Since proper fermentation requires precise timing and technique, you’ll want to begin by crushing 10-12 fresh garlic cloves thoroughly to release their natural oils and compounds.
- Mix crushed garlic with 1 cup of water in a clean container, ensuring all cloves are completely submerged to prevent mold formation during the fermentation process.
- Let the mixture ferment for 5-7 days at room temperature, stirring daily to encourage proper bacterial activity and maintain ideal conditions.
- Strain the liquid through cheesecloth after fermentation completes, removing all solid pieces to create your concentrated garlic extract.
- Dilute the concentrate with water at a 1:10 ratio before transferring to spray bottles for effective pest control applications.
This fermented garlic creates a powerful, natural deterrent against garden pests.
Preparing and Straining Your Fermented Garlic Concentrate

After your garlic mixture has completed its fermentation period, you’ll notice a distinctly pungent aroma and possibly some bubbling activity that indicates successful bacterial development.
Now it’s time to strain your fermented garlic concentrate to remove all solid pieces. Use cheesecloth or a coffee filter to thoroughly separate the liquid from garlic chunks, pressing gently to extract maximum potency. The resulting clear, amber-colored concentrate packs powerful pest control properties.
Store your strained concentrate in a cool, dark place or refrigerator to maintain effectiveness for several weeks. Always label containers with preparation dates for tracking freshness.
When ready to use, dilute the concentrate with water at a 1:10 ratio before applying to plants for best results.
Proper Dilution Ratios for Different Garden Applications
Three key dilution ratios will determine your fermented garlic spray’s effectiveness across different garden scenarios.
Understanding proper dilution ratios guarantees you’ll tackle garden pests without harming your plants.
Mastering dilution ratios ensures effective pest elimination while protecting your precious plants from potential damage.
Here’s how to apply the right concentrations:
- General pest control: Mix 1 cup garlic spray with 10 cups water for standard protection against common garden invaders.
- Targeted pest treatment: Use 1 cup garlic spray to 5 cups water when battling stubborn aphids or spider mites requiring stronger intervention.
- Preventative maintenance: Dilute 1 cup garlic spray with 15 cups water for weekly applications that maintain pest-free conditions.
- Plant-specific adjustments: Reduce concentration for delicate leafy greens while increasing strength for hardy plants based on pest severity.
Always test new dilutions on small plant areas first to prevent adverse reactions.
Optimal Timing and Application Techniques
While proper dilution sets the foundation for effective pest control, timing your applications correctly will maximize your fermented garlic spray’s impact.
For ideal timing, apply the spray during early morning or late evening hours when cooler temperatures prevent rapid evaporation and enhance leaf absorption.
Always test on a small plant section first to check for adverse reactions before treating your entire garden.
Apply thorough coverage to leaf tops and undersides where pests hide. During active infestations, reapply every 3-4 days; for prevention, weekly applications suffice.
Stop spraying at least two weeks before harvest to prevent garlic flavor transfer.
If rain’s expected within 48 hours, reapply afterward to maintain effectiveness against garden pests.
Target Pests Effectively Controlled by Fermented Garlic Spray
Fermented garlic spray targets an impressive array of garden pests, making it one of the most versatile natural pesticides you can prepare at home.
The fermentation process concentrates sulfur compounds like allicin, which disrupt insect sensory receptors and repel pests more effectively than fresh garlic preparations.
This powerful spray controls these common garden threats:
- Small insects – Aphids, spider mites, and whiteflies succumb to consistent applications
- Caterpillars – Various species that damage leaves and fruits are effectively deterred
- Larger mammals – Rabbits and deer avoid treated plants due to the strong odor
- Fungal diseases – Antifungal properties help prevent powdery mildew while repelling insects
Studies demonstrate that fermented garlic spray can reduce pest populations by up to 80% when applied consistently as part of your integrated pest management strategy.
Plant-Specific Application Guidelines and Coverage Methods
You’ll achieve better pest control results by tailoring your fermented garlic spray application to specific crop types and their unique vulnerabilities.
Proper coverage techniques guarantee the spray reaches pest hiding spots, while strategic timing maximizes absorption and effectiveness.
Understanding when and how often to apply the treatment creates a systematic approach that protects your plants without causing damage.
Targeted Crop Applications
Since different plants have varying sensitivities and pest pressures, you’ll need to tailor your fermented garlic spray application to each crop type.
1. Leafy Greens: Use a milder garlic spray on lettuce and spinach to prevent leaf burn.
Apply every 7-10 days to effectively deter common insects while protecting delicate foliage.
2. Cruciferous Vegetables: Cabbage and broccoli can handle stronger concentrations.
During active pest infestations, apply every 3-4 days to combat persistent insects attacking these hardy crops.
3. Tomatoes and Peppers: Combine your garlic spray with neem oil for dual protection against pests and fungal diseases.
This combination provides thorough defense for these vulnerable nightshades.
4. Fruit Trees: Focus on leaf undersides and new growth where pests congregate.
Apply every two weeks or after rainfall, ensuring you plant garlic nearby as an additional natural deterrent.
Proper Spray Coverage
Knowing which crops to treat is only half the battle—how you apply the spray determines its effectiveness.
You’ll need to cover both leaf tops and undersides since pests often hide underneath. Position yourself 15-30 cm away from foliage to prevent leaf burn while ensuring even coverage.
Before full application, conduct a patch test on a small plant area to check for adverse reactions.
Adjust your garlic spray concentration based on plant sensitivity—use milder solutions for delicate leafy greens and stronger mixtures for robust vegetables like tomatoes.
Timing matters for ideal pest control.
Reapply every 3-4 days during active infestations and after rainfall to maintain the spray’s protective barrier and effectiveness against garden pests.
Timing and Frequency
When applying fermented garlic spray, early morning or late evening applications maximize absorption while preventing rapid evaporation that reduces effectiveness.
Your timing and frequency strategy should adapt to current pest pressure and plant types in your garden.
For ideal pest control, follow these application guidelines:
- Preventative Schedule – Apply weekly treatments during calm pest periods to maintain protective barriers on foliage.
- Active Infestation Response – Increase frequency to every 3-4 days when pests are actively damaging plants.
- Plant-Specific Timing – Leafy greens need gentler weekly applications, while cruciferous vegetables require stronger, more frequent treatments.
- Coverage Strategy – Target new growth areas first, spraying 15-30 cm from leaves to guarantee even distribution on tops and undersides.
Monitor your plants’ specific pest challenges and customize accordingly.
Storage and Shelf Life Management for Fermented Solutions
While fermented garlic spray offers excellent pest control benefits, you’ll need proper storage techniques to maximize its effectiveness and longevity.
Store your fermented solution in a cool, dark place like your refrigerator to maintain potency and extend shelf life. Use airtight containers to prevent contamination and preserve the solution’s integrity.
Properly labeled fermented garlic solutions last up to two years when stored correctly, extending to three years under refrigeration.
Regularly inspect your stored spray for spoilage signs or unusual odor changes, which indicate degradation requiring disposal.
Follow a first-in, first-out rotation system with older batches to maintain peak effectiveness.
Consider preparing smaller quantities to guarantee maximum freshness and potency for your garden pest control efforts throughout the growing season.
Troubleshooting Common Issues With Fermented Garlic Spray
You might encounter several challenges when using fermented garlic spray that can impact its effectiveness in your garden.
Common problems include the spray losing its pest-repelling potency too quickly, your plants showing signs of damage or stress after application, or discovering that certain stubborn pests aren’t responding to the treatment at all.
Understanding how to identify and address these issues will help you maximize your spray’s performance while keeping your plants healthy.
Spray Loses Potency Quickly
Although fermented garlic spray provides an effective natural deterrent against garden pests, its potency doesn’t last indefinitely. You’ll notice the spray’s effectiveness against pests diminishes within weeks of preparation, requiring strategic timing and storage.
Here’s how to maintain your garlic spray’s potency:
- Use fresh batches – Apply your fermented spray within a few weeks of preparation for maximum pest-repelling strength.
- Store properly – Keep unused spray in cool, dark locations since warmer temperatures accelerate potency loss.
- Reapply frequently – Schedule applications every 7-10 days, or immediately after rainfall washes away the protective layer.
- Strengthen weak mixtures – Increase garlic concentration or add hot peppers when pests persist despite regular applications.
Monitor your plants for adverse reactions and adjust dilution if leaf burn occurs.
Plants Show Adverse Reactions
Even when you apply fermented garlic spray correctly, your plants might react negatively to the treatment. Adverse reactions like leaf burn or wilting indicate the concentration’s too strong for sensitive foliage. You’ll need to monitor plants closely after application to catch distress early.
| Problem | Solution |
|---|---|
| Leaf burn appears | Dilute mixture further |
| Wilting occurs | Reduce application frequency |
| Uneven damage | Shake spray before use |
| Persistent issues | Try alternate pest control |
Always test garlic sprays on a small, inconspicuous area first. This lets you gauge your plant’s reaction without risking overall health. If problems persist despite dilution, consider alternating with other pest control methods. Over-reliance on garlic treatments can stress plants and diminish growth, so moderation’s key.
Ineffective Against Certain Pests
While fermented garlic spray works well against many garden pests, some insects show remarkable resistance to its deterrent properties.
You’ll find that garlic-based repellent methods don’t work universally, requiring alternative approaches for complete pest management.
Pests showing resistance to garlic include:
- Silverleaf whiteflies – These tiny insects often ignore garlic treatments entirely.
- Certain beetles and weevils – Many species continue feeding despite regular applications.
- Rosy apple aphids – Show notable tolerance to garlic interventions.
- Mosquitoes – Remain largely unaffected by garlic-based solutions.
When you encounter ineffective against certain pests situations, monitor your garden regularly and adjust garlic concentrations accordingly.
Complement your spray with other natural pest deterrents like neem oil or hot peppers to enhance effectiveness against resistant insects.
Frequently Asked Questions
What Pests Does Garlic Spray Repel?
You can use garlic spray to repel aphids, spider mites, whiteflies, caterpillars, yellow mealworm larvae, and cabbage flies. It’ll also deter larger mammals like rabbits and deer from damaging your plants.
How to Make Garlic Spray for Garden Pests?
Blend 4-5 crushed garlic cloves with 1 quart water, steep overnight, add 1 tablespoon dish soap, then strain through cheesecloth. Apply early morning or evening, reapplying every 3-4 days.
What Insects Hate the Smell of Garlic?
You’ll find that aphids, spider mites, whiteflies, cabbage moths, and beetles all hate garlic’s strong sulfur compounds. These insects’ sensory receptors can’t tolerate the pungent odor, making them avoid treated areas.
How Long Does Garlic Repel Insects?
You’ll find garlic spray repels insects for one to two weeks under normal conditions. However, you’ll need to reapply more frequently after rain or during heavy pest infestations to maintain effective protection.
In Summary
You’ve now got the knowledge to create your own powerful, natural pest deterrent that’ll protect your garden without harsh chemicals. Remember to start with proper fermentation, dilute correctly for your specific needs, and apply consistently for best results. Store your concentrate properly and don’t hesitate to adjust ratios based on pest pressure. With this fermented garlic spray, you’re equipped to maintain a thriving, pest-free garden naturally.


Leave a Reply