You should prioritize sealing doors and windows first since they’re responsible for 80% of pest entry points in your home. Focus on installing quality weatherstripping and door sweeps to create effective barriers against insects and rodents. These high-traffic areas offer the maximum impact for your sealing efforts and provide immediate results. After securing doors and windows, move on to foundation cracks and utility penetrations. The thorough approach below reveals additional critical entry points you’ll want to address.
Understanding Common Pest Entry Points in Your Home
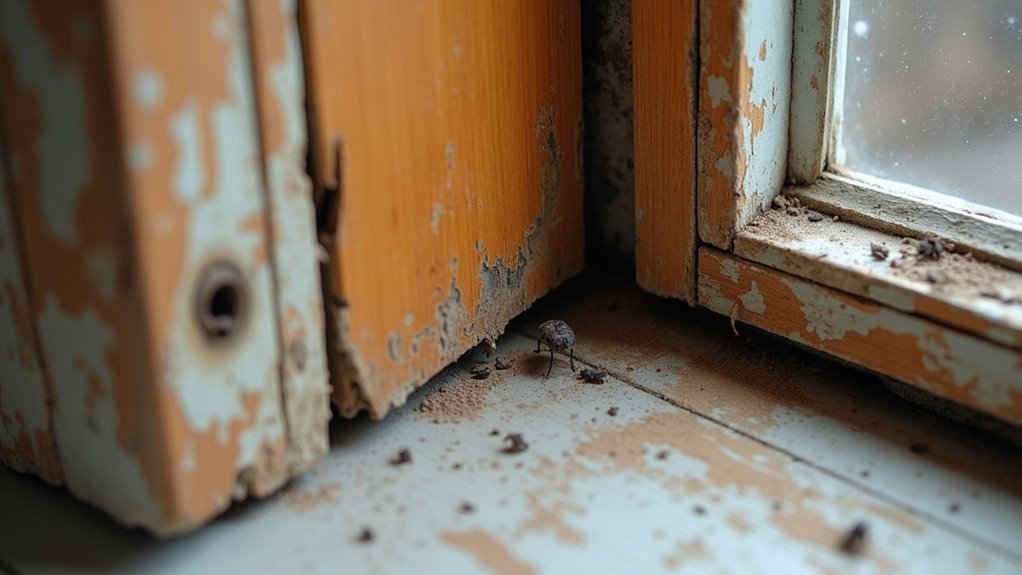
While you might think your home is secure, countless tiny gaps and openings provide easy access for unwanted pests. These pest entry points are more numerous than you’d expect, starting with the gaps under your doorways where daily wear creates perfect openings for insects and rodents.
Even the most secure-looking homes contain numerous hidden gaps that offer pests surprisingly easy access to your living space.
Foundation cracks rank among the most problematic common entry points, allowing termites, ants, and cockroaches to infiltrate your home’s structure.
You’ll also need to examine utility penetrations where plumbing, electrical, and HVAC systems enter your house.
Don’t overlook your roof vents, which can attract roof rats via overhanging branches.
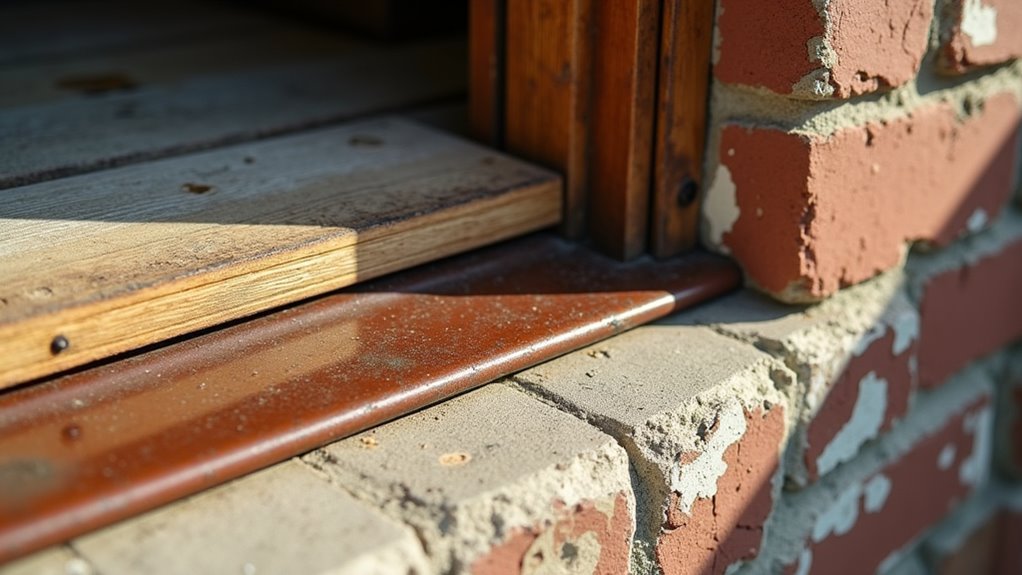
Windows and doors with damaged weatherstripping create additional vulnerabilities.
To seal holes effectively, you must first identify these vulnerable areas through systematic inspection of your home’s exterior and interior access points.
Prioritizing Door and Window Gaps for Maximum Impact
You’ll achieve the biggest pest prevention impact by focusing on doors and windows first, since these represent the most vulnerable entry points in your home.
Installing quality weatherstripping around window frames and door jambs creates an effective barrier that stops insects and small rodents from squeezing through even tiny gaps.
Don’t overlook door sweeps and proper caulking techniques—these simple sealing methods can eliminate access points that pests exploit most frequently.
Weatherstripping Installation Basics
Since even the tiniest gaps around doors and windows create highways for pests like roaches and scorpions, weatherstripping installation becomes your first line of defense against unwanted intruders.
Weatherstripping around these entry points for pests requires high-quality materials like silicone or foam that resist wear and effectively fill openings. Start by choosing materials that’ll withstand regular use while maintaining flexibility.
When installing, verify you’re sealing gaps to achieve less than 1/16 inch tolerance – this prevents even the smallest pests from entering. Clean surfaces thoroughly before application, then apply consistent pressure for proper adhesion.
Beyond pest control, you’ll improve energy efficiency by reducing drafts that make your home attractive to warmth-seeking invaders.
Inspect your weatherstripping regularly and replace worn sections immediately to maintain effectiveness.
Sealing Gaps Effectively
Because door and window gaps represent the most vulnerable entry points in your home’s defense system, you’ll achieve maximum pest-blocking impact by targeting these areas first. Focus on sealing entry points where you can spot daylight or feel drafts, as these indicate openings large enough for pest infiltration.
| Entry Point | Sealing Method | Effectiveness |
|---|---|---|
| Door frames | Weather stripping | Blocks 75% of pests |
| Window frames | Caulking | Prevents small insects |
| Door bottoms | Door sweeps | Stops crawling pests |
Even cracks or gaps smaller than a quarter inch allow common pests access to your home. If you’re overwhelmed by multiple entry points, consider consulting a pest control service to prioritize the most critical areas requiring immediate attention.
Essential Tools and Materials for Effective Sealing

Success in sealing home entry points depends heavily on having the right tools and materials at your disposal.
Effective home sealing requires proper preparation with the right tools and quality materials for long-lasting pest prevention results.
You’ll need essential tools including a caulking gun, utility knife, and putty knife to apply sealing materials effectively and guarantee smooth, tight fits in all pest entry points.
For small cracks and gaps up to one-quarter inch, use high-quality silicone or acrylic caulk that provides durable, weather-resistant barriers.
Larger openings between one-quarter inch and one inch require expanding foam insulation that fills gaps completely.
When dealing with potential rodent access points, copper mesh offers superior protection since it deters gnawing and lasts longer.
Don’t forget weatherstripping for doors and windows, which prevents pest entry while improving your home’s energy efficiency.
Foundation Cracks: Your First Line of Defense
You’ll need to systematically examine your foundation’s perimeter to spot hairline fractures and larger gaps that invite unwanted pests into your home.
Once you’ve identified these vulnerabilities, you can apply the right sealing technique—whether it’s vinyl concrete patch for minor cracks or professional-grade solutions for substantial damage.
Regular maintenance and proper moisture control around your foundation will help you prevent new cracks from forming and keep your first line of defense strong.
Identifying Foundation Vulnerabilities
How often do you walk around your home’s perimeter and actually examine the foundation? Most homeowners rarely conduct thorough inspections, missing critical foundation cracks that serve as entry points for pests.
You should examine your foundation at least twice yearly, looking for hairline cracks, gaps around utility penetrations, and areas where settling has occurred.
Check both interior and exterior foundation walls, paying special attention to corners and areas near water sources. Use a flashlight to illuminate dark spaces and run your hand along surfaces to detect subtle irregularities. Document any findings with photos and measurements.
Focus on basement walls, crawl spaces, and ground-level foundations where soil movement and water damage commonly create vulnerabilities that welcome unwanted pests into your home.
Proper Sealing Techniques
After documenting cracks and vulnerabilities during your foundation inspection, you’re ready to tackle sealing these entry points before pests discover them.
Small gaps might seem insignificant, but they’re highways for ants, cockroaches, and termites seeking shelter in your home.
Proper sealing techniques require methodical execution:
- Clean thoroughly – Remove debris, loose concrete, and dirt from cracks using a wire brush or compressed air.
- Apply vinyl concrete patch – Fill small foundation cracks completely, ensuring the material penetrates deep into gaps.
- Schedule professional assessment – Contact experts for larger cracks that compromise structural integrity.
- Inspect regularly – Check sealed areas monthly to catch new vulnerabilities early.
These techniques don’t just block pests—they improve energy efficiency by eliminating drafts and enhancing insulation throughout your home.
Preventing Future Damage
While sealing existing cracks provides immediate protection, preventing future foundation damage requires a proactive approach that addresses the root causes of structural deterioration.
You’ll need to schedule quarterly foundation inspections to catch new cracks before they become major entry points for pests.
Maintain proper drainage around your home’s perimeter by clearing gutters and ensuring water flows away from the foundation.
Address soil settlement issues promptly, as shifting ground creates stress that leads to cracking.
Install a quality vapor barrier in crawl spaces to control moisture levels that weaken concrete over time.
You should also monitor temperature fluctuations, as freeze-thaw cycles expand existing vulnerabilities.
Weatherstripping Installation for Doors and Windows
Since gaps around doors and windows can account for significant energy loss and provide entry points for pests, weatherstripping installation becomes one of your most effective sealing strategies.
Weatherstripping installation stands as your most powerful defense against energy loss and unwanted pest intrusion through door and window gaps.
Before installing weatherstripping, you’ll need to measure door and window frames carefully to guarantee proper coverage.
Choose from several weatherstripping types based on your specific needs:
- Adhesive-backed foam tape – Easy to install and ideal for irregular surfaces with minimal compression
- V-strip weatherstripping – Durable metal or plastic option that creates excellent seal when compressed
- Door sweeps – Essential for sealing the gap between door bottom and threshold
- Rubber gaskets – Long-lasting solution for areas requiring flexible, weather-resistant barrier
Regular inspection prevents deterioration, and proper installation can reduce your energy bills by up to 20% while effectively blocking pest access.
Sealing Utility Penetrations and Pipe Entry Points
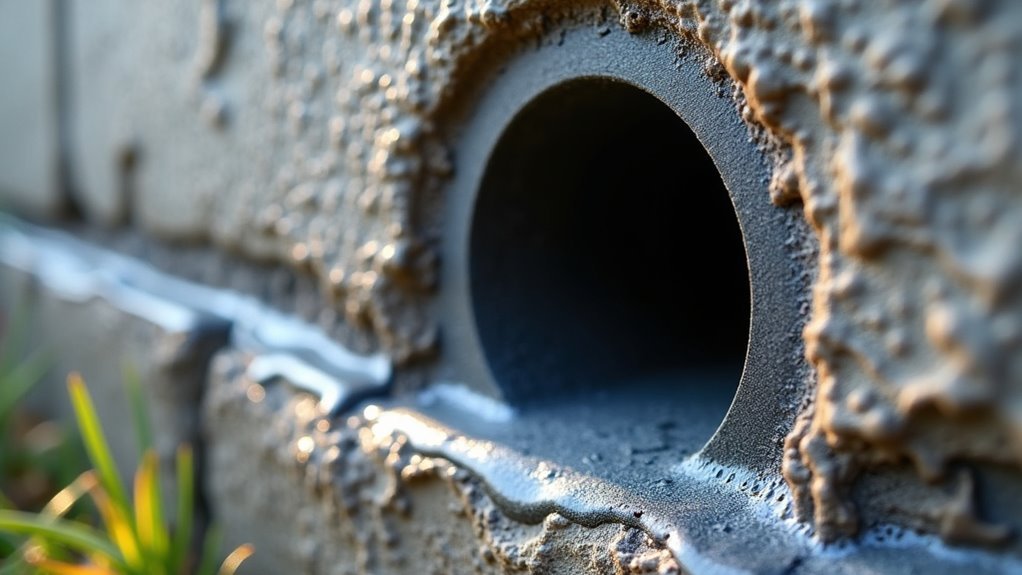
Throughout your home, utility penetrations where pipes, electrical conduits, and HVAC lines enter create some of the most overlooked entry points for pests. These gaps around utility lines allow ants, beetles, and other unwanted visitors to infiltrate your living space, especially when moisture’s present.
You’ll need different materials for effective sealing. Use expanding foam insulation for larger openings and high-quality silicone or acrylic caulk for smaller gaps. This approach transforms vulnerable areas into properly sealed areas.
| Gap Size | Material | Application Method | Benefits |
|---|---|---|---|
| Large (>1″) | Expanding foam | Spray directly | Fills irregular spaces |
| Medium (½”-1″) | Polyurethane sealant | Caulk gun | Flexible, durable |
| Small (<½") | Silicone caulk | Squeeze tube | Precise application |
| Wire entry | Steel wool + caulk | Pack then seal | Pest-resistant barrier |
Regular inspections verify these sealed areas remain effective while improving energy efficiency.
Addressing Roof Vents and Attic Access Points
Your roof vents provide essential airflow but create convenient entry points for roof rats and insects if left unprotected.
You’ll need to install metal mesh or wire grates over these openings while ensuring your attic access points are properly sealed around their perimeters.
Don’t overlook gaps around ducts, plumbing penetrations, and attic hatches, as even small openings can invite unwanted pests into your home’s upper levels.
Roof Vent Protection
Roof vents present a classic dilemma for homeowners – they’re essential for proper attic ventilation but can become highways for unwanted pests like roof rats, squirrels, and birds.
These creatures can wreak havoc by gnawing on insulation and electrical wiring, creating costly damage and safety hazards.
Installing metal mesh or grates over your roof vents effectively blocks pest entry while maintaining proper airflow.
Here’s your protection strategy:
- Install hardware cloth or metal mesh with ¼-inch openings over all vent openings
- Trim overhanging tree branches that provide pest access routes to your roof
- Inspect vents quarterly for damage, loose screens, or gaps that need sealing
- Secure all attic access points including gaps around ducts and penetrations
This proactive approach keeps your home pest-free without compromising ventilation.
Attic Entry Prevention
While roof vents create obvious entry points for pests, your attic harbors dozens of additional vulnerabilities that savvy invaders exploit with surprising efficiency.
Focus on sealing gaps around ductwork and vents with high-quality materials, as these attic entry points provide direct access to your home’s upper levels.
You’ll need preventative measures that address overhanging tree branches, which offer convenient pathways for squirrels and raccoons. Trim branches back from your roofline to eliminate these natural bridges.
Don’t overlook proper screening on attic vents – they must block entry while maintaining essential airflow.
When these access points remain unsealed, pests are likely to establish nesting sites in your attic space, potentially damaging insulation and electrical systems while reducing your home’s energy efficiency.
Garage Door Sealing Techniques That Work
The garage door represents one of the largest entry points in your home, making proper sealing essential for keeping pests out.
Your garage door’s size makes it a prime entry point for pests without proper sealing measures in place.
Even small gaps can welcome unwanted rodents, insects, and other creatures into your space.
Here are four effective sealing techniques:
- Install a door sweep on the bottom of your garage door to eliminate gaps that allow easy pest access.
- Inspect weather seals regularly around the entire door frame, replacing worn or damaged seals to maintain tight protection.
- Add rodent guards at the door’s bottom to prevent small animals from slipping through any remaining openings.
- Install a threshold seal on your garage floor to create an additional barrier at the door’s base.
Ensure your garage door closes completely and securely every time.
Caulking Methods for Small Cracks and Gaps
Even after sealing larger entry points like garage doors, small cracks and gaps throughout your home can still provide easy access for determined pests. Caulking effectively seals these openings up to one-quarter inch, creating a barrier that keeps unwanted visitors out.
| Caulk Type | Best For | Durability |
|---|---|---|
| Silicone | Moisture-prone areas | 15-20 years |
| Acrylic | Interior gaps around windows | 5-10 years |
Before applying caulk, clean small cracks thoroughly to remove debris and old sealant. Use a caulking gun to apply the material evenly, filling gaps around windows, doors, and baseboards completely. Smooth the caulk with your finger or a tool for a neat finish. Regularly inspect and reapply as needed to maintain your pest-proof barrier.
Using Expanding Foam for Large Openings
Large gaps around pipes, utility lines, and structural penetrations require a more robust sealing solution than caulk can provide. Expanding foam excels at filling these large openings, expanding up to 30 times its original size to create airtight seals in irregularly shaped spaces.
For oversized gaps that challenge traditional caulking methods, expanding foam delivers superior sealing power with impressive 30x expansion capability.
Before application, verify surfaces are clean and dry for ideal adhesion. The foam will effectively seal voids while providing insulation benefits.
- Wear protective gear – Use gloves and a mask to prevent skin contact and fume inhalation
- Apply foam carefully – Start with small amounts as it expands considerably
- Allow proper curing time – Wait for complete hardening before trimming excess
- Finish professionally – Trim and paint over cured foam to blend with surrounding surfaces
Wire Mesh Installation for Vent Protection
While expanding foam handles structural gaps effectively, your home’s ventilation system presents unique sealing challenges that require a different approach.
Wire mesh offers the perfect solution for protecting vents from unwanted intruders while maintaining essential airflow.
Choose fine metal mesh with holes no larger than 1/4 inch to block even the smallest insects from entering through roof and dryer vents.
Secure the mesh tightly against vent openings, ensuring you’ve eliminated any gaps that pests could exploit. Even tiny openings become major entry points for determined invaders.
This cost-effective installation considerably reduces infestation risks by sealing critical access routes.
Remember to inspect your mesh regularly for wear or damage, replacing it promptly to maintain maximum protection for these vulnerable entry points.
Seasonal Maintenance Schedule for Sealed Entry Points
Although wire mesh provides excellent initial protection, maintaining your home’s sealed entry points requires a systematic approach that adapts to seasonal pest behaviors and weather patterns.
Your seasonal maintenance schedule should target the most vulnerable times when pests actively seek shelter and weather conditions compromise your sealing efforts.
- Spring (March-May): Clean gutters and downspouts to prevent moisture accumulation that attracts pests and weakens seals around potential entry points.
- Fall (September-November): Conduct thorough pest entry point inspections when creatures are most active seeking winter shelter, sealing any newly discovered gaps.
- Bi-annual (Spring/Fall): Replace weatherstripping around doors and windows to maintain tight seals against both pests and temperature changes.
- Pre-winter (October-November): Inspect and seal foundation cracks before cold weather allows pests and drafts to compromise your home’s protection.
When to Call Professional Pest Control Services
Despite your best DIY efforts with seasonal maintenance schedules and careful sealing techniques, certain situations demand professional expertise to effectively protect your home from persistent pest intrusions.
You should call professional pest control services when you discover droppings, gnaw marks, or other infestation signs that indicate your current sealing methods aren’t working.
Professionals conduct thorough inspections to identify overlooked entry points and use advanced materials for superior barriers.
Professional pest control experts utilize specialized inspection techniques and commercial-grade sealing materials that surpass typical DIY approaches for comprehensive home protection.
If you’re uncertain about properly sealing specific areas or experiencing recurring pest problems, experts provide targeted solutions and long-term management strategies.
Regular professional maintenance guarantees your seals remain intact and effective, giving you peace of mind against future infestations.
Frequently Asked Questions
How to Seal Entry Points in Home?
Start by inspecting doors and windows for gaps. Apply weather stripping or caulk to small cracks. Use expanding foam for larger openings. Seal utility penetrations and cover vents with wire mesh to block pests effectively.
How to Seal Entry Points for Bugs?
Use silicone caulk for small holes up to quarter-inch. Apply expanding foam for larger gaps. Replace damaged weatherstripping around doors and windows. Install wire mesh over vents and seal foundation cracks immediately.
How to Seal off Rat Entry Points?
You’ll need to seal gaps around doors and windows with caulk, stuff steel wool in holes near utility lines, cover vents with metal mesh, and patch foundation cracks with concrete sealant.
How to Seal Roach Entry Points?
You’ll need to seal foundation cracks with silicone caulk, apply weather stripping around doors and windows, seal utility penetrations, repair damaged screens, and maintain cleanliness to eliminate food sources attracting roaches.
In Summary
You’ve learned which entry points to tackle first and the tools needed to seal them effectively. Start with foundation cracks and major gaps around doors and windows since these offer the biggest impact. Don’t forget to install wire mesh over vents and maintain your seals seasonally. If you’re still seeing pests after sealing these priority areas, it’s time to call professional pest control services for additional help.


Leave a Reply