You should seal your home against pest invasion to protect yourself from the $5 billion in annual structural damage that termites alone cause nationwide. Unsealed gaps around doors, windows, utility lines, and foundations create highways for rodents and insects that’ll decrease your property value by 10% or more. You’ll also avoid costly treatment services ranging from $100-$500 per visit and potential medical bills from pest-related health risks. Discover the essential sealing strategies that’ll safeguard your investment.
Understanding Common Pest Entry Points Around Your Home
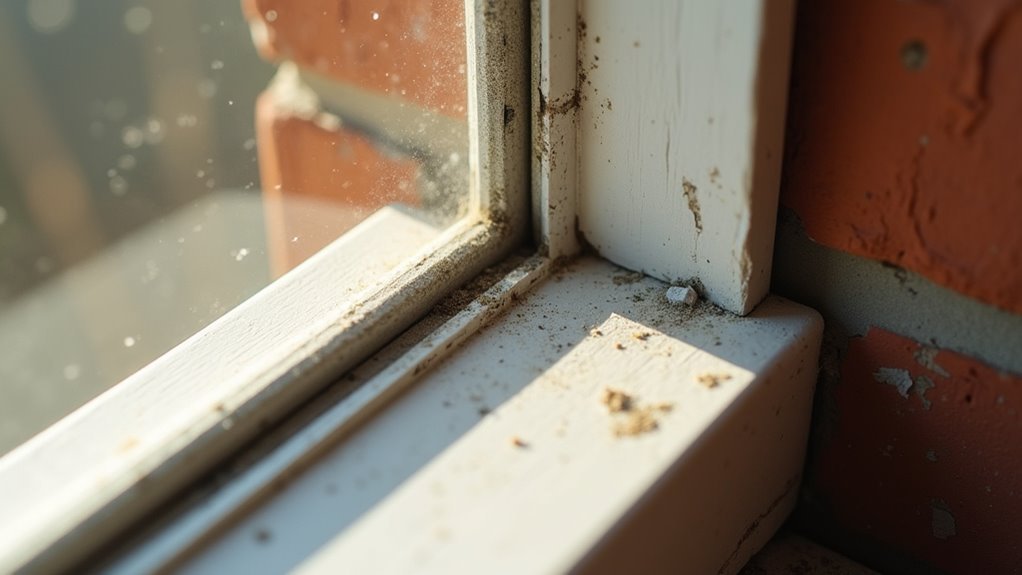
While you might think your home is well-sealed, pests can exploit surprisingly small entry points to gain access to your living space. The most common vulnerabilities include gaps around doors and windows, where weatherstripping may have deteriorated over time.
You’ll also need to examine utility openings for plumbing, electrical wiring, and gas lines, as these are frequently overlooked during routine maintenance.
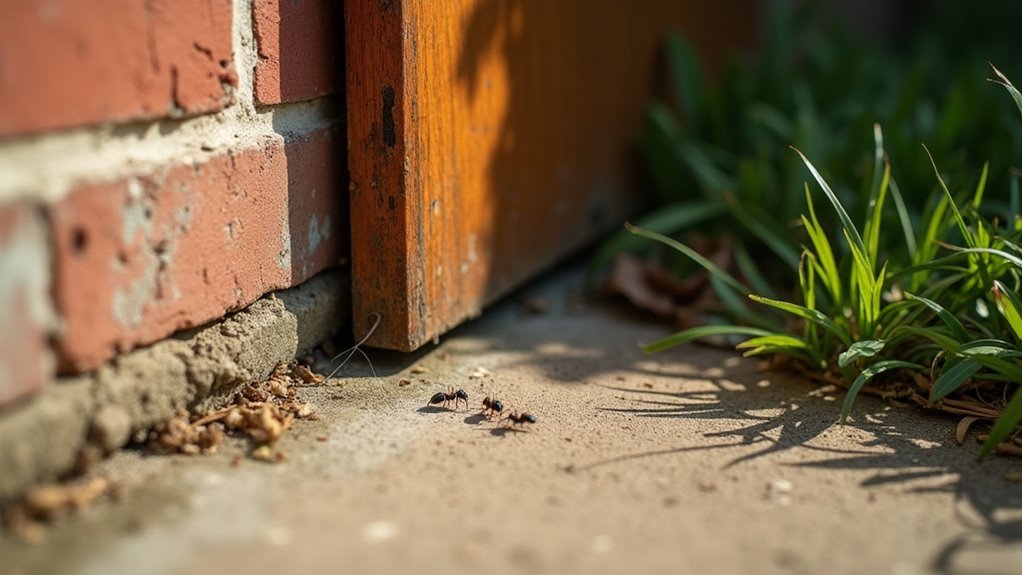
Your foundation presents another critical concern, especially where cracks have developed in damp areas that naturally attract insects and rodents.
Don’t forget to check roof vents and chimneys, which require proper screening to prevent pest intrusion.
Regular inspections of these entry points are essential, since weathering and house settling can create new gaps that compromise your home’s defenses against unwanted invaders.
The Hidden Costs of Pest Infestations You Can Avoid
Beyond the immediate annoyance of unwanted guests, pest infestations carry substantial financial consequences that many homeowners don’t recognize until it’s too late.
Termites alone cause $5 billion in structural damage annually across the United States. You’ll face treatment costs ranging from $100 to $500 per service, plus expensive repairs from pest-related destruction.
Health risks compound these expenses. Cockroach droppings trigger allergies and asthma, leading to medical bills and lost productivity. Your insurance premiums may increase or claims could be denied since many policies exclude pest damage coverage.
Most devastating is the impact on property values—infestations can decrease your home’s worth by 10% or more.
Home sealing for pest prevention through regular maintenance offers thorough pest protection, helping you prevent pest invasions before they devastate your finances.
Essential Tools and Materials for Effective Home Sealing

You’ll need the right combination of professional-grade sealing materials and practical application tools to create an effective barrier against pests.
Quality materials like silicone caulk, expanding foam, and weather stripping form the foundation of your defense system, while proper tools guarantee you can apply them correctly.
Having both components ready before you start will make your sealing project more efficient and deliver better long-term results.
Professional Sealing Materials
Effectiveness in pest sealing depends entirely on choosing the right materials for each specific application around your home. Professional sealing materials offer superior performance compared to basic alternatives, ensuring long-lasting pest prevention.
| Material | Best Application |
|---|---|
| Silicone-based caulk | Small gaps and cracks around fixtures |
| Expanding foam sealant | Large crevices and irregular openings |
| Weather stripping | Door and window perimeters |
| Fine mesh screens | Vents and chimney openings |
| Masonry crack filler | Foundation and structural cracks |
You’ll find silicone-based caulk provides flexible, weather-resistant sealing for smaller spaces. Expanding foam sealant tackles larger gaps by expanding and hardening into place. Weather stripping eliminates entry points while improving energy efficiency. Fine mesh screens maintain ventilation without compromising security. Masonry crack filler addresses foundation issues while controlling moisture that attracts pests.
DIY Application Tools
Having the right sealants won’t help if you don’t possess the proper tools to apply them effectively. You’ll need a caulking gun for dispensing silicone caulk into small cracks and gaps.
For larger openings, expanding foam requires careful application to avoid overfilling. Weather stripping installation demands utility knife or scissors to cut materials to proper lengths around door and window frames.
Fine mesh screens cover vents and chimney openings, requiring secure attachment methods. A putty knife smooths caulk applications for professional-looking finishes.
Your measuring tape guarantees accurate sizing of all sealing materials before installation.
Don’t overlook cleaning supplies—vacuum or sweep surfaces thoroughly before applying any sealant. Dust and debris prevent proper adhesion, compromising your pest exclusion efforts.
These essential tools assure successful DIY sealing projects.
Step-by-Step Guide to Sealing Cracks and Gaps in Walls
You’ll need to systematically examine your home’s exterior walls to spot cracks, gaps, and holes that serve as pest entry points.
Once you’ve identified these problem areas, select the appropriate sealing materials based on gap size—silicone caulk for small cracks or expanding foam for larger openings.
Apply your chosen sealing technique carefully to create an effective barrier that keeps pests out while improving your home’s energy efficiency.
Identify Problem Areas
Before you can effectively seal your home against unwanted invaders, you must first conduct a thorough inspection to locate every potential entry point.
Start by examining your home’s exterior walls, foundation, and roofline systematically. Look for visible cracks and gaps that could serve as entry points for pests. Pay special attention to areas where different materials meet, such as where siding connects to the foundation.
When you identify problem areas, mark them for immediate attention.
Focus on spaces around utility lines, pipes, and electrical conduits entering your home. Check basement and attic areas thoroughly, as these spaces often harbor hidden openings.
If you’re unsure about certain areas, consider consulting pest control professionals who can help you maintain a pest-free environment through proper sealing techniques.
Choose Right Materials
After mapping out all the vulnerable spots in your home, selecting the appropriate sealing materials becomes your next priority. You’ll need different pest control solutions depending on gap sizes and locations.
| Gap Size | Material | Application |
|---|---|---|
| Under 1/4 inch | High-quality silicone-based caulk | Cracks in walls, small openings |
| Over 1/4 inch | Expanding foam sealant | Larger holes, structural gaps |
| Doors/windows | Weather stripping | Moving parts, frames |
| Vents/chimneys | Fine mesh screens | Maintain ventilation while blocking pests |
High-quality silicone-based caulk offers flexibility against weather conditions for smaller cracks. Expanding foam sealant creates a strong barrier against pests in larger openings. Weather stripping effectively seal gaps around moving parts while improving energy efficiency. Fine mesh screens allow necessary ventilation while preventing insect access. Remember to regularly inspect these sealed areas, as new gaps can form from natural settling, requiring ongoing maintenance to seal gaps effectively.
Apply Sealing Technique
Start sealing your wall cracks and gaps by conducting a systematic room-by-room inspection with a flashlight, paying special attention to baseboards, corners, and areas around electrical outlets where small openings often hide.
Follow this proven technique to eliminate entry points for pests:
- Apply silicone-based caulk to seal cracks smaller than ½ inch, smoothing the surface for complete coverage around windows and doors.
- Use expandable foam for larger irregular gaps, allowing it to cure completely before trimming excess material.
- Install weather stripping and door sweeps guaranteeing snug contact without preventing proper door operation.
- Schedule regular home inspection every six months to maintain the seals and replace worn materials.
This methodical approach guarantees you’re preventing pest infiltration while maintaining long-term protection for your home’s vulnerable cracks around utility penetrations.
Protecting Windows and Doors From Pest Infiltration
Two critical areas of your home—windows and doors—serve as the primary battlegrounds in the fight against pest infiltration.
These entry points require your constant attention and maintenance to effectively seal your home against unwanted invaders.
Start by inspecting windows and doors regularly for gaps, cracks, or damaged screens.
Install high-quality weather stripping around frames to create tight seals that block pest access.
Apply silicone caulk to any cracks and gaps larger than a quarter-inch.
Ensure window screens fit properly without tears or holes, as even tiny openings invite pests inside.
Don’t forget door sweeps—they’re essential barriers against crawling insects and rodents.
When these preventive measures aren’t enough, consider contacting professional pest control services for thorough protection strategies.
Basement and Crawl Space Sealing Strategies
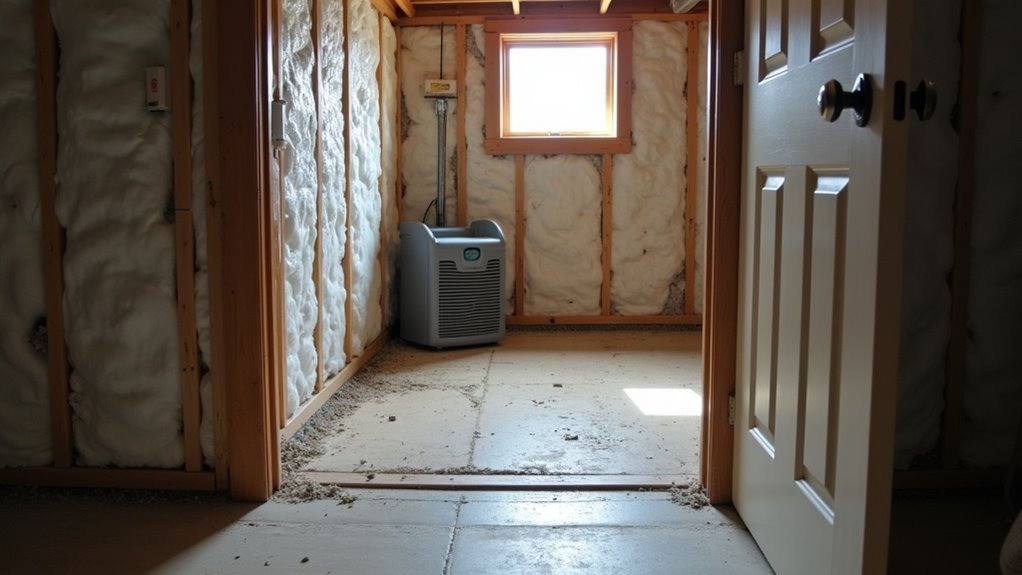
Your basement and crawl space present unique challenges when sealing against pests, requiring targeted moisture control methods to eliminate the humid conditions that attract unwanted invaders.
You’ll need to focus on foundation crack sealing as your primary defense, since even small gaps can become highways for insects and rodents seeking shelter.
These below-grade areas demand special attention because they’re naturally prone to dampness and often overlooked during routine home maintenance.
Moisture Control Methods
Three critical areas demand your immediate attention when controlling moisture in basements and crawl spaces: dehumidification, foundation sealing, and protective storage.
These moisture control methods form the foundation of effective pest prevention in your home’s lower levels.
Implementing proper moisture management requires a systematic approach:
- Install dehumidifiers to maintain ideal humidity levels, reducing moisture levels that attract unwanted pests.
- Seal foundation cracks using professional-grade materials like masonry crack fillers or silicone-based caulk to eliminate access points.
- Store belongings in airtight containers to protect clothes and papers from moisture exposure and pest damage.
- Conduct regular inspections of these areas, focusing on identifying leaks and moisture signs for timely repairs.
This thorough strategy guarantees you’ll maintain a pest-free home environment.
Foundation Crack Sealing
Foundation cracks represent the most vulnerable points where pests infiltrate your basement and crawl spaces. Even tiny openings allow rodents and insects to establish infestations in these areas.
Foundation crack sealing using masonry fillers or silicone-based caulk effectively blocks pest entry while preventing moisture intrusion that attracts unwanted visitors.
You’ll need to inspect your foundation regularly for new cracks in the walls or deteriorating sealants. This proactive approach guarantees continuous protection against pest invasion.
Proper sealing doesn’t just stop pests—it reinforces your home’s structural integrity by preventing water damage.
Maintaining dry conditions through effective sealing greatly deters moisture-loving pests like termites. When you seal your basement and crawl space properly, you’re creating an inhospitable environment that forces pests to seek alternative locations.
Roof and Attic Vulnerability Points to Address
When examining your home’s upper defenses, the roof and attic present multiple entry points that pests exploit with surprising ease.
These vulnerability points require immediate attention through thorough sealing for pest control measures.
Your attic’s warmth and moisture naturally attract unwanted invaders, making proper insulation and gap sealing vital.
Gaps around plumbing and electrical penetrations create highways for rodents and insects, while damaged shingles invite larger wildlife like raccoons and squirrels.
Critical roof and attic entry points to address:
- Roof vents and chimney openings – Install screens and caps for protection
- Plumbing and electrical entry gaps – Seal with appropriate materials
- Damaged or loose shingles – Repair immediately to prevent wildlife access
- Eave and roof seam cracks – Regular inspection and professional home maintenance guarantees ideal protection
Sealing Around Utility Lines and Pipe Penetrations
While your roof and attic demand attention, utility lines and pipe penetrations throughout your home create equally problematic entry points that you can’t afford to overlook.
These gaps around pipes, electrical lines, and cable connections provide direct pathways for pest invasion, allowing insects and rodents easy interior access.
Small openings around utility connections become major highways for unwanted pests seeking shelter inside your home.
You’ll need to seal these openings using expandable foam or caulk appropriate for each surface and exposure condition.
Focus on areas where utility lines enter your foundation, walls, and floors. Regular inspections help you identify new gaps or deteriorating seals before pests exploit them.
Proper sealing around utility lines doesn’t just prevent unwanted visitors—it also improves your home’s energy efficiency by eliminating air leaks that increase heating and cooling costs.
Foundation Repairs That Block Pest Highways
Though you’ve addressed gaps around utility lines, your home’s foundation represents the most critical battlefield in preventing pest invasions. Foundation repairs eliminate the primary entry points that rodents and insects use to access your property.
Essential Foundation Sealing Steps:
- Inspect regularly – Check for cracks, gaps, and deteriorating mortar that create pest highways.
- Seal immediately – Use masonry crack fillers or silicone-based caulk on identified openings.
- Control moisture – Prevent water accumulation that attracts termites and cockroaches.
- Maintain proactively – Schedule routine foundation assessments to avoid structural damage.
Taking a proactive approach to foundation repairs considerably reduces pest intrusion while preserving your home’s integrity.
This strategy enhances overall pest control efforts and minimizes reliance on chemical treatments when you properly seal your home’s most vulnerable access points.
Seasonal Maintenance to Keep Seals Effective
Four times a year, seasonal changes put your home’s pest barriers to the ultimate test. Temperature fluctuations cause materials to expand and contract, creating new entry points that compromise your defenses.
Temperature changes throughout the year create gaps and cracks that turn your sealed home into an open invitation for unwanted pests.
You’ll need consistent seasonal maintenance to prevent pest entry effectively. Inspect seals around door thresholds, window frames, and utility openings every few months. Look for damaged weather stripping or compromised caulking that needs immediate replacement.
Don’t overlook your gutters—clean them regularly to prevent water accumulation that causes moisture damage and attracts pests. Apply fresh sealant or caulk wherever gaps appear from natural settling or environmental factors.
Replace worn screens promptly to maintain barriers. Consider professional home sealing services if extensive repairs are needed to keep your pest defenses intact year-round.
When to Call Professionals Vs DIY Sealing Approaches
Although minor gaps around windows and doors make perfect candidates for DIY repairs, extensive pest problems demand professional intervention.
You can easily apply silicone caulk or weather stripping to control small entry points around your home, but significant structural issues require expert attention.
Here’s when to choose each approach:
- DIY solutions work for minor cracks where you can seal gaps with basic materials.
- Professional services handle extensive infestations and identify hidden entry points throughout your home.
- Expert consultation becomes necessary for foundations and roof vents requiring specialized sealing techniques.
- Professional materials withstand weather conditions better, creating longer-lasting barriers to keep pests out.
Proper sealing decisions help prevent pests from entering while avoiding complications from improper methods.
Frequently Asked Questions
How to Seal a House so Bugs Don’t Get In?
You’ll need to inspect your home for cracks and gaps around doors, windows, and utilities. Seal small openings with silicone caulk, use expanding foam for larger holes, and install weather stripping.
Why Is It Important to Prevent Pest Infestation?
You’ll protect your home from costly structural damage, reduce health risks from disease-carrying pests, maintain comfort and peace of mind, save money on treatments, and improve your home’s energy efficiency.
How Much Does It Cost to Seal a House From Bugs?
You’ll spend between $300 to $3,000 sealing your house from bugs, depending on your home’s size and sealing complexity. Professional services charge by square footage, while materials cost $1-5 per linear foot.
Is Pest Prevention Worth It?
Yes, you’ll save money long-term since prevention costs less than repeated treatments. You’ll reduce infestations by 90%, lower energy bills, protect your home’s structure, and improve indoor air quality considerably.
In Summary
You’ve learned the essential steps to seal your home effectively against pest invasions. By identifying entry points, using proper materials, and maintaining your seals seasonally, you’ll save money on extermination costs and property damage. Don’t wait until pests establish themselves—start sealing today. Remember, consistent maintenance keeps your barriers strong. When you’re facing complex issues like foundation problems, it’s time to call professionals for lasting protection.


Leave a Reply